
The first step in constructing any kit is performing an inventory of the parts. Not only will this save frustrating delays later in the build process, it will also ensure that any missing/damaged pieces and/or parts are reported to the kit manufacturer soon enough that they will send you replacements on their nickle.

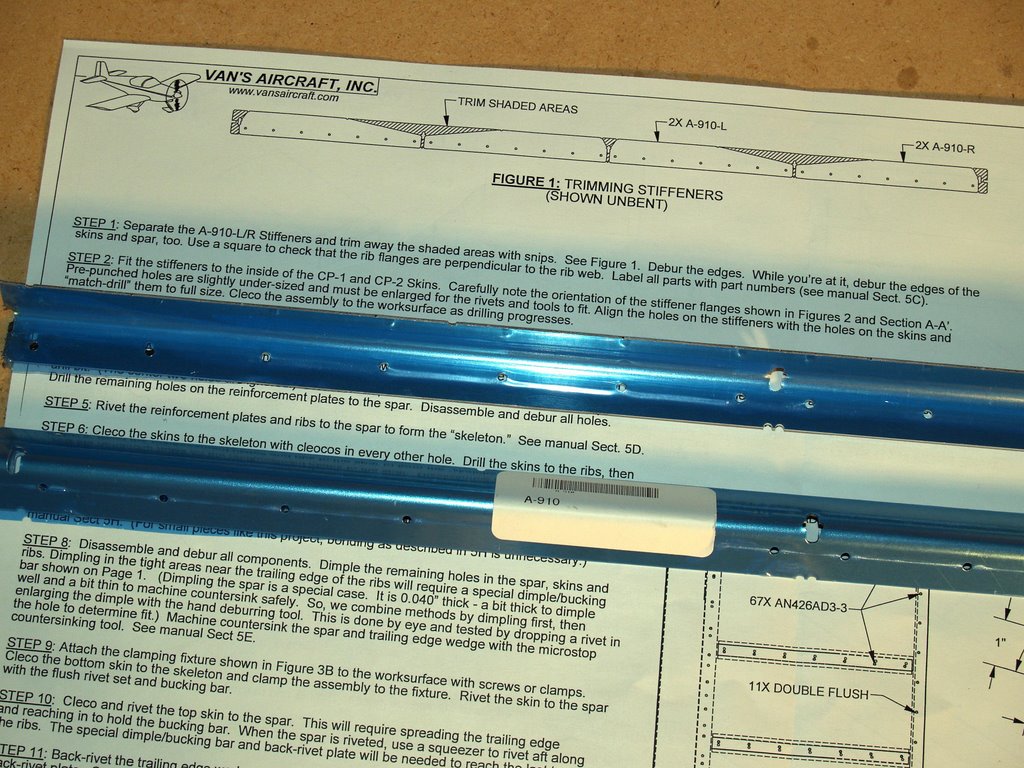
All parts were present, and there was no damage, so on to the next step: read and comprehend the instructions!
Here's the 3D view of what I'm building:

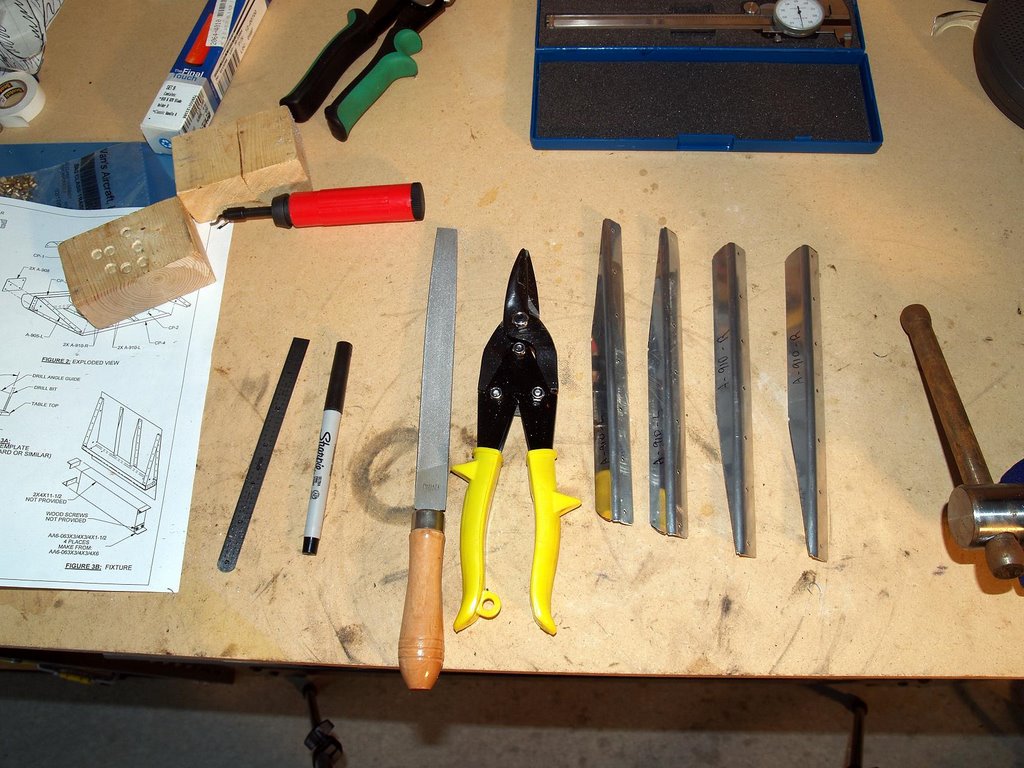
The first step actually involving working with metal requires cutting some skin stiffeners out of the supplied angle pieces shown here. The blue color comes from the protective plastic that coats the kit parts. It is easily peeled off, although a lot of people building planes tend to leave it on as long as possible to avoid damaging the soft aluminum. It doesn't take much of a scratch to completely ruin a piece. The nearly pure aluminum cladding on the copper-alloyed 2024-T3 aluminum commonly used in building airplanes is intended to provide corrosion control. The clad layer is very thin, typically only 5% of the total thickness. Consider that the thickness of a wing skin is usually on the order of only .025", that's pretty thin! Scratching it removes the corrosion protection from that area, and possibly even worse, it creates "stress risers," areas that will could possibly crack as the aluminum gets more brittle with age.
I cut the stiffeners out of the angle with tin snips, which initially didn't go very well. The snips can be very destructive to the piece you're working on if you aren't very careful. I did pretty well for the most part, although one of the stiffeners got a bit bent on the narrow end. I don't think it'll matter too much, though, and I can fix it up a bit with a pair of pliers. Once the rough cut was made with the snips, I cleaned up the edges with the file. The tool with the red handle is a deburring tool. It can be used to clean up the rough edges of a drilled hole, or it can also be used to clean up a rough edge. All holes and cuts MUST be deburred to avoid stress cracks in the future. In fact, roughly half of the time spent building an airplane is in the arena of drill, deburr, cut, deburr, assemble, and rivet.
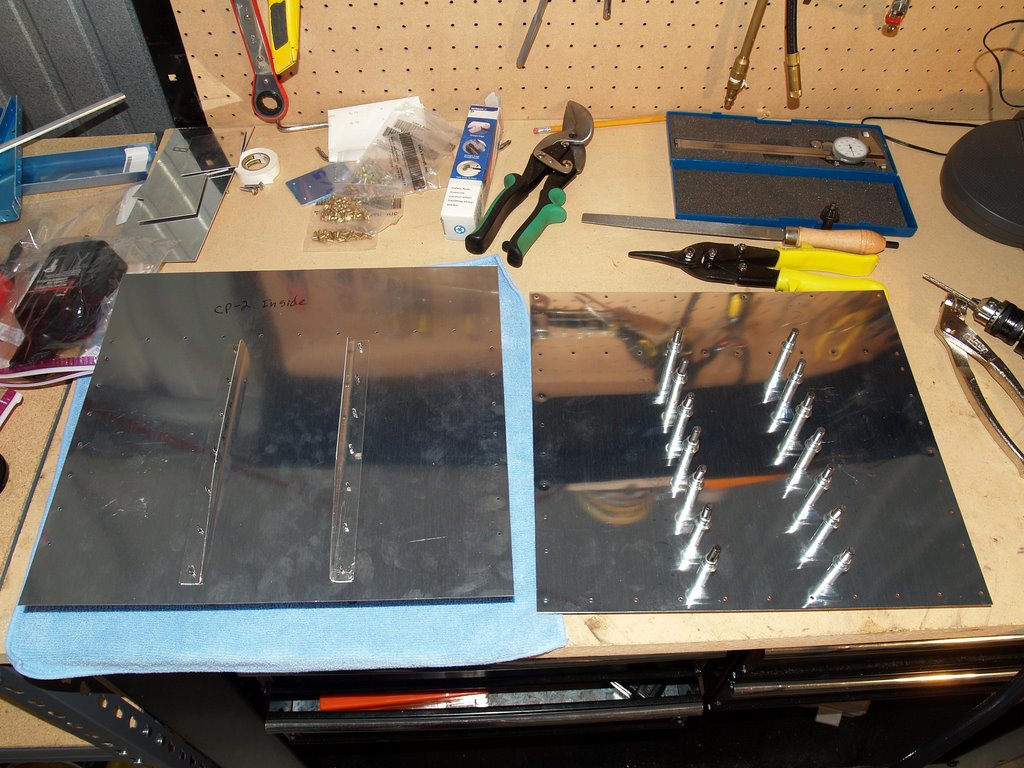
The next step is to drill the pre-punched holes to the final size they will need to fit the rivets, then cleco the stiffeners onto the skin. The mere addition of a thin piece of metal with a 90 degree bend in it stiffens the skin by at least a few orders of magnitude; it's really pretty amazing. Clecos are spring loaded clamps used to hold two (or more, I suppose) pieces of metal together while drilling or working on pieces. You can see them in this picture:

This picture also shows the one stiffener that objected to being rendered with tin snips. I haven't tried to straighten it out yet. You can tell it's not right by the gap between the stiffener and the skin - it should be completely flush against the skin.
I'm currently stuck at step 3. In step 3, I have to dimple each hole in both the skin and the stiffeners to allow room for the rivet to go into the hole far enough to leave a flush surface on the outside of the skin. This process is called flush riveting, oddly enough. The promblem here is that the skin is only .025" thick, and anyhing less than .032" requires dimpling rather than countersinking. Countersinking is done with a special drill bit, one of which I have in my toolbox. Dimpling, on the other hand, is done with a C-frame dimpler, a $200+ tool that I don't own. I would need one if I was building a plane, but it obviously isn't worth the capital investment just for this kit, particularly when I can borrow one pretty easily.
Here are the top and bottom skins, with the stiffeners clecoed in place and waiting for dimpling:
So far I've spent two hours on the kit. If you think about it, that's approximately one-tenth of one percent of what it would take to build a plane. That's apropos of nothing, I suppose, but for me it's something to think about. Could I do this 1000 more times?
No comments:
Post a Comment