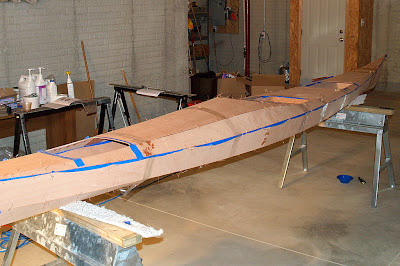
Today's task was a measure of fortitude: it's time for the big cut. That would be the hatch covers fore and aft of the cockpit. Now, to be perfectly honest, I would have been more than happy to skip this step, what with it involving the making of two good-sized cuts in the deck. It's akin to the cuts you have to make for your landing light(s) on an RV: cutting into the leading edge of the wing is enough to cause severe puckering just as cutting into the deck of a boat is. You can't skip it though, and the fact that this specific question is explicitly addressed in the builders manual indicates that I am far from the first builder to look for the cowardly way out. You can't just leave the deck unmolested because then you wouldn't have the access to the inner parts of the boat that is essential to the next steps.
I carefully placed the inner sills on top of the deck to trace the inner edge, which would provide the exact size hole required. The idea is to make this a very neat and precise cut so as to end up with a nice piece of cut away wood to act as the hatch. I put down masking tape before making the Sharpie marker line that I would cut along, knowing that I could easily drift off of the line with the saw, and I didn't want a permanent reminder of my incompetence enshrined forevermore into the deck of my boat. Of course, I could have done myself a favor and positioned it better - lesson learned and soon thereafter applied in the cutting of the aft hatch.

To make a slot for the jigsaw blade, I placed a metal straightedge along the Sharpie line and used it to hold a 1/16" drill bit in position:

I widened the slot with my nifty


The corners were a little trickier, which is unfortunate as that is where I managed to get the Sharpie mark directly onto the wood. Doh! I suppose it'll sand off.


This was even more fortuitous on the aft hatch, when the hatch collapsed into the hull during the second crosswise cut. That let it flop up and down as I was sawing it, which led to a parabolic detour away from the straight and narrow:

Looks like a boat still, but the next step is to remove the deck (again) and start on the fiberglass sarcophagus:

I put masking tape along the seams where I thought the epoxy might soak through a gap during the "tack welding" process, but obviously missed one. The idea was to use that piece of carpet for the hull to rest on to keep it from getting dinged up. It worked, I suppose, but this is going to leave a mess when I try to get it off of there:


No comments:
Post a Comment