It's a Hollywood rule: you can't have a submarine movie without at least one depth charge attack that forces the submarine crew to lie motionless and silent at the bottom of the ocean. You can't have a sailing ship movie without having the vessel stranded for endless days in the Doldrums, the area around the earth centered slightly north of the equator between the two belts of trade winds known for its warm, moist air, low air pressure, cloudiness, high humidity, light & variable winds, and various forms of severe weather such as thunderstorms and squalls (or so says The Mighty Google). And finally, you can't have an RV blog without suffering something similar in the way of prohibitively unflyable weather for what seems like weeks on end.
And so, here I am. It's weather suitable only for hibernation, but here I am cursed with existing as one of those pitiful mammals that isn't blessed with the ability to hibernate. Poor design decision on someone's part, that. If it's not cold, it's windy. If it's not windy, it's socked in with low hanging clouds. If it's not cloudy, it's cold. We've had a relatively mild winter thus far, but even a mild winter is winter none the less, and I'm simply not 100% in love with the whole climatic situation right now, truth be told.
The most recent weather related impediment thrown in my way was the couple of inches of snow we got late last week. A couple inches of snow doesn't sound like a big problem, and in reality it shouldn't be. But the overly helpful crew at the airport has a barn full of big snow plows, and doggone it, they're going to use them! And when they do, a couple of inches of that formerly benign snow become a three inch tall ice wall in front of the hangar when they allow some of the snow to dribble off of the blade right up tight against the hangar door. Surely there must exist a union work rule that prohibits the driver from actually picking up a shovel and clearing away the obstructing snow before it solidifies because they sure as hell don't do it. It's the same kind of rule that apparently prohibits a trash truck driver from cleaning up the mess he makes when he spills trash out of the can during the mechanized pick-up operation.
Absent all of the weather related challenges, I still have a problem: my right main tire has a slow leak. The tube is only a year old, and with the complete lack of flying activity of the last few weeks, I cannot figure out how it possibly could have developed a leak, but a flat tire is hard to mistake for anything else so there's no real question as to the accuracy of my diagnosis. In any event, I went to the hangar yesterday (I can at least step over the ice wall, even if it is insurmountable to the airplane - ironic that a machine of such capability and agility is stymied by that tiny little crest, isn't it?) and replaced the valve stem in the offending tube. Time will tell if that is all that was needed. Interestingly, as I returned to my garage I noted that the Miata too has a flattening tire. Weird!
I'm not on a complete aviation hiatus, though. I've still got A&P school on Monday and Wednesday nights. Night school is vastly different than day school in that there is no semblance of order in the classes that we take. This quarter, for example, is my fourth, which puts me maybe one-third of the way through the Airframe portion of the series, yet I'm in what is called a Capstone class. This is a class that a day student would take as the last in the airframe series. The class has to do with rigging and inspections, and is based on knowledge gained in every class that preceeded it. This dependency on previously taught material is most apparent in the written tests, which are extremely comprehensive. I'm being tested on material that I won't officially be taught until next year, or even the year after that! Fortuntely, it's typical FAA testing, which is to say a ton of multiple choice questions, all of which are published in answer guides. So, the challenge isn't so much the difficulty of the material; rather, it's the effort comes from the sheer volume of information I have to memorize. Good thing I'm not wasting a bunch of time flying, isn't it!
We did some rigging work on an old Piper Warrior last week. We found that the elevator up cable was seriously over tightened and that the rudder cables were seriously loose. The elevator cables were so mis-rigged that the cable would get very taut prior to full thrown being achieved on the elevator. Tightening and loosening the cables is a simple matter, though, involving only the adjustment of a turnbuckle on each cable. Those turnbuckles are obviously very critical to the operation of the airplane, and are therefore safety wired to keep them from working themselves loose and leaving some unfortunate aviator wondering why his frantic yoke inputs are being ignored to the degree normally reserved for 13 year-old daughters disregarding the directives of their father figure, a situation with which I am well versed. Not wanting to be responsible for such an incident, the good mechanic will secure said turnbuckles with .041 safety wire in a fancy single or double wrap pattern.
Well, not in the real world, mind you. Real world mechanics have modern little clips that pop right into the turnbuckle and call it a day without all of the drama and angst of a fullblown turnbuckle safety wiring session, a task that to me, at least, is orders of magnitude more difficult than normal safety wiring. A&P school mechanics are made of far more masochistic stuff, though, and do it the old fashioned way. That is, they bleed. Yes, it's true: there's nothing safe about safety wire! In fact, I believe myself to be highly allergic to it, as it seems that I cannot be in any kind of close proximity to it without spontaneously springing multiple blood leaks in my fingers and hands. It would be funny if..... well, it really is funny, at least for the rest of the class, most of whom don't seem to share my affliction.
Rigging the ailerons on the Warrior requires that they be locked in a neutral position, a feat accomplished via the simple expedient of inserting a 3/16" aileron rigging pin. 'Tisn't a sophisticated tool, that rigging pin, what with being nothing more than a nice, straight piece of 3/16" metal with a nice taper at the inserted end, but sophisticated or not, it does suffer the requirement that you be able to find it when needed. Which, of course, we could not. This put quite a damper in the evening, to be sure. There we were, only an hour into a five hour class, with no way to proceed without that darned rigging pin. "Improvise," my Dad used to say as a means of avoiding the drawing forth of the magical wallet of parental financial largesse to provide me with whatever my object of desire was at the moment, and the lesson remains with me to this day. "We need to improvise here, guys," I thought, drawing on the life experience that had been imparted to me during my formative years.
"Say," said I, "why don't we see if there's some 3/16" welding rod down in the welding shop?" "Capital idea," cried one and all. And it would have been, except for the pesky fact that the welding shop seems to favor 1/8" rod over all others. Whipped, dejected, and resolved to enduring a long night of inactivity, we filed out of the welding shop. But!! On the way out, my alert eyes noticed a coat rack populated with thick metal hangers. "How thick are those," I asked. Out came the trusty slide caliper, and with it's highly accurate (but infinitely inscrutable) vernier scale we determined the diameter of the hanger to be anywhere from .185" to 17.32" Close enough, on the low end estimate anyway. Mental note: start bringing the dial indicator caliper to class - those vernier scales might as well be written in sanskrit. One remaining problem: the designers of said hangers were of the paranoid (or possibly prescient) sort, and had permanently attached the hangers to the coat rack in the hopes of preventing exactly the type of purloining I was envisioning.
Well, it is a shop after all, and shops have all sorts of tools. Including hacksaws. Now I don't want to confess to actually procuring a hacksaw blade and sawing away at one of those hangers while a classmate guarded the door against nosy teachers, but the fact remains that within just a couple of minutes those ailerons on the Warrior were locked down tighter than OJ's fancy leather gloves. And it really should go without saying, because this is really just as predictable as can be, that I found the real rigging pin ten minutes later. Someone had left it in the pilot's seat of the Cessna 310, where I found it via unfortunate, yet time tested, method sitting on it. Funny, isn't it, that a tool designed to keep something immobile can cause such an extremely opposite reaction in me? Well, the class sure thought it was!
Monday, January 29, 2007
Wednesday, January 10, 2007
Gaps in my reasoning
Frankly, I've been distraught over the poor fit of the right leg upper intersection fairing. To the degree, mind you, that it was this issue that gave me night sweats late Monday night, rather than the egregious failure of our formerly highly esteemed Buckeye football team in their ignominious loss to the lowly Florida Gators. How, I asked myself, could the right side fit so poorly when the left side fit as tightly as OJ's shrunken glove?
Finally it dawned on me that the problem was far more likely to be the result of poor alignment of the leg fairing than a defect in the manufacture of the fairing. Apparently the voodoo spell of jacking the plane and running parallel strings to the back did not sufficiently appease the gods of misalignment, and I had somehow managed to get the alignment perfectly wrong. Perhaps I was remiss in skipping the step that called for the sacrificing of a virginal free-range chicken upon an altar of discarded glass trimmings after all. Lesson learned, grocery list updated.
To validate this theory, I made some alignment marks on the leg fairing and fuselage side so I'd be able to return the leg fairing to the scene of the crime (so to speak) should it be necessary and loosened the hose clamp that held the fairing tightly in place. Upon rotating said fairing, I quickly observed that the intersection fairing fit somewhat better. Still, there was a noticeable gap between the front edge of the fairing and the smelly belly of the plane. This gap was a result of a mental block on my part: I had, for some reason, believed that the vertical cut at the back of the intersection fairing was sacrosanct, and that the edges would butt against each other perfectly without resorting to trimming. Such, alas, is not the case. Indeed, a little trimming back of the edges allowed them to butt together without inducing the offending forward gap.
You live, you learn. Once it gets a little warmer towards the end of this week, I will make the required changes to the fit. Next step: determine if the problem with the fit of the lower left fairing can be similarly resolved. I hope it's not a problem with the alignment of the already-installed wheel fairing! Maybe a preventative chicken sacrifice is in order...
Saturday, January 06, 2007
Back to the grind(ing)
I arranged to borrow a second wing jack from the FBO at Bolton (the most helpful group of professionals that you could ever wish for!) and was able to borrow a tail stand from the builder of the other TZR-based RV-6. That left only one open issue: how was I going to lift that danged tail up into the stand? Sure, it only weighs 80 pounds for so, but it's an awkward lift that never fails to damage me physically to the degree that I swear never to do it again. And then along comes a job like this one that requires the tail to be elevated and I develop some sort of transitive amnesia about my previous experiences and heft it up.
The reason the tail needed to be lifted today was that I needed to do the final alignment of the leg fairings so I could trim and fit the upper intersection fairings. There's apparently a noticeable difference in the alignment of the gear legs in flight versus their position with the weight of the airplane compressing them, so the weight of the airplane has to be borne temporarily by wing jacks. There could also be a difference in alignment with the tail on the ground, so to further simulate an in-flight attitude the tail needs to be lifted and the airplane leveled.
Being as I only have one jack of my own, I have never lifted the entire airplane. I wasn't sure if it would be better to jack the wings prior to lifting the tail or vice-versa, but I decided lifting the wings first would be a bit safer as it is more unlikely that it would move (or fall off of) those heavy steel jacks than it was that the relatively frail wooden tail stand would slide or fall. I jacked the left wing until the wheel was just light enough to turn, then started on the right side. As I pumped the jack, I fixated on the left side and the right side tire, waiting for the same scuffing roll movement of the right side wheel. Eventually it seemed that I had been pumping much longer than expected, even considering a prior lack of experience with this, the borrowed jack. I eventually broke my fixation on the tire long enough to notice, with no small measure of shock and dismay, that the tail had, of its own accord, lifted itself way up in the air, and as a direct result the nose was close to assuming the position of a dog rooting out a field mouse. Huh, the CG is forward of the jack points; who knew?
While this unexpected intervention from the friendly gods of physics solved the brute force facet of lifting the tail, it presented a new, unexpected issue. You see, I had borrowed a tail stand, a tool that is only effective in one direction, e.g. holding the tail up. It is entirely useless in the function of holding the tail down. The simple expedient of lowering the wing jacks proved to be the answer - I was able to get the plane leveled with only a little bit of weight on the wheels. Given the inherent inaccuracies in this entire alignment process, I was ok with that.
I pulled the leg fairings off to do some sanding on their trailing edges, and touched up the paint on the plane where the old fairings had rubbed it away. I also got some paint on the bare areas of the gear legs while they were exposed. Those areas will all be covered by the new fairings, but it seemed a good idea from the corrosion prevention point of view to not leave any bare spots.
I plumb-bobbed a chalk line down the center of the fuselage again, unfortunately discovering some sort of defect in my chalk string dispenser in the process. Unwound to nearly the full length of the plane, it became irreparably jammed. No string out, no string in, no matter the extremity of the torque applied to the crank. I had to take it apart to untangle the internal disarray. I'm here to tell you, if you haven't yet had the pleasure and experience of disassembling a nearly full chalk line dispenser, don't be in any great hurry to do it. It's like opening a vacuum cleaner bag and rooting around through the mess of ingested dust mice and carpet fibers, except for being a much more colorful blue.
So, with the airplane more or less leveled and the fairings aligned to the best of my meager abilty (the far more discerning and infinitely more accurate judge of my alignment efforts will be the 185 mph airflow across the fairings in flight; I have no hope of achieving that precision of measurement with string), I could start trimming the upper intersection fairings.
As we're nearing the finish of the project, I thought it might be instructive to provide a 'before' picture:
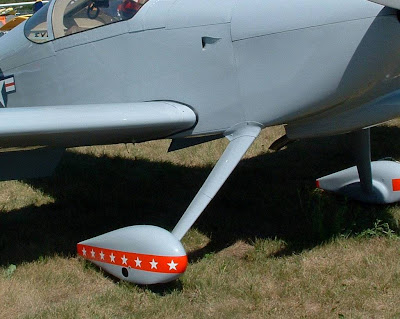
The upper intersection fairings need to be trimmed fairly extensively around their perimeter to round out the unattractive rectangular shape they're molded in. I just sketched some curves with a Sharpie pen by eye, looking for a conservative cut line. I've learned to treat trimming glass in the same way I've learned to tell my clan of females what time we need leave the house for any given appointment. For exmple, I'll tell them that we absolutely must depart at say, 9:00, knowing full well that we really don't need to leave until 9:30. And, just as we usually manage to get out of the house by 9:45, I always manage to find a way to cut away too much material when I trim. So I was especially conservative today, making particularly sure that there would be a large enough 'flat' area where the fairing is flush with the fuselage skin to support a #8 screws and a tinnerman washers that would hold it in place.
I rough cut around the Sharpie line with a cutting disk in my die grinder, then used a sanding drum to grind a nice radius curve all the way around the fairing. Ack, the dust! But it all came out well and the fairings for the most part fit pretty well against the plane. The right side will need some adjustment, though.
I also had to cut a relief hole on the inside side of each to provide room for the screw on the hose clamp. I'm not thrilled with that aspect of the design, less because the opening is going to cause a little drag than because it's going to be a catch-all for the gunk thrown up by the landing gear when using grass runways. Of course, if I was concerned about drag, I would have done a better job of positioning the hole on the right side fairing than I did. The precision of my marking of the hole location was only marginally better than what would have been expected to result from a completely blind guess, so the ensuing drag resulting from the elargement of said hole is entirely my fault. So yeah, it's certainly not about drag at all. That's my story and I'm sticking to it, as they say.
The former fairings utlized a hole in the lower corner of the bottom cowl for a screw and nut to hold them in place and I'm going to re-use those holes to host #8 rivnuts. That way, I won't have to mess with the little nut way down there in the corner of the bottom cowl every time I have to remove the cowls. The pre-existing holes were also handy for getting a Cleco in place to hold the fairings:
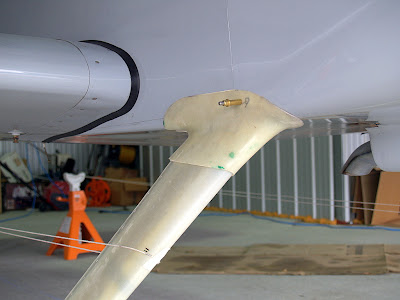
There will be three more rivnut/screw locations drilled for each fairing, and I will also have to tap a hole for one of the screws on each fairing since the hole location is an area backed by an internal doubler. There's not enough grip length in the rivnuts to get a good solid fit through metal that thick.
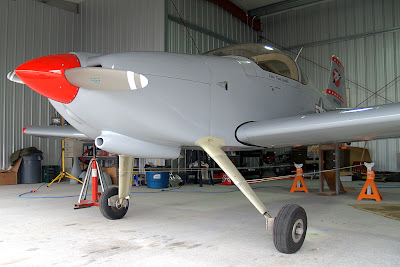
You can start to see how it's going to look when it's done:

The reason the tail needed to be lifted today was that I needed to do the final alignment of the leg fairings so I could trim and fit the upper intersection fairings. There's apparently a noticeable difference in the alignment of the gear legs in flight versus their position with the weight of the airplane compressing them, so the weight of the airplane has to be borne temporarily by wing jacks. There could also be a difference in alignment with the tail on the ground, so to further simulate an in-flight attitude the tail needs to be lifted and the airplane leveled.
Being as I only have one jack of my own, I have never lifted the entire airplane. I wasn't sure if it would be better to jack the wings prior to lifting the tail or vice-versa, but I decided lifting the wings first would be a bit safer as it is more unlikely that it would move (or fall off of) those heavy steel jacks than it was that the relatively frail wooden tail stand would slide or fall. I jacked the left wing until the wheel was just light enough to turn, then started on the right side. As I pumped the jack, I fixated on the left side and the right side tire, waiting for the same scuffing roll movement of the right side wheel. Eventually it seemed that I had been pumping much longer than expected, even considering a prior lack of experience with this, the borrowed jack. I eventually broke my fixation on the tire long enough to notice, with no small measure of shock and dismay, that the tail had, of its own accord, lifted itself way up in the air, and as a direct result the nose was close to assuming the position of a dog rooting out a field mouse. Huh, the CG is forward of the jack points; who knew?
While this unexpected intervention from the friendly gods of physics solved the brute force facet of lifting the tail, it presented a new, unexpected issue. You see, I had borrowed a tail stand, a tool that is only effective in one direction, e.g. holding the tail up. It is entirely useless in the function of holding the tail down. The simple expedient of lowering the wing jacks proved to be the answer - I was able to get the plane leveled with only a little bit of weight on the wheels. Given the inherent inaccuracies in this entire alignment process, I was ok with that.
I pulled the leg fairings off to do some sanding on their trailing edges, and touched up the paint on the plane where the old fairings had rubbed it away. I also got some paint on the bare areas of the gear legs while they were exposed. Those areas will all be covered by the new fairings, but it seemed a good idea from the corrosion prevention point of view to not leave any bare spots.
I plumb-bobbed a chalk line down the center of the fuselage again, unfortunately discovering some sort of defect in my chalk string dispenser in the process. Unwound to nearly the full length of the plane, it became irreparably jammed. No string out, no string in, no matter the extremity of the torque applied to the crank. I had to take it apart to untangle the internal disarray. I'm here to tell you, if you haven't yet had the pleasure and experience of disassembling a nearly full chalk line dispenser, don't be in any great hurry to do it. It's like opening a vacuum cleaner bag and rooting around through the mess of ingested dust mice and carpet fibers, except for being a much more colorful blue.
So, with the airplane more or less leveled and the fairings aligned to the best of my meager abilty (the far more discerning and infinitely more accurate judge of my alignment efforts will be the 185 mph airflow across the fairings in flight; I have no hope of achieving that precision of measurement with string), I could start trimming the upper intersection fairings.
As we're nearing the finish of the project, I thought it might be instructive to provide a 'before' picture:
The upper intersection fairings need to be trimmed fairly extensively around their perimeter to round out the unattractive rectangular shape they're molded in. I just sketched some curves with a Sharpie pen by eye, looking for a conservative cut line. I've learned to treat trimming glass in the same way I've learned to tell my clan of females what time we need leave the house for any given appointment. For exmple, I'll tell them that we absolutely must depart at say, 9:00, knowing full well that we really don't need to leave until 9:30. And, just as we usually manage to get out of the house by 9:45, I always manage to find a way to cut away too much material when I trim. So I was especially conservative today, making particularly sure that there would be a large enough 'flat' area where the fairing is flush with the fuselage skin to support a #8 screws and a tinnerman washers that would hold it in place.
I rough cut around the Sharpie line with a cutting disk in my die grinder, then used a sanding drum to grind a nice radius curve all the way around the fairing. Ack, the dust! But it all came out well and the fairings for the most part fit pretty well against the plane. The right side will need some adjustment, though.
I also had to cut a relief hole on the inside side of each to provide room for the screw on the hose clamp. I'm not thrilled with that aspect of the design, less because the opening is going to cause a little drag than because it's going to be a catch-all for the gunk thrown up by the landing gear when using grass runways. Of course, if I was concerned about drag, I would have done a better job of positioning the hole on the right side fairing than I did. The precision of my marking of the hole location was only marginally better than what would have been expected to result from a completely blind guess, so the ensuing drag resulting from the elargement of said hole is entirely my fault. So yeah, it's certainly not about drag at all. That's my story and I'm sticking to it, as they say.
The former fairings utlized a hole in the lower corner of the bottom cowl for a screw and nut to hold them in place and I'm going to re-use those holes to host #8 rivnuts. That way, I won't have to mess with the little nut way down there in the corner of the bottom cowl every time I have to remove the cowls. The pre-existing holes were also handy for getting a Cleco in place to hold the fairings:
There will be three more rivnut/screw locations drilled for each fairing, and I will also have to tap a hole for one of the screws on each fairing since the hole location is an area backed by an internal doubler. There's not enough grip length in the rivnuts to get a good solid fit through metal that thick.
You can start to see how it's going to look when it's done:
Monday, January 01, 2007
Another down time project
With all of this free time that I've had over the holidays, I've gotten a lot done. Now I'm embroiled in writing another review for GamingNexus, this time for a very nice joystick/throttle setup from Saitek. This thing is a thing of beauty, and I want to do it justice in the pix that I submit with the review. Here's what I was able to get this afternoon:





It's no trouble to double
Cold, blustery weather (at last!!) drove me back to project status by removing any temptation whatsoever to fly today. Today I wanted to tackle the issue of the potentially problematic leg fairing tabs. I've seen complaints on various message boards about these tabs cracking, presumably even with the suggested application of several layers of glass cloth in the weak area. I had a ('too', as it turns out) small scrap of .020 aluminum left over from the dregs I had hoovered up last spring when I was in the sheet metal class, so I decided to fabricate some tab doublers. The idea was to put an aluminum tab between the glass tab and the gear leag, and rivet it in place off to the sides, where the shop heads of the rivets wouldn't be in contact with the gear leg.
It was very easy to get a rough cut piece cut out with tin snips:

It needed some curvature so it would snug up against the fairing:

Two notches form the tab:

The snips leave rough edges, so it had to be filed clean:
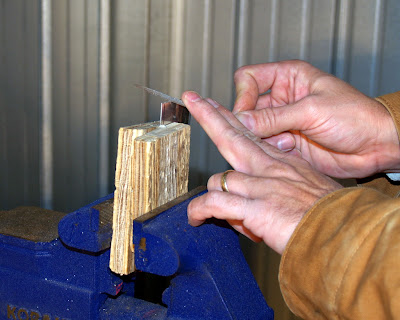
The cleco clamps did a pretty good job, but I did encounter a little bending of the aluminum away from the drill bit when trying to drill the rivet holes:

The bigger (#4) rivet came about because of very severe bit slippage, as mentioned above. Also note the Picassoesque psuedo-random positioning of the rivets which is the most recent manifestation of my artistically abstract period:

I almost immediately started running low on my very limited supply of aluminum, so the next two doublers were a bit less extravagant. As you can also see, I made an artistic statement by being even more abstract with my rivet placement in order to draw attention to my nascent transition into my rebellious phase. This stuff is art, says I, and needs to be treated as such.
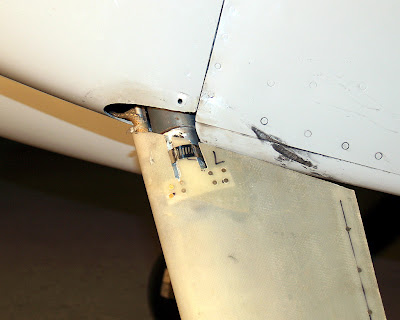
Even with the simplified design I only had enough metal to make three doublers, so the inside left leg hasn't got one yet. Here are both leg fairings held in place with the hose clamps and tabs:

Now I need to get the final alignment of the leg fairings done, and start on the intersection fairings. The plane has to be jacked to take the weight off of the gear legs to do the alignment, and I only have one jack. I'm afraid jacking one leg at a time would not give me perfect alignment, so I'm going to either have to scare up another jack, or find another way to get both gear unloaded. The tail needs to come up as well, which is another kettle of fish entirely.
After that, I have a lot of trimming, sanding, filling, sanding, filling, sanding and filling to do. Then, at long last, painting. I have no idea how I'm going to do that.
It was very easy to get a rough cut piece cut out with tin snips:
It needed some curvature so it would snug up against the fairing:
Two notches form the tab:
The snips leave rough edges, so it had to be filed clean:
The cleco clamps did a pretty good job, but I did encounter a little bending of the aluminum away from the drill bit when trying to drill the rivet holes:
The bigger (#4) rivet came about because of very severe bit slippage, as mentioned above. Also note the Picassoesque psuedo-random positioning of the rivets which is the most recent manifestation of my artistically abstract period:
I almost immediately started running low on my very limited supply of aluminum, so the next two doublers were a bit less extravagant. As you can also see, I made an artistic statement by being even more abstract with my rivet placement in order to draw attention to my nascent transition into my rebellious phase. This stuff is art, says I, and needs to be treated as such.
Even with the simplified design I only had enough metal to make three doublers, so the inside left leg hasn't got one yet. Here are both leg fairings held in place with the hose clamps and tabs:
Now I need to get the final alignment of the leg fairings done, and start on the intersection fairings. The plane has to be jacked to take the weight off of the gear legs to do the alignment, and I only have one jack. I'm afraid jacking one leg at a time would not give me perfect alignment, so I'm going to either have to scare up another jack, or find another way to get both gear unloaded. The tail needs to come up as well, which is another kettle of fish entirely.
After that, I have a lot of trimming, sanding, filling, sanding, filling, sanding and filling to do. Then, at long last, painting. I have no idea how I'm going to do that.
Excuse me, your slip is showing
Taking a break from looking at the plane as a project rather than a flying vehicle, I made a short flight to Urbana on Saturday morning. I don't have all of the fairings done yet, so I just stripped everything off. No fairings from the hips down, if you will. The weather was fantastic and was actually worthy of a more significant trip than the 30 miles or so to Urbana, but I don't want to put an extended amount of wear and tear on the exposed wheel pant brackets which are prone to cracking from the flexing caused by the windstream. Well, that and the fact that it's kinda ugly all nekkid like that.
I had wondered how the plane would fly without all the leggings. The answer: not bad. We saw GPS speeds in the high 140 to low 150 knot range, with very little wind to factor in. There was a roll to the right that I couldn't fully trim out, but I had a passenger on board and had, as is my normal practice, burned from the left wing first after my last refueling so there was a fuel inbalance as well. Or, it could be an unintended slip being imparted by the wooden leg fairings (these are fairing-shaped lengths of wood that are fiberglassed to the gear legs to reduce unwanted movement/shaking in the gear legs - you can see them here) possibly not being adequately aligned with the airframe. I'm not sure, and it doesn't really matter since it's a temporary condition. It does somewhat infuse me with the desire to be extremely diligent in aligning the new fairings, though.
Now, if I could conjure up an even remotely plausible aerodynamic explanation for the atrocious bouncing of the ensuing three-fer wheel landing at Urbana, I'd insert it here. 'Tis not the case, though. It was a pilot thing. I knew the plane was going to be heavy and draggy, so I over-cautiously carried 75-80 mph down final and into the flare. That leaves way too much lift in the wing and without perfect technique is a recipe for what I have termed ICF, or "inadvertently continued flight." I have not perfected my technique. You can guess the rest.
Squeaker back at Bolton, though, to save the day.
Subscribe to:
Posts (Atom)
