One of the attractive, yet intangible benefits of buying N466PG was that the builder lives right here in Ohio. My thinking was that I would be sure to have questions regarding how it was built, and possibly questions as to correct operation and past maintenance issues. As is my wont, I dragged my feet on contacting him until just a couple of days ago when I sat down and wrote a quick letter and sent it to the address on the most recent registration card in the plane. Last night I received a phone call from the builder, and we had a nice chat during which I was able to clear up a few questions that had been nagging at me for awhile.
First, I was curious about his history with F-86 tail number FU-466. There are typically two people that get emotionally bound to a single plane in a squadron: pilots and crew chiefs. My theory had been that he was a pilot, and FU-466 was the plane in the squadron with his name painted on it, and that is indeed the case. He flew the F-86 in the mid-50's, based in Toule, France. Other famous pilots that have been stationed there include Eddie Rickenbacker and Gen. Chuck Yeager.
This allowed me to test another of my pet theories: that RVs are attractive to current and retired fighter pilots because they have similar flying qualities to military fighter planes. His response: "If you want to know what it feels like to fly an F-86, get an RV." Well now, how cool is that?? I HAVE always wondered how those planes felt on the controls. I was 50-50 between them being a little heavier on the controls due to the speed they fly and the immense pressures on the control surfaces, but my alternate theory about that pressure being overcome by boosted controls was the correct one, as it turns out. Of course, there are still significant differences between the two planes, mostly having to do with climb rate and cruise speed.
I also had a few questions about the plane and some of the things I've noticed about it. First, the tires and brakes that I recently replaced were the originals, which indicates that I should be able to get 200 hours out of a set. That's good because that will likely be two years worth of flying. Keep in mind that most of my flights are short, so I do more landings per hour than someone that is taking long trips. Every other year to replace tires and brakes is fine by me.
I also asked about the landing light switch on the instrument panel, which has been intriguing to me since there are no landing lights installed. I'd like to install at least one, but I didn't know if any wiring had been run out inside the wing. It turns out that there is wire run out to each wing tip, so I could install a landing/taxi light on each side. That's the best possible answer since I really like the wig-wag lights, and have found that they greatly increase the visibility of the plane for both other planes and the control tower. It's GOOD to be seen! Now it's just a matter of working up the self confidence to cut a pair of holes into a perfectly good wing!
I had done a little poking around inside the aileron bellcrank inspection hole looking for wire conduits out to the wingtips and noted that the internal wing bays were primered. Not all builders primer all of the parts because it is expensive and time consuming, and since my plane is hangared I could live with it either way, but my experience with the Tampico, which was fully primered and 100% corrosion free after spending years in a coastal, salt water environment, led me to believe that full primer is desireable. I now know for sure that Papa Golf is fully primered, through and through.
I wanted to know a few things about instrument indications I'm seeing in flight. First, I was curious about the ammeter which has never had a steady reading. The needle flickers from 0 to 1 about twice a second. The voltmeter is reading over 14 volts (it would read 12 if the alternator wasn't working) and the battery is always strong, so I have no concerns as to whether the alternator is working or not, but I've always wondered why the indicator won't settle. I've done all the normal things like turning off the stobe lights and transponder (two electrical items that only make periodic demands from the electrical system), but to no effect. Apparently it has always behaved that way, so for this one I'm going with "no harm, no foul."
Another strange indication is more sporadic - I only see it now and then. This one is the fuel pressure reading high. I tried replacing the transducer, and that seemed to clear it up for awhile, but I've seen it starting to creep up again. My theory was that I was having a problem with the ground wire to the indicator, but I couldn't prove it. The symptoms were very familiar to the builder: "I thought I had that fixed." He suggested getting up behind the panel and putting a little pressure on the wires to make sure they are firmly in contact with the indicator. He went through all the trouble of having the fuel pump checked out with a mechanical pressure gauge, and eventually traced the problem to the indicator itself. Again, this is good news! I was pretty sure this was the case, but it's always nice to know for sure, particularly with something as critical as fuel flow to the engine.
Another of my theories was proven true when I asked about the conical engine mount. I had been concerned about the level of vibration from the engine, finding it to be far more than what I was used to from the Tampico and other planes I've flown. I recently noticed that the engine was mounted using a conical mount, rather than the more vibration daming dynafocal model. The only reason I could think of to use a conical would be if the builder came across a bargain priced engine that just happened to be set up for the conical mount, and that is exactly what happened. This one was more of a curiosity satisfier than something I really needed to know.
He had a few questions for me, too. He asked how the King KLN-89b GPS was working out for me, and I told him that I seldom used it since I mounted the Garmin 295 to the canopy glare shield. I told him that I consider this plane day-VFR, and that's why I'm not concerned about the flaky vacuum pump. While the vacuum pump works, it doesn't seem overly trustworthy in that it takes a good burst of power on start-up to get it to work. It's no problem for the kind of flying I do, and it works well enough in the air that I would be able to use it to get myself back out of a cloud should I ever unintentionally get myself into one. Still, I've been curious about it. He told me that he had had similar problems with it, and at one point removed the vacuum pump for repair. The problem turned out to be that for some reason, oil had gotten into the pump. I'm still thinking about how that could have happened, and of course I'm wondering if it has happened again. Something to look at someday when I get further into the A&P program.
There were a few other details back and forth, and I have to say that it was a very satisfying conversation. Of course, I should have written much sooner. One of my questions had to do with how to get matching paint. Well, until a week ago he could have sent me the extra paint he's had lying around for ten years, but he just cleaned out his shop and decided he didn't need it anymore.
I'm looking forward to nicer weather so I can fly out to Mad River and have an in-person visit. That should be fun!

Saturday, December 31, 2005
Friday, December 30, 2005
Another GIMP masterpiece
I was thinking about a Pitts painted to look like the Peashooter shown here in previous posts, and go to wondering if I could model it using the GIMP software I use to try out various ideas on the RV.
I started with this picture:

I can't do much about the positioning and style of the stripes (yet), but I was able to do a fairly good job of changing the colors:

It's enough to get an idea, anyway.
I started with this picture:

I can't do much about the positioning and style of the stripes (yet), but I was able to do a fairly good job of changing the colors:
It's enough to get an idea, anyway.
Wednesday, December 28, 2005
I decided I like this one too
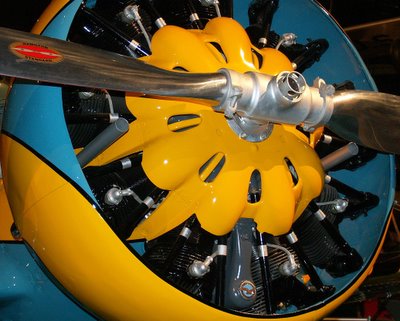
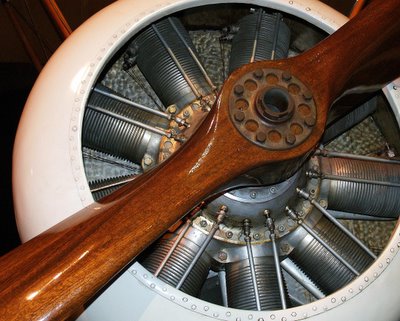
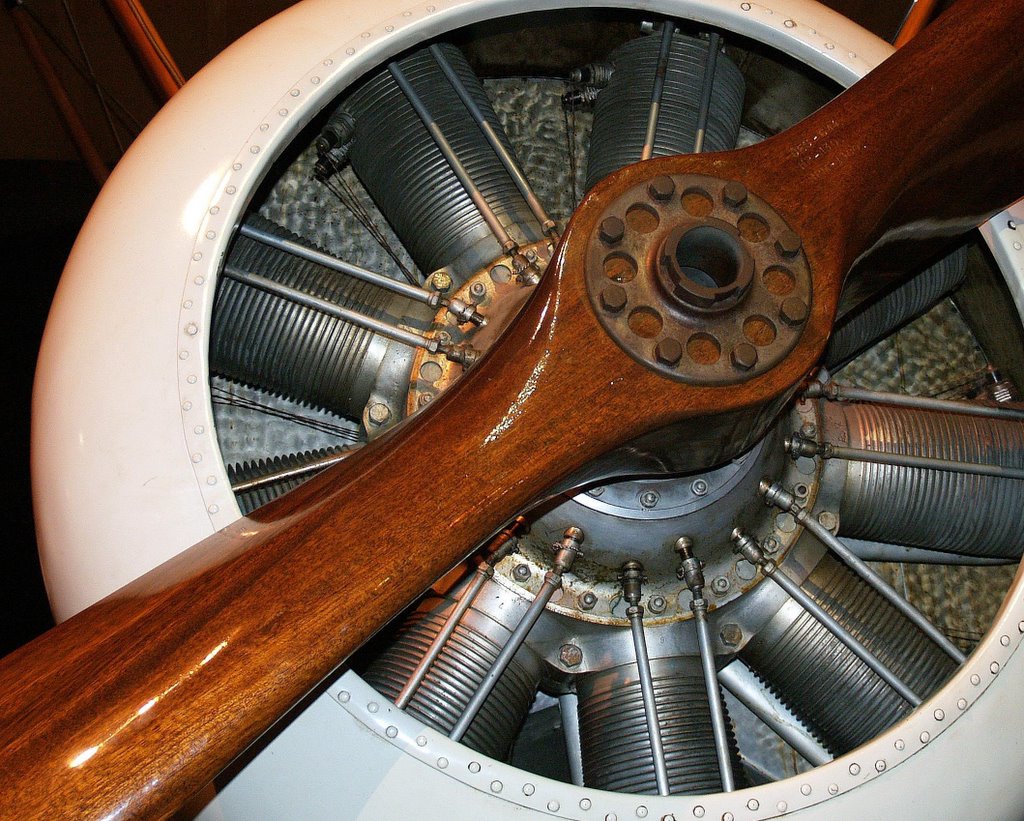
I cropped another of the pictures I took at the Air Force Museum yesterday. This one is the prop and engine of the P-26 Peashooter:

It Fits!!
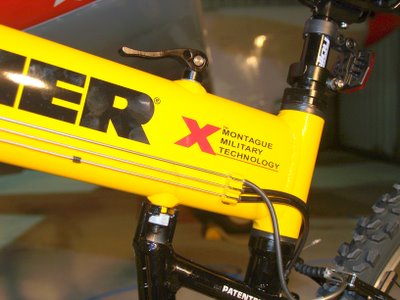
When I sold my 4 seat Tampico in order to buy the RV-6, I pretty much thought I was giving up my dream of someday having a folding bicycle that would fit in the plane. I have been looking at them on the internet for years, finding prices ranging from around $200 for a spindly looking thing with tiny wheels to more than $600 for one that looked like a real bike. I've always thought the Montague bikes looked the best, and had the price been more in range with what I willing to spend, I'd have gotten one.
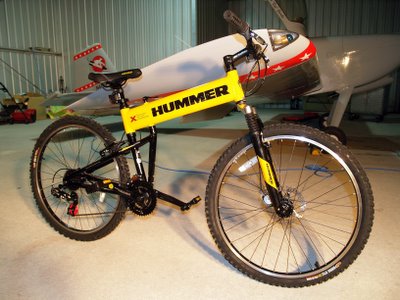
Sometime earlier this year, Sam's Club started selling the Hummer, a folding mountain bike made by Montague in a promotional arrangement with GM. I've studied it closely every time we've gone to Sam's, noting the high quality of the brakes and shifter stuff. It's light, too, weighing in at 26 pounds. Still, if I remember correctly it was priced at over $300, which was a bargain compared to the normal street price of nearly $800, but still a bit too dear for me. Today, while browsing down the aisle just to get another glance, I noticed that the price was down to $199. Yow! At that price I decided to buy one whether it fits in the plane or not! I've been riding the same cheap Huffy that I bought ten years ago to carry Co-pilot Egg in a baby seat. That activity, by the way, lasted only as long as it took her to realize that she could sit back there and give Daddy wedgies.
Still, I was hoping I could find a way to load the Hummer into the RV. There are just tons of places that I haven't gone to or only go to rarely because there's nothing to do or see within walking distance. Being able to bring a full-size bike along will be fabulous!
And it really is a full-size bike. Here's what it looks like ready to ride:
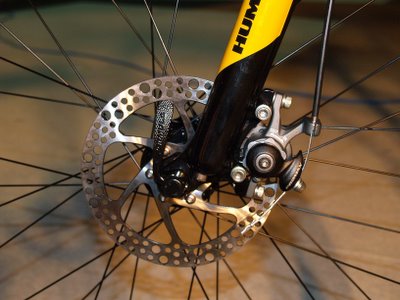
This is a close-up of the front brake, which I think is indicative of the quality of the various components:
To fold the bake, you remove the front wheel, which only takes a few seconds. Then you use this quick release to release the center joint:
Here it is folded up just before my first attempt to get it in the plane:
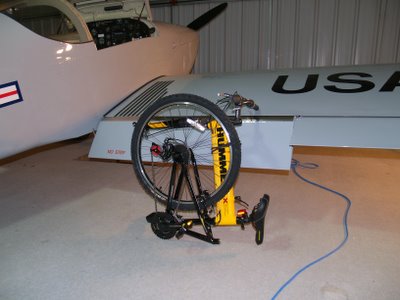
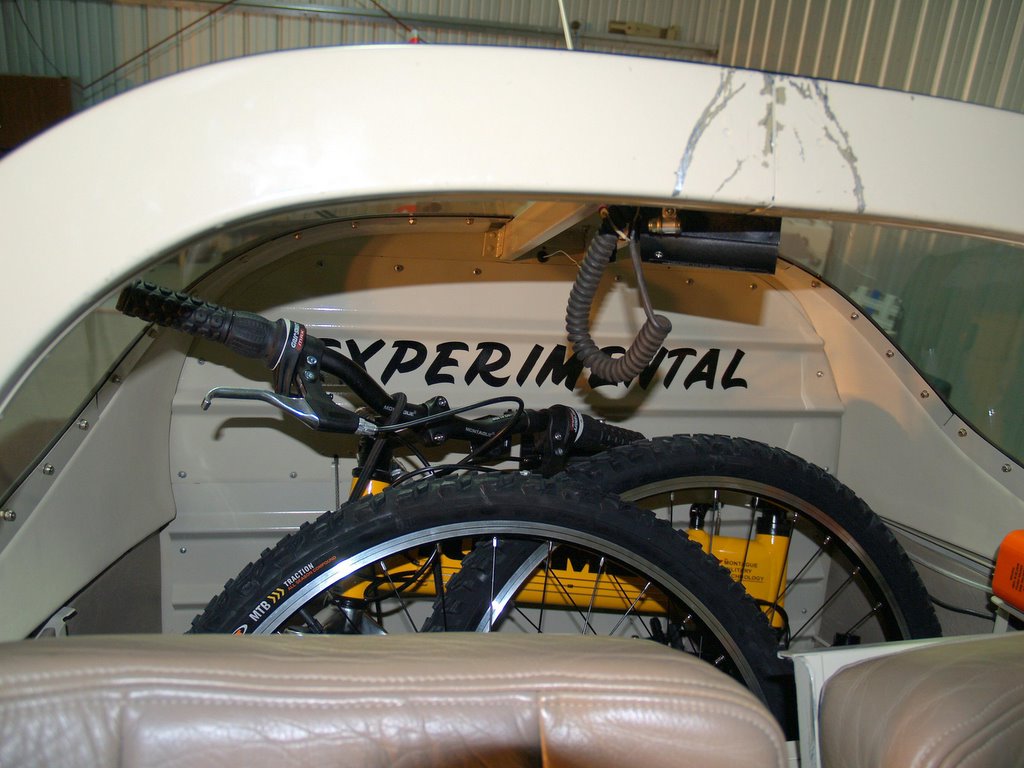
I was able to get it in there like that, but it was tough and I worried about scratching the paint or dinging up the fancy gears on the bike. I had a heck of a time getting it back out of there - it was like a barbed fish hook. Once it was in, it wasn't coming back out! I finally managed to get it back out of there, and went ahead and removed the seat, pedals, and rear wheel. None of that was particularly hard to do, and it made it much easier to get everything into the plane. Here it is snuggled into the baggage area:
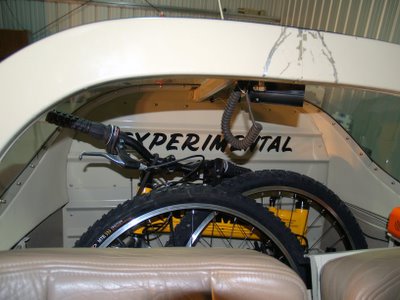
It's fairly secure back there, but I'm worried that rough air could cause it to fly up and bang against the plexiglass, so I'm going to find a way to hold it in place with a bungee cord, or even better, a tie-down strap. I'm guessing that it will take about 5 minutes to get the bike out of the plane and reassembled. Once I get good at it, I think it will be pretty easy to do. For now, though, it's a bit of trial and error.
I haven't actually ridden the bike yet, so I can't comment on the ride. Maybe tomorrow if this dismal weather clears up enough.
Update:
I pulled the bike out of the plane this morning and had it ready to ride in less than 5 minutes. Most of that time was putting the rear wheel back on. If you were just folding it and tossing it in your car/boat, it would take less than a minute for folding and unfolding. It's light, too, so it's easy to move around, although it's bulky and unless you grip it right (or wrap it in a bungee like I've tahen to doing) it will try to unfold at the most inconvenient times.
I tossed it in the back of the Subie and took it home for a ride around the neighborhood. It rides great! There's a little gear-jumping, but I haven't tried to adjust it yet. The rear brake is very effective, and the front disc brake is much gentler. The seat is as comfortable as all bike seats seem to be these days, which is to say it's pretty hard and is going to hurt after a few miles.
Sometime earlier this year, Sam's Club started selling the Hummer, a folding mountain bike made by Montague in a promotional arrangement with GM. I've studied it closely every time we've gone to Sam's, noting the high quality of the brakes and shifter stuff. It's light, too, weighing in at 26 pounds. Still, if I remember correctly it was priced at over $300, which was a bargain compared to the normal street price of nearly $800, but still a bit too dear for me. Today, while browsing down the aisle just to get another glance, I noticed that the price was down to $199. Yow! At that price I decided to buy one whether it fits in the plane or not! I've been riding the same cheap Huffy that I bought ten years ago to carry Co-pilot Egg in a baby seat. That activity, by the way, lasted only as long as it took her to realize that she could sit back there and give Daddy wedgies.
Still, I was hoping I could find a way to load the Hummer into the RV. There are just tons of places that I haven't gone to or only go to rarely because there's nothing to do or see within walking distance. Being able to bring a full-size bike along will be fabulous!
And it really is a full-size bike. Here's what it looks like ready to ride:

This is a close-up of the front brake, which I think is indicative of the quality of the various components:

To fold the bake, you remove the front wheel, which only takes a few seconds. Then you use this quick release to release the center joint:

Here it is folded up just before my first attempt to get it in the plane:

I was able to get it in there like that, but it was tough and I worried about scratching the paint or dinging up the fancy gears on the bike. I had a heck of a time getting it back out of there - it was like a barbed fish hook. Once it was in, it wasn't coming back out! I finally managed to get it back out of there, and went ahead and removed the seat, pedals, and rear wheel. None of that was particularly hard to do, and it made it much easier to get everything into the plane. Here it is snuggled into the baggage area:
It's fairly secure back there, but I'm worried that rough air could cause it to fly up and bang against the plexiglass, so I'm going to find a way to hold it in place with a bungee cord, or even better, a tie-down strap. I'm guessing that it will take about 5 minutes to get the bike out of the plane and reassembled. Once I get good at it, I think it will be pretty easy to do. For now, though, it's a bit of trial and error.
I haven't actually ridden the bike yet, so I can't comment on the ride. Maybe tomorrow if this dismal weather clears up enough.
Update:
I pulled the bike out of the plane this morning and had it ready to ride in less than 5 minutes. Most of that time was putting the rear wheel back on. If you were just folding it and tossing it in your car/boat, it would take less than a minute for folding and unfolding. It's light, too, so it's easy to move around, although it's bulky and unless you grip it right (or wrap it in a bungee like I've tahen to doing) it will try to unfold at the most inconvenient times.
I tossed it in the back of the Subie and took it home for a ride around the neighborhood. It rides great! There's a little gear-jumping, but I haven't tried to adjust it yet. The rear brake is very effective, and the front disc brake is much gentler. The seat is as comfortable as all bike seats seem to be these days, which is to say it's pretty hard and is going to hurt after a few miles.
Tuesday, December 27, 2005
Air Force Museum
An incredible bargain, and I just can't get enough of it. Co-pilot Egg and I went out to the Air Force Museum near Dayton today. Open 363 days a year, free admission and parking, and an unbelievable collection of airplanes, missles, and all things Air Force and air history.
I took the new camera to see how it would do in the hostile lighting of the museum. It's darn hard to get a good picture in there - I've been trying for years with little to no success. This time, though, I got a few that I thought were worth sharing.
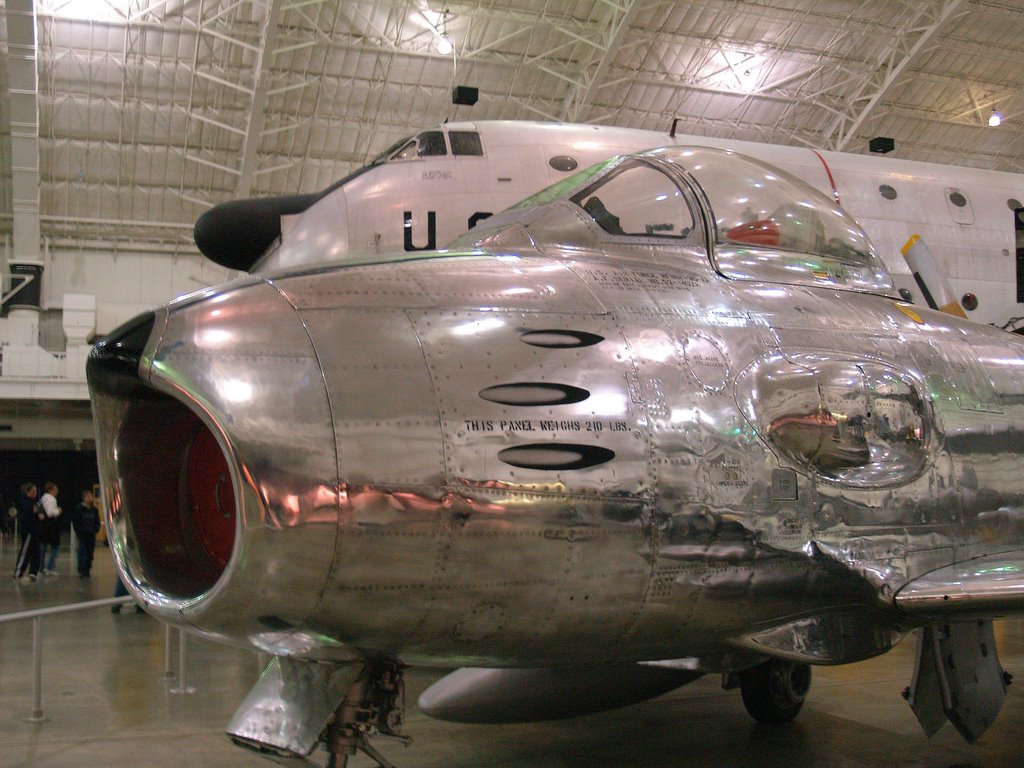
One goal I had was to get some pictures of F-86 gunports, still thinking I might want to try to decorate the nose of the RV with a nice set of simulated ports. I chuckled when I found them - they have the soot stains that I finally ended up deciding lookes too fake:
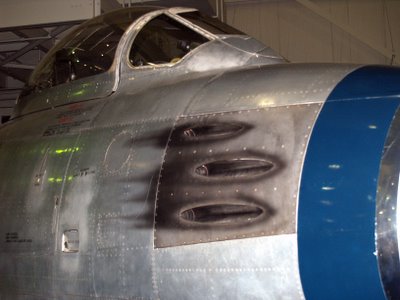
That made me chuckle, but this next picture made me laugh out loud! This is a reconaissance version of the F-86 which I've never seen or heard about before. Look at the gun ports:

They're decals!! I got a real kick out of that since that's what I'll be trying to do. I hope I can get them better looking than that, though.
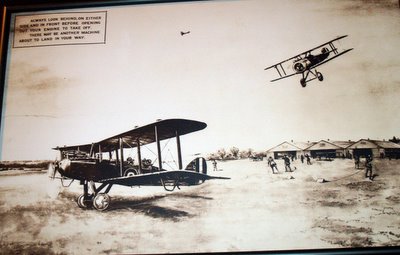
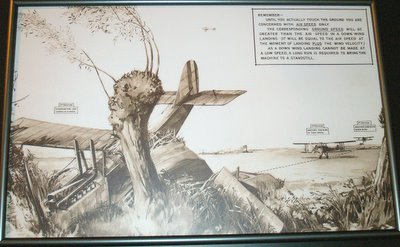
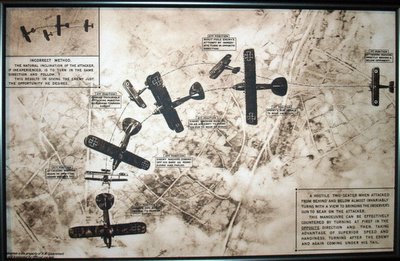
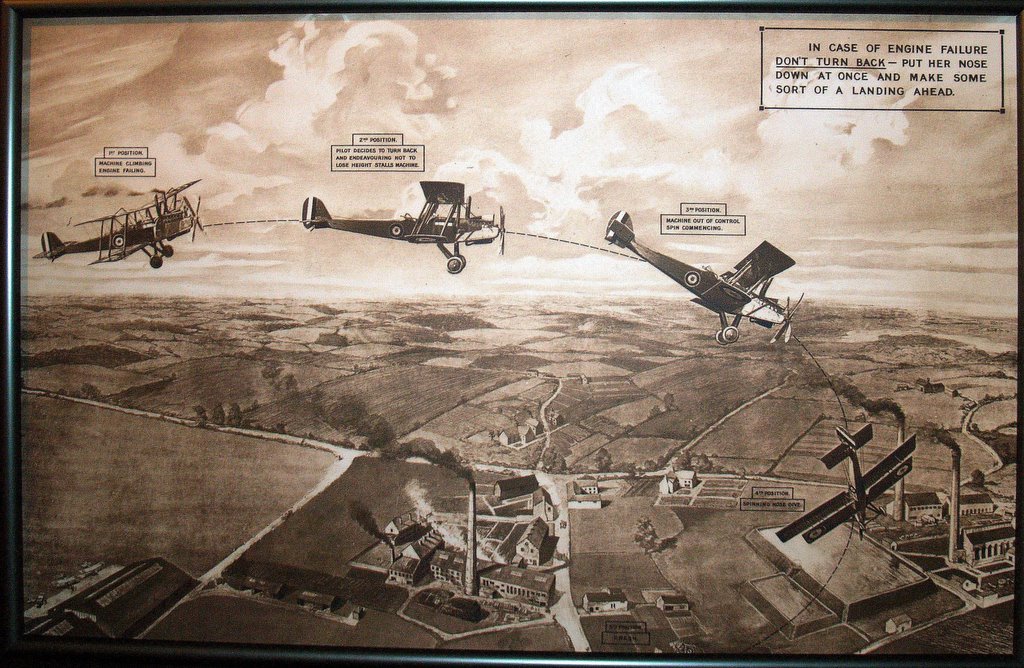
I also saw these four "flight lesson" posters for the first time, and really liked them:

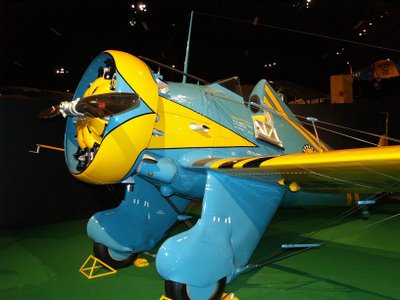
I've always liked the paint job on this P-26 Peashooter. I'd like to paint a plane to look like this someday:
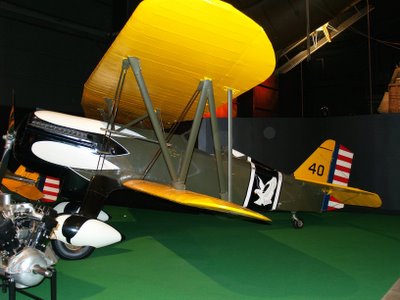
I also got a pretty good shot of the Curtiss P-6E that I thought would make a good paint scheme for a restored Pitts:
This one is a crop that I think turned out pretty well. The original shot was nothing special, but I was fooling around seeing how much detail I could pull out of the 8 megapixels, and like the result:
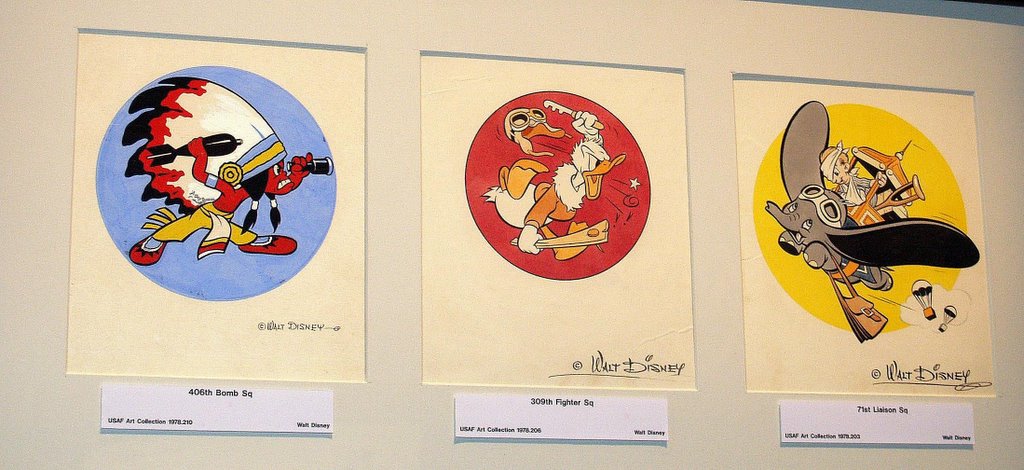
They had a temporary exhibit going showing the Disney art that was used as nose art. As I was setting up to take a picture, I was approached by a docent who wanted to confirm that I was not a professional photographer. The new camera must have prompted the question since I didn't see any of the other people with cameras being so queried. I told her that I had never been accused of that before, and wondered why it mattered. I never found out. Anyway, this turned out pretty well. It's just about the only one that didn't need a lot of touchup on the computer:

Boy, I really like German engines! This is a Bf109 WWII German fighter:
The weather cleared up on the way back home, so I was even able to get the RV-6 out for a quick flight. I took a friend of the wife's that had never been in a small plabe for a lap of Columbus. The air was glass smooth, and the visibility under clear skies was a good 10 miles. I think he enjoyed the ride - he says he's always thought he might want to learn to fly, and now he's sure of it! That RV grin is sure contagious!
Winds were 170 @ 11 knots, which is a quartering headwind from the left. No problem on takeoff or landing, although the takeoff did have a left swerve when the tailwheel lifted, just like last time I flew. I need to get out and do some stop and goes as soon as I get another chance. Also of note, the winds at 5000' had us doing 185 knots in level cruise, and 120 when we turned around and came back. I think 185 is a new level flight speed record for me. We also reached a bit of an anniversary: the tach went from 199 hours to 200 hours sometime while we were flying.
I took the new camera to see how it would do in the hostile lighting of the museum. It's darn hard to get a good picture in there - I've been trying for years with little to no success. This time, though, I got a few that I thought were worth sharing.
One goal I had was to get some pictures of F-86 gunports, still thinking I might want to try to decorate the nose of the RV with a nice set of simulated ports. I chuckled when I found them - they have the soot stains that I finally ended up deciding lookes too fake:

That made me chuckle, but this next picture made me laugh out loud! This is a reconaissance version of the F-86 which I've never seen or heard about before. Look at the gun ports:
They're decals!! I got a real kick out of that since that's what I'll be trying to do. I hope I can get them better looking than that, though.
I also saw these four "flight lesson" posters for the first time, and really liked them:


I've always liked the paint job on this P-26 Peashooter. I'd like to paint a plane to look like this someday:

I also got a pretty good shot of the Curtiss P-6E that I thought would make a good paint scheme for a restored Pitts:

This one is a crop that I think turned out pretty well. The original shot was nothing special, but I was fooling around seeing how much detail I could pull out of the 8 megapixels, and like the result:
They had a temporary exhibit going showing the Disney art that was used as nose art. As I was setting up to take a picture, I was approached by a docent who wanted to confirm that I was not a professional photographer. The new camera must have prompted the question since I didn't see any of the other people with cameras being so queried. I told her that I had never been accused of that before, and wondered why it mattered. I never found out. Anyway, this turned out pretty well. It's just about the only one that didn't need a lot of touchup on the computer:
Boy, I really like German engines! This is a Bf109 WWII German fighter:

The weather cleared up on the way back home, so I was even able to get the RV-6 out for a quick flight. I took a friend of the wife's that had never been in a small plabe for a lap of Columbus. The air was glass smooth, and the visibility under clear skies was a good 10 miles. I think he enjoyed the ride - he says he's always thought he might want to learn to fly, and now he's sure of it! That RV grin is sure contagious!
Winds were 170 @ 11 knots, which is a quartering headwind from the left. No problem on takeoff or landing, although the takeoff did have a left swerve when the tailwheel lifted, just like last time I flew. I need to get out and do some stop and goes as soon as I get another chance. Also of note, the winds at 5000' had us doing 185 knots in level cruise, and 120 when we turned around and came back. I think 185 is a new level flight speed record for me. We also reached a bit of an anniversary: the tach went from 199 hours to 200 hours sometime while we were flying.
Monday, December 26, 2005
Another hare-brained scheme
I haven't even had the first session of the first class in the collection of 20+ classes required to earn an FAA Airframe & Powerplant certificate, but I'm already thinking about some of the opportunities that would arise from having it.
I went through a fairly lengthy internal debate about how aviation fits in with my current life, and how I want it to fit in with my future. This actually started a few years ago, and led directly to the swap from a 4-seat 100 knot "store bought" plane to the 2-seat, 150 knot RV-6. Over the years, it had become abundantly apparent that I don't do a lot of point A to point B flying, and when I do, it is often alone. Rather, I like to do day trips, or simply fly around the local area just enjoying the sensation of flight and the incumbent respite from the pressures of dealing with other people. When I really think deeply about what attracts me to flying, it seems to be a combination of mastering a relatively complex machine in a challenging environment with the ability to get myself away from the cloying aspects of city life. My favorite trips seem to be to places where can take a nice, quiet walk away from cars, people, etc.
What does this have to do with the A & P program? Nothing, yet. I'm still working up to that. As part of the self-analysis that led to the airplane swap, I remembered back to my early days of aviation interest, back when I was still a pre-teen. When I think back to the planes that I was truly fascinated with, I remember that most were either homebuilts or classics. I had dreamed of having a plane like the Mitchell U-2, or the even more unattainable RV-4. Even as recently as a decade ago, I wanted an RV-4. Prior to buying the Tampico, I kicked around the idea of buying an already built RV-4, but back then in pre-Google days, I wasn't able to research issues around the insurability and maintainability of already-built Experimentals. Between that and the fact that I still believed I needed more than a 2 seat airplane, I bought the Tampico.
Obviously, post-Google research was enough to demonstrate that there are no real problems with owning an Experimental if you aren't the builder and/or holder of the Repairman's Certificate (which allows the holder to do any type of work on the specific airplane for which it was assigned) and insurance, at least for planes as safe and popular as the Van's series, is easily available. That said, in lieu of the Repairman's Certificate, the owner of an already-built Experimental lives in a bit of a gray area in the regs. This, plus the fact that I live one mile from the school, got me to thinking about getting the A&P.
That, in and of itself, was not enough reason to enter a 3-5 year curriculum. I had to take a step back again and consider where I am in my career, and how I could leverage my interest in all things aviation into some kind of semi-retirement career change over the next 5-10 years. I can't do what I do now for too much longer - the kind of work I do is more of a younger guy's gig, and the positions that it morphs into for aging geeks are pretty unappealing. I'm finding that more and more, my job is to beg other, younger people to do the work that I would prefer to be doing myself. I'm realizing that I'm a hands-on guy, and I can't stand sitting on the sidelines coaching.
I had always thought I would move into something like flight instruction. I finally got serious about doing some analysis on that idea, and didn't like what I found. First, it would take tens of thousands of dollars to get the required ratings. It would also require the ability to spend a solid month at a time away from home/work to get the training at a reputable academy. One completed, my choices would be to either try to go it alone and train in a plane I own, or enter a relationship with an FBO and use their planes. In the former case, insurance would wipe out any potential profit; in the latter, competition from other instructors would drive my hourly rate down to $15-20. There are also currency requirements that have to be met, and I would have to get flight physicals twice as often as I do now. But what really changed my mind was the reaction of the CFI that I used for transition training in the RV to a flight he had scheduled after our lesson one day. To put it simply, he didn't want to do it. He had enjoyed flying in the RV so much, he couldn't bear the idea of spending another 2 hours in a tiny Cessna 152. I made a conscious decision 15 years ago that I didn't want flying to be my "work." There is a difference between flying because you want to and flying because you have to. I saw a lot of this back when I worked for NetJets - a lot of those pilots had the love of flying beaten out of them by 14 hour days, flying for unappreciative passengers, in weather you wouldn't want to be out in at all if you had any choice.
Part of owning the RV that I've enjoyed more than I expected to is working on it. I'm always leery of certain aspects of maintenance, though, for two reasons: first, I don't know as much as I'd like to about maintenance best-practices and standards, and second, there are regulatory issues around some of the things I might need to do that would require either an A&P or a Repairman's Certificate. The path to the Repairman's Certificate is to build your own plane, and even then you are limited to working on only the plane you built. The A&P program would take the same amount of time, and far less dollars, as building a plane, and it also would enable me to work on any airplane. Additionally, there are no currency or medical requirements; I'd be able to work on planes for the rest of my life.
Ok, that's nice but the reality is that there is no shortage of A&Ps, so it's not the case that I could open a shop and make a mint or walk into a job at another shop and get a high hourly wage. Nor would I want to. The day-to-day grind of working for someone else is what I'm hoping to escape.
No, the thing to do would be to specialize. Specifically, I would like to specialize in restoration of classic factory-builts, or classic-like Experimentals. The type of older planes I'm thinking about are typically steel tube fuselage, wood wings, and fabric covering. There is no shortage of fabric covered planes out there that could benefit from removing the old covering, fixing whatever problems have been hidden under wraps for years, and replacing the old covering with more modern fabrics and paint. There are also a lot of updates that can be made to the old engine to modernize it with newer, more efficient and reliable components.
This is all well and good, but it seems to me that book learning is only going to get me so far. Here's where the hare-brained idea comes in. I'm thinking that some time after the first year or so of A&P classes, I want to find a fixer-upper that could serve as my own on-going lab exercise, and hopefully at some point, also serve as a resume of sorts to convince other owners that I'm the guy they're looking for to update/restore their plane.
I've kicked around quite a few ideas as to what type of plane I'd be looking for, where I would be able to store it/work on it, and how much budget I should put into it. For now, the leading candidate is a Pitt's S1C. The S1C was a very early model of the venerable Pitts biplane line that went on to dominate international aerobatics competition before the highly muscular monoplanes came along and changed the nature of aerobatic competition. The S1C is extremely simple compared to the later evolutions, and by definition is an Experimental. As an Experimental, I could work on it before I complete the A&P program.
It is also quite small, and dissassembled should fit easily into the same hangar as the RV. It's construction is very simple and straightforward, basically being nothing more than wood and steel tube covered with fabric. Thousands were built, and many of those are gathering dust in the back of a hangar somewhere.

I would be looking for an unmolested plane; in other words, one that had not undergone a plethora of possibly ill-thought modifications. I wouldn't be looking for an absolute basket case, though. The best bet would be a plane that has been flying, but simply worn out the covering and the engine. I would estimate a plane like that would cost between $5-10k. Fabric and paint would cost $3-$4,000 to do it really well, and the engine could be overhauled for under $10k if I did the work myself. I have no idea what the resulting restored plane would bring on the market, but I'm also not sure I'd want to sell it. The Pitts is another of the planes I've dreamed about for most of my life. Fully assembled, it's possible that it might fit in the hangar with the RV. Of course, all of this is a few years down the road at least, so for now I'm just worried about whether I will have enough room in the hangar to work on it.
Interestingly, I was browsing Barnstomers.com to try to get a feel for the feasibility of this idea when I came across an ad very similar to what I've been thinking. The ad was run by a local guy, just graduated from Columbus State A&P program, looking for a $5,000 project that he could restore and sell. I dropped him an email to compare notes and goals. His idea is to rebuild the plane and log the hours he spends on it to further his pursuit of the IA authorization. The IA is required to be able to sign-off on major maintenance items. It's kind of a post-graduate program for A&Ps. This, to some degee, served to validate my idea, albeit with a somewhat different goal in mind.
Winter: not much else to do other than come up with schemes like this.
I went through a fairly lengthy internal debate about how aviation fits in with my current life, and how I want it to fit in with my future. This actually started a few years ago, and led directly to the swap from a 4-seat 100 knot "store bought" plane to the 2-seat, 150 knot RV-6. Over the years, it had become abundantly apparent that I don't do a lot of point A to point B flying, and when I do, it is often alone. Rather, I like to do day trips, or simply fly around the local area just enjoying the sensation of flight and the incumbent respite from the pressures of dealing with other people. When I really think deeply about what attracts me to flying, it seems to be a combination of mastering a relatively complex machine in a challenging environment with the ability to get myself away from the cloying aspects of city life. My favorite trips seem to be to places where can take a nice, quiet walk away from cars, people, etc.
What does this have to do with the A & P program? Nothing, yet. I'm still working up to that. As part of the self-analysis that led to the airplane swap, I remembered back to my early days of aviation interest, back when I was still a pre-teen. When I think back to the planes that I was truly fascinated with, I remember that most were either homebuilts or classics. I had dreamed of having a plane like the Mitchell U-2, or the even more unattainable RV-4. Even as recently as a decade ago, I wanted an RV-4. Prior to buying the Tampico, I kicked around the idea of buying an already built RV-4, but back then in pre-Google days, I wasn't able to research issues around the insurability and maintainability of already-built Experimentals. Between that and the fact that I still believed I needed more than a 2 seat airplane, I bought the Tampico.
Obviously, post-Google research was enough to demonstrate that there are no real problems with owning an Experimental if you aren't the builder and/or holder of the Repairman's Certificate (which allows the holder to do any type of work on the specific airplane for which it was assigned) and insurance, at least for planes as safe and popular as the Van's series, is easily available. That said, in lieu of the Repairman's Certificate, the owner of an already-built Experimental lives in a bit of a gray area in the regs. This, plus the fact that I live one mile from the school, got me to thinking about getting the A&P.
That, in and of itself, was not enough reason to enter a 3-5 year curriculum. I had to take a step back again and consider where I am in my career, and how I could leverage my interest in all things aviation into some kind of semi-retirement career change over the next 5-10 years. I can't do what I do now for too much longer - the kind of work I do is more of a younger guy's gig, and the positions that it morphs into for aging geeks are pretty unappealing. I'm finding that more and more, my job is to beg other, younger people to do the work that I would prefer to be doing myself. I'm realizing that I'm a hands-on guy, and I can't stand sitting on the sidelines coaching.
I had always thought I would move into something like flight instruction. I finally got serious about doing some analysis on that idea, and didn't like what I found. First, it would take tens of thousands of dollars to get the required ratings. It would also require the ability to spend a solid month at a time away from home/work to get the training at a reputable academy. One completed, my choices would be to either try to go it alone and train in a plane I own, or enter a relationship with an FBO and use their planes. In the former case, insurance would wipe out any potential profit; in the latter, competition from other instructors would drive my hourly rate down to $15-20. There are also currency requirements that have to be met, and I would have to get flight physicals twice as often as I do now. But what really changed my mind was the reaction of the CFI that I used for transition training in the RV to a flight he had scheduled after our lesson one day. To put it simply, he didn't want to do it. He had enjoyed flying in the RV so much, he couldn't bear the idea of spending another 2 hours in a tiny Cessna 152. I made a conscious decision 15 years ago that I didn't want flying to be my "work." There is a difference between flying because you want to and flying because you have to. I saw a lot of this back when I worked for NetJets - a lot of those pilots had the love of flying beaten out of them by 14 hour days, flying for unappreciative passengers, in weather you wouldn't want to be out in at all if you had any choice.
Part of owning the RV that I've enjoyed more than I expected to is working on it. I'm always leery of certain aspects of maintenance, though, for two reasons: first, I don't know as much as I'd like to about maintenance best-practices and standards, and second, there are regulatory issues around some of the things I might need to do that would require either an A&P or a Repairman's Certificate. The path to the Repairman's Certificate is to build your own plane, and even then you are limited to working on only the plane you built. The A&P program would take the same amount of time, and far less dollars, as building a plane, and it also would enable me to work on any airplane. Additionally, there are no currency or medical requirements; I'd be able to work on planes for the rest of my life.
Ok, that's nice but the reality is that there is no shortage of A&Ps, so it's not the case that I could open a shop and make a mint or walk into a job at another shop and get a high hourly wage. Nor would I want to. The day-to-day grind of working for someone else is what I'm hoping to escape.
No, the thing to do would be to specialize. Specifically, I would like to specialize in restoration of classic factory-builts, or classic-like Experimentals. The type of older planes I'm thinking about are typically steel tube fuselage, wood wings, and fabric covering. There is no shortage of fabric covered planes out there that could benefit from removing the old covering, fixing whatever problems have been hidden under wraps for years, and replacing the old covering with more modern fabrics and paint. There are also a lot of updates that can be made to the old engine to modernize it with newer, more efficient and reliable components.
This is all well and good, but it seems to me that book learning is only going to get me so far. Here's where the hare-brained idea comes in. I'm thinking that some time after the first year or so of A&P classes, I want to find a fixer-upper that could serve as my own on-going lab exercise, and hopefully at some point, also serve as a resume of sorts to convince other owners that I'm the guy they're looking for to update/restore their plane.
I've kicked around quite a few ideas as to what type of plane I'd be looking for, where I would be able to store it/work on it, and how much budget I should put into it. For now, the leading candidate is a Pitt's S1C. The S1C was a very early model of the venerable Pitts biplane line that went on to dominate international aerobatics competition before the highly muscular monoplanes came along and changed the nature of aerobatic competition. The S1C is extremely simple compared to the later evolutions, and by definition is an Experimental. As an Experimental, I could work on it before I complete the A&P program.
It is also quite small, and dissassembled should fit easily into the same hangar as the RV. It's construction is very simple and straightforward, basically being nothing more than wood and steel tube covered with fabric. Thousands were built, and many of those are gathering dust in the back of a hangar somewhere.
I would be looking for an unmolested plane; in other words, one that had not undergone a plethora of possibly ill-thought modifications. I wouldn't be looking for an absolute basket case, though. The best bet would be a plane that has been flying, but simply worn out the covering and the engine. I would estimate a plane like that would cost between $5-10k. Fabric and paint would cost $3-$4,000 to do it really well, and the engine could be overhauled for under $10k if I did the work myself. I have no idea what the resulting restored plane would bring on the market, but I'm also not sure I'd want to sell it. The Pitts is another of the planes I've dreamed about for most of my life. Fully assembled, it's possible that it might fit in the hangar with the RV. Of course, all of this is a few years down the road at least, so for now I'm just worried about whether I will have enough room in the hangar to work on it.
Interestingly, I was browsing Barnstomers.com to try to get a feel for the feasibility of this idea when I came across an ad very similar to what I've been thinking. The ad was run by a local guy, just graduated from Columbus State A&P program, looking for a $5,000 project that he could restore and sell. I dropped him an email to compare notes and goals. His idea is to rebuild the plane and log the hours he spends on it to further his pursuit of the IA authorization. The IA is required to be able to sign-off on major maintenance items. It's kind of a post-graduate program for A&Ps. This, to some degee, served to validate my idea, albeit with a somewhat different goal in mind.
Winter: not much else to do other than come up with schemes like this.
Saturday, December 24, 2005
Finally!
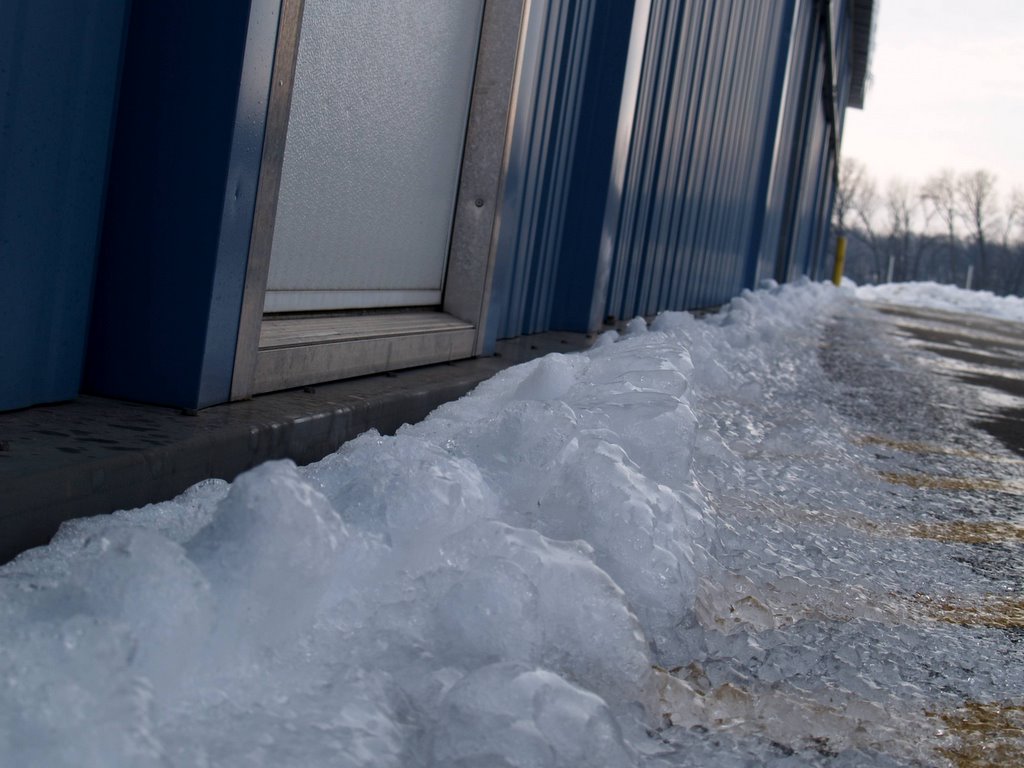
We finally got enough warm weather to melt the ice dam that has been blocking my hangar entrance for weeks now. I was able to get out to the practice area west of Bolton for about a half hour this morning - just long enough to heat the oil and charge the battery. Even after a couple of weeks of bitter cold weather, I still had a strong battery, and with two shots of prime the engine started on the second blade. This is soooo much better than what the Tampico was like in the winter. I also ended up turning off the heat in the RV this morning because I was too hot; that never happened in the frigid Tampico.
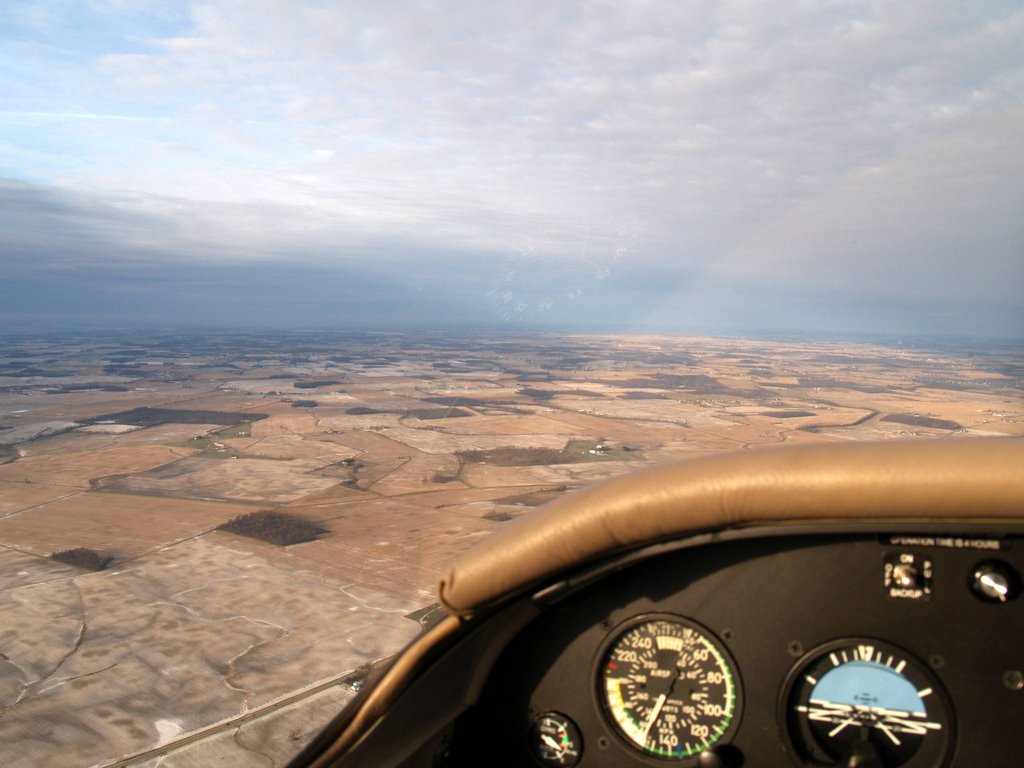
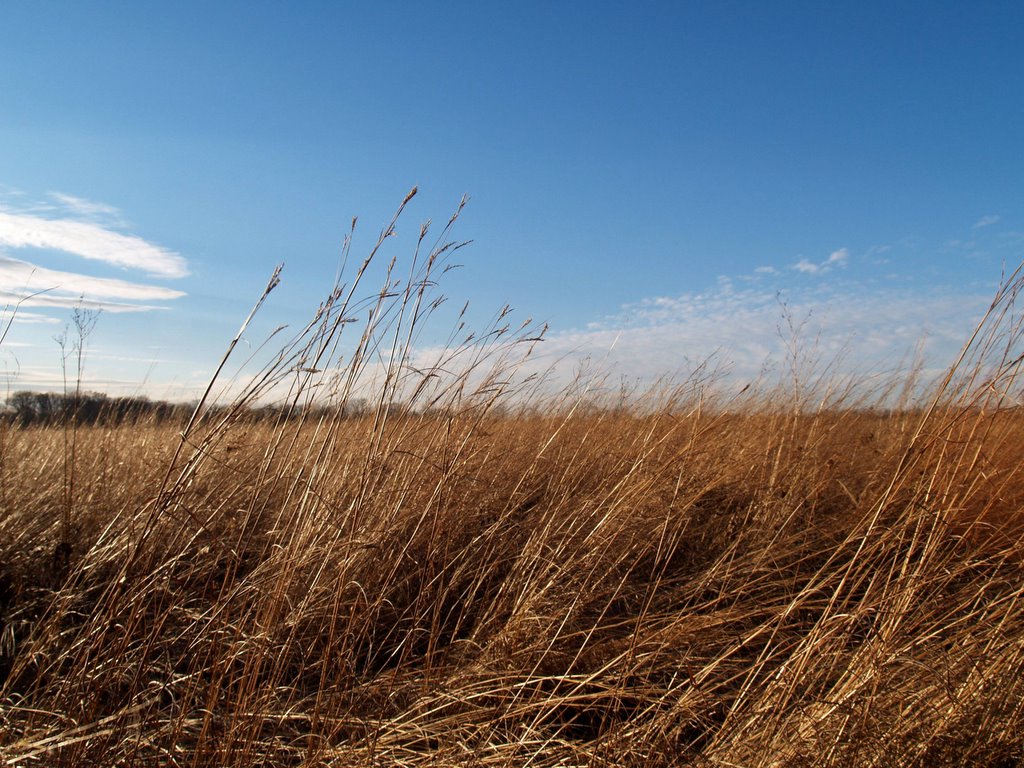
The fields are all still covered with snow/ice, and small Lake Madison looks like it's still frozen:
Having fun, though:
The apron in front of the hangar was still pretty icy, so taxiing out was a bit more challenging that usual when I hot ice patches and the tailwheel refused to provide assistance. Byt the time I got back, though, it was mostly melted. I had been worried that I wouldn't be able to push the plane back into the hangar if the ice hadn't melted, and there were a couple of icy places on the pavement that required me to push on a different part of the plane that usual just to get better footing.
Takeoff was a little shabby at first, but the landing was fine. I find it interesting that a technique that I've been practicing on the Microsoft flight simulator on my computer actually worked when I tried it in the RV today. Practicing on the computer seems to have helped me with one type of the different bouncing problems I have on landing, although it's probably too soon to tell for sure.
I have the week off between Xmas and New Years, so hopefully the nice weather will continue and I can get a longer flight in.
The fields are all still covered with snow/ice, and small Lake Madison looks like it's still frozen:

Having fun, though:

The apron in front of the hangar was still pretty icy, so taxiing out was a bit more challenging that usual when I hot ice patches and the tailwheel refused to provide assistance. Byt the time I got back, though, it was mostly melted. I had been worried that I wouldn't be able to push the plane back into the hangar if the ice hadn't melted, and there were a couple of icy places on the pavement that required me to push on a different part of the plane that usual just to get better footing.
Takeoff was a little shabby at first, but the landing was fine. I find it interesting that a technique that I've been practicing on the Microsoft flight simulator on my computer actually worked when I tried it in the RV today. Practicing on the computer seems to have helped me with one type of the different bouncing problems I have on landing, although it's probably too soon to tell for sure.
I have the week off between Xmas and New Years, so hopefully the nice weather will continue and I can get a longer flight in.
Friday, December 23, 2005
Sunday, December 04, 2005


A better stripe?
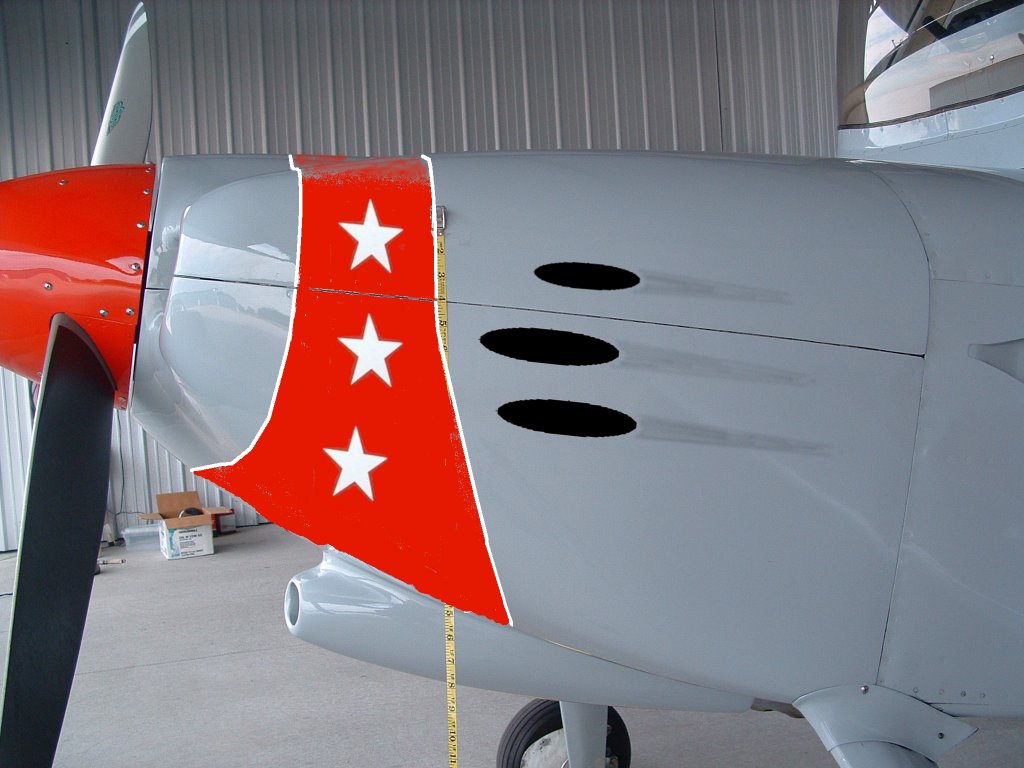
I'd have to find a way of drawing more 3D looking gun ports, and the stars would have to be bigger.
Still noodling nose art
I haven't had any response to my information requests re: getting a vinyl decal made from the pirate picture, so I'm still considering alternatives for the overly bland nose on the RV.
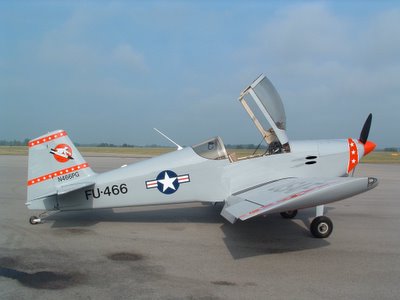
I thought of trying to head in the direction of adding more F-86 like details. Here's a picture of an F-86 I took while I was up at Oshkosh:

I spent a few hours hacking around in Gimp and came up with this:
Pardon my poor artistic skills, please. The elllipses are supposed to look like the machine gun ports on the actual Sabre. I had thought I'd like to just paint the NACA ducts black and just have one simulated port, but that didn't look right, so I added the blacks ellipses. I don't like the location, though. I think I'd move them closer to the front of the plane. The black airbrush effect behind them is intended to simulate gun smoke stains. I saved them on top of the only image I had with the new red stripe added, so it's too late to move them without having to re-draw the red stripe. You'll just have to imagine it. The stripe may be exactly the right choice as neither Co-pilot Egg or her mother even noticed it at first. I think that means it looks "right," although I think if needs to move towards the back by a few inches.
I thought of trying to head in the direction of adding more F-86 like details. Here's a picture of an F-86 I took while I was up at Oshkosh:

I spent a few hours hacking around in Gimp and came up with this:

Pardon my poor artistic skills, please. The elllipses are supposed to look like the machine gun ports on the actual Sabre. I had thought I'd like to just paint the NACA ducts black and just have one simulated port, but that didn't look right, so I added the blacks ellipses. I don't like the location, though. I think I'd move them closer to the front of the plane. The black airbrush effect behind them is intended to simulate gun smoke stains. I saved them on top of the only image I had with the new red stripe added, so it's too late to move them without having to re-draw the red stripe. You'll just have to imagine it. The stripe may be exactly the right choice as neither Co-pilot Egg or her mother even noticed it at first. I think that means it looks "right," although I think if needs to move towards the back by a few inches.
Two Reviews
I'll now provide two reviews concerning items mentioned in the Breakfast Flight post immediately below.
First, the new Harry Potter movie:
Best Potter movie yet! Back when we were reading the books the day they came out, there was a discernable difference in tone when the fourth book came out. In fact, one of the more amusing memories of it was when a former neighbor came to our door to warn us that it was much darker than the previous three, and as one of the Hogwart's students gets killed, we might not want to let Co-pilot Egg read it. I found that amusing since Co-pilot Egg has always had an extremely good ability to separate reality from fiction, and had in fact already seen Scar through Mufasa over a cliff to his death countless times without any obvious damage to her psyche.
The movie follows the book pretty faithfully, particularly in that even down to the lighting, sets, and overall tone, Hogwarts is no longer a fun, joyful place. War clouds are looming, and the kids are dealing with ever greater and more dangerous events, including dealing with the opposite sex. In tone, this movie is more like the Lord of the Ring movies than the previous Potter movies. The special effects are, ase usual, spectacular. Nothing makes me want a flying broom more than watching a Harry Potter movie does!
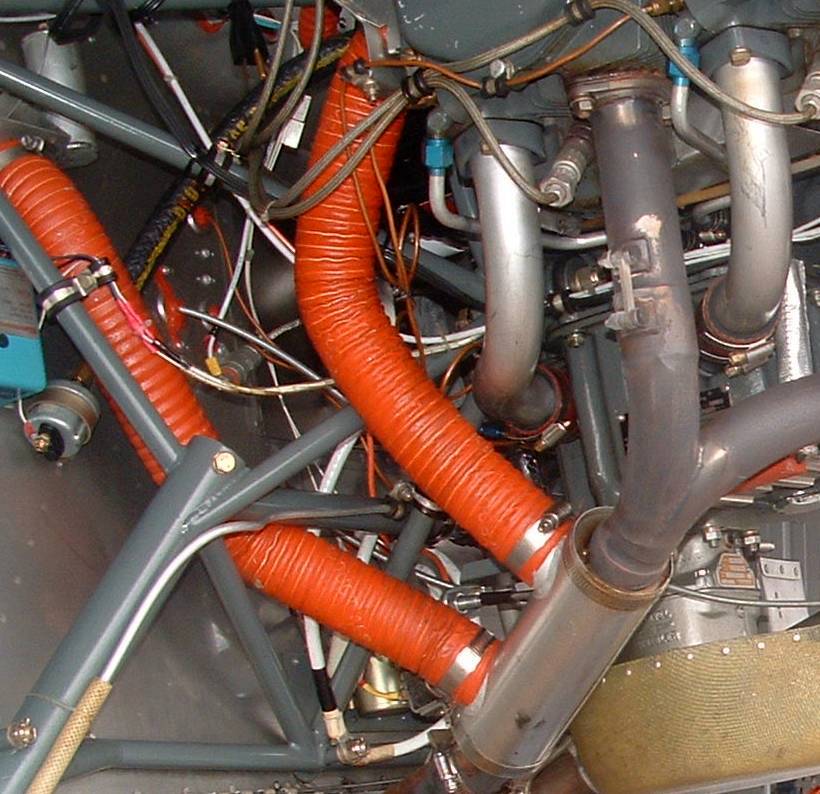
I also wanted to mention how well the heater worked in the RV yesterday. It was 20 degrees or below at altitude, and 24 on the ground. Because an airplane engine is typically air-cooled, it doesn't have the hot radiator water coming through the firewall and into a heater coil like you have in a car. Rather, it has a cuff strapped onto an exhaust pipe, and provides heat by blowing air across the exhaust pipe and into the cockpit. This makes two very large differences between a car heater and the airplane heater.
First, since you're pushing air across the exhaust and from there straight into the cockpit, you have to be very sure that you don't have any exhaust leaks. If you did, there would be a very real chance of filling the cabin with carbon monoxide. That's a bad thing. I mitigate that risk through periodic inspection of the exhaust pipe, and the installation of a throw-away CO detector.

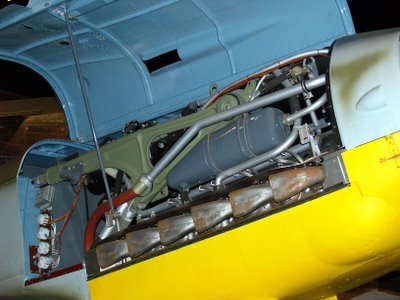
The hose on the right is incoming air, and the one on the left delivers toasty warm, albeit possibly toxic, air to the cockpit. At least that's the way I remember the hoses being configured - I'm going to take a closer look next time the cowls are off.
The second difference is, and I'm going to invent a phrase here, is in the thermal inertia. The dry air heat from the exhaust is much "lighter" than the heated water type of heater in that it warms up far more quickly, but cools off equally fast. As you can imagine, the exhaust pipe gets warm almost immediately after starting the engine, and the faster the engine is running, the hotter it gets. As you pull the throttle back for descent, though, the pipe cools quickly and the heat drops off. Still, there was plenty of heat and I don't think I'll wear the big, bulky bomber jacket next time. Probably the best thing to wear to get a good compromise between thermal protection while prepping the plane for flight and not being too bulky in the cockpit would be my Carhartt-clone overalls that I use for snow removal jobs and letting Hogarth's inner Husky enjoy romping in the snow.
First, the new Harry Potter movie:
Best Potter movie yet! Back when we were reading the books the day they came out, there was a discernable difference in tone when the fourth book came out. In fact, one of the more amusing memories of it was when a former neighbor came to our door to warn us that it was much darker than the previous three, and as one of the Hogwart's students gets killed, we might not want to let Co-pilot Egg read it. I found that amusing since Co-pilot Egg has always had an extremely good ability to separate reality from fiction, and had in fact already seen Scar through Mufasa over a cliff to his death countless times without any obvious damage to her psyche.
The movie follows the book pretty faithfully, particularly in that even down to the lighting, sets, and overall tone, Hogwarts is no longer a fun, joyful place. War clouds are looming, and the kids are dealing with ever greater and more dangerous events, including dealing with the opposite sex. In tone, this movie is more like the Lord of the Ring movies than the previous Potter movies. The special effects are, ase usual, spectacular. Nothing makes me want a flying broom more than watching a Harry Potter movie does!
I also wanted to mention how well the heater worked in the RV yesterday. It was 20 degrees or below at altitude, and 24 on the ground. Because an airplane engine is typically air-cooled, it doesn't have the hot radiator water coming through the firewall and into a heater coil like you have in a car. Rather, it has a cuff strapped onto an exhaust pipe, and provides heat by blowing air across the exhaust pipe and into the cockpit. This makes two very large differences between a car heater and the airplane heater.
First, since you're pushing air across the exhaust and from there straight into the cockpit, you have to be very sure that you don't have any exhaust leaks. If you did, there would be a very real chance of filling the cabin with carbon monoxide. That's a bad thing. I mitigate that risk through periodic inspection of the exhaust pipe, and the installation of a throw-away CO detector.
The hose on the right is incoming air, and the one on the left delivers toasty warm, albeit possibly toxic, air to the cockpit. At least that's the way I remember the hoses being configured - I'm going to take a closer look next time the cowls are off.
The second difference is, and I'm going to invent a phrase here, is in the thermal inertia. The dry air heat from the exhaust is much "lighter" than the heated water type of heater in that it warms up far more quickly, but cools off equally fast. As you can imagine, the exhaust pipe gets warm almost immediately after starting the engine, and the faster the engine is running, the hotter it gets. As you pull the throttle back for descent, though, the pipe cools quickly and the heat drops off. Still, there was plenty of heat and I don't think I'll wear the big, bulky bomber jacket next time. Probably the best thing to wear to get a good compromise between thermal protection while prepping the plane for flight and not being too bulky in the cockpit would be my Carhartt-clone overalls that I use for snow removal jobs and letting Hogarth's inner Husky enjoy romping in the snow.
Saturday, December 03, 2005
Breakfast Flight
The forecast for the weekend was for "good enough" early in the day, degrading to "oh crap, I don't even want to drive" throughout Saturday. I really wanted to get some flying in since it's been a few weeks, and that kind of lay-off isn't good for the plane or for the pilot. The forecast for degrading weather also triggered a promise to Co-pilot Egg that we'd go to the new Harry Potter movie on the next cruddy day, so an early morning breakfast mission to Urbana-Grimes seemed a great idea for getting some flying in early.
Co-pilot Egg was saddled with a ton of homework that she had to have done as a precondition to the HP movie, so I asked Rick if he'd like to ride along. Surprisingly he agreed, apparently thinking that by now my landings would have improved. That worked out well because this was my first chance to get into the air with my new camera and he surely wouldn't decline my request to drive the plane for awhile.
By the way, here's how the new cowl hinge pins look:
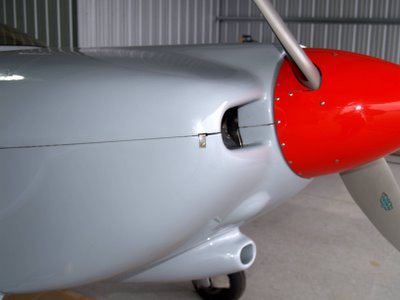
It really isn't as clean looking as it was, but getting rid of the dread I used to feel when I had to take the cowls off made it worth the price.
I plugged in the pre-heater last week when I saw we were going to get prolonged cold weather, so the engine cranked right up. It started on the first blade, which is actually half a rotation better than usual. Man, I LOVE a 200 hour engine! I also immediately noticed that I've gained another inch in height. I know that's hard to believe, but I was back to bumping my head on the canopy again. I was wearing a pretty bulky coat (it was only 24 deg. out, after all, and I didn't know how well the heat worked in the plane when it's that cold), so that may have been the reason, I suppose. Anyway, it reminded me that I really want to do something about the seat cushions. They're beautifully made, but they're just too darned over-stuffed for me. I don't want to spend $800 to have a set made, either. It seems to me that it would be pretty easy to cut out the foam pieces I need to make the seat, but I'd have zero idea as to how to make the fabric covering. I suppose I could just take the cushions to an upholstery shop for an estimate and see if it comes in below $800 or not.
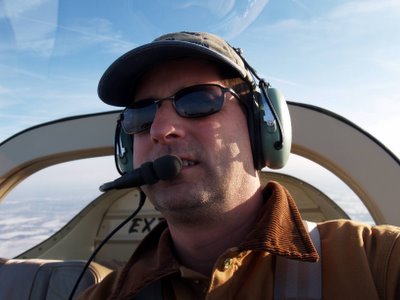
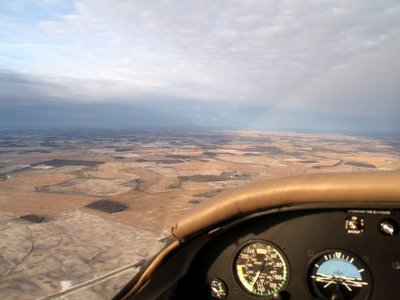
Once we got to a decent altitude, I asked Rick to drive for awhile while I played with the new camera. A lot of my shots are one-handed hail mary's, so even though I could use both hands I left the camera in the full Auto mode and took a couple of quick shots out the window.
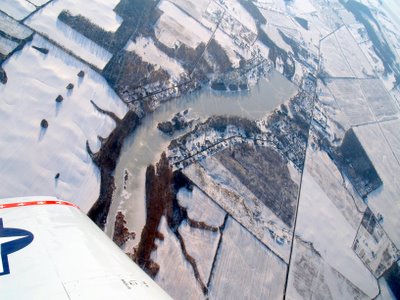
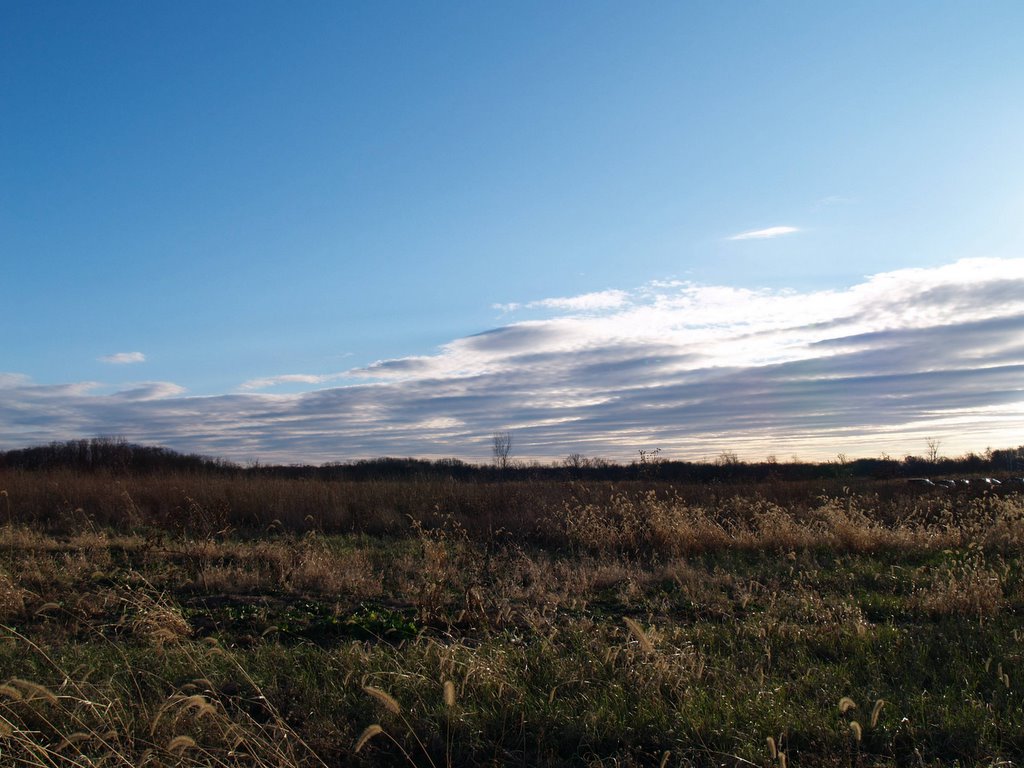
You can see from the lighting that the sun was rising behind us, and you can almost feel the bite of the cold air when you see the white frost tint on the fields. Also of note is the airspeed, which is indicating just shy of 150 mph, with the engine practically loafing at 2250 rpm:
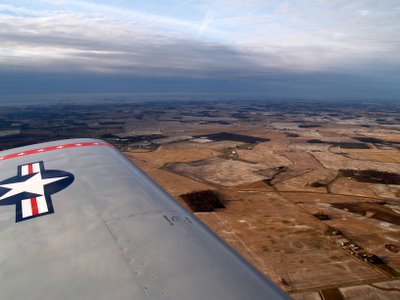
Off to the south you can see the remnants of yesterday's bluer skies:
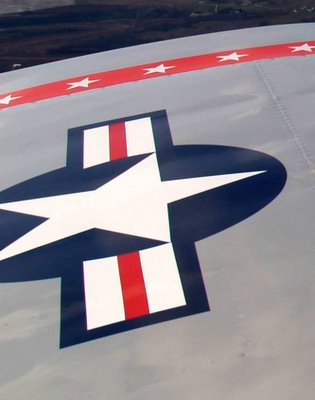
Now that I have 8 megapixels, I'd thought I'd see what I can get out of a really tight crop:
While eating breakfast, I decided to humor my fetish for pictures of my plane taken though interior windows:

I'm sure there's some deeply rooted psychological reason for why I'm intrigued by that particular framing, but I fear what else I would find if I were to start self-analysis. You never know what's down that slippery slope.
It's been a few weeks since I've flown, so a takeoff and landing quality report might be justified. The departure from Bolton was pretty good, but then again there was very little wind. The landing at Urbana also went well, with just a few of the baby bounces I get if I let it touch down at anything over 60mph. I considered it a good landing. You know, the kind I don't get when Rick has his video camera. The takeoff from Urbana was ok, but I think that's the one where I got a little of the tire chatter I get when there's a crosswind and the plane is trying to convince me that it's ready to fly before I'm convinced that I agree. I just take a quick look down at the airspeed (which used to really screw me up when I did it back in my transition training, but doesn't anymore) at if it's 60mph or more, I'll go ahead and let it fly up into the ground effect cushion. The ground effect is a region of air right over the runway where the air flowing across the bottom of the wing is close enough to runway to add a little more lift. The height of the ground effect is related to the wingspan of the plane. With the relatively stubby wings of the RV, that's a pretty short ground effect, so I have to keep it relatively low to the runway until I get up to at least 70mph. That only takes a couple of seconds, though, so the whole process is hardly noticable. I think I had a few bounces at Madison Co., where stopped to gas up. The takeoff from Madison was noteworthy in that it was a case where the right rudder needed to counteract the torque of the engine was completely negated by the left rudder that would have been needed to resist the right turning tendancy arising from the right crosswind. Purty cool. Landing back at Bolton was pretty bad - it was one of those where for some reason I don't get the throttle fully closed in the flare. Even 100 extra rpm makes a big difference with a light plane like the RV. It usually causes a big bounce, and it did again today.
At least that's the way I remember it. I'm usually concentrating so much during a landing that there's no extra brain capacity left for making notes.
Co-pilot Egg was saddled with a ton of homework that she had to have done as a precondition to the HP movie, so I asked Rick if he'd like to ride along. Surprisingly he agreed, apparently thinking that by now my landings would have improved. That worked out well because this was my first chance to get into the air with my new camera and he surely wouldn't decline my request to drive the plane for awhile.
By the way, here's how the new cowl hinge pins look:

It really isn't as clean looking as it was, but getting rid of the dread I used to feel when I had to take the cowls off made it worth the price.
I plugged in the pre-heater last week when I saw we were going to get prolonged cold weather, so the engine cranked right up. It started on the first blade, which is actually half a rotation better than usual. Man, I LOVE a 200 hour engine! I also immediately noticed that I've gained another inch in height. I know that's hard to believe, but I was back to bumping my head on the canopy again. I was wearing a pretty bulky coat (it was only 24 deg. out, after all, and I didn't know how well the heat worked in the plane when it's that cold), so that may have been the reason, I suppose. Anyway, it reminded me that I really want to do something about the seat cushions. They're beautifully made, but they're just too darned over-stuffed for me. I don't want to spend $800 to have a set made, either. It seems to me that it would be pretty easy to cut out the foam pieces I need to make the seat, but I'd have zero idea as to how to make the fabric covering. I suppose I could just take the cushions to an upholstery shop for an estimate and see if it comes in below $800 or not.
Once we got to a decent altitude, I asked Rick to drive for awhile while I played with the new camera. A lot of my shots are one-handed hail mary's, so even though I could use both hands I left the camera in the full Auto mode and took a couple of quick shots out the window.
You can see from the lighting that the sun was rising behind us, and you can almost feel the bite of the cold air when you see the white frost tint on the fields. Also of note is the airspeed, which is indicating just shy of 150 mph, with the engine practically loafing at 2250 rpm:
Off to the south you can see the remnants of yesterday's bluer skies:

Now that I have 8 megapixels, I'd thought I'd see what I can get out of a really tight crop:

While eating breakfast, I decided to humor my fetish for pictures of my plane taken though interior windows:

I'm sure there's some deeply rooted psychological reason for why I'm intrigued by that particular framing, but I fear what else I would find if I were to start self-analysis. You never know what's down that slippery slope.
It's been a few weeks since I've flown, so a takeoff and landing quality report might be justified. The departure from Bolton was pretty good, but then again there was very little wind. The landing at Urbana also went well, with just a few of the baby bounces I get if I let it touch down at anything over 60mph. I considered it a good landing. You know, the kind I don't get when Rick has his video camera. The takeoff from Urbana was ok, but I think that's the one where I got a little of the tire chatter I get when there's a crosswind and the plane is trying to convince me that it's ready to fly before I'm convinced that I agree. I just take a quick look down at the airspeed (which used to really screw me up when I did it back in my transition training, but doesn't anymore) at if it's 60mph or more, I'll go ahead and let it fly up into the ground effect cushion. The ground effect is a region of air right over the runway where the air flowing across the bottom of the wing is close enough to runway to add a little more lift. The height of the ground effect is related to the wingspan of the plane. With the relatively stubby wings of the RV, that's a pretty short ground effect, so I have to keep it relatively low to the runway until I get up to at least 70mph. That only takes a couple of seconds, though, so the whole process is hardly noticable. I think I had a few bounces at Madison Co., where stopped to gas up. The takeoff from Madison was noteworthy in that it was a case where the right rudder needed to counteract the torque of the engine was completely negated by the left rudder that would have been needed to resist the right turning tendancy arising from the right crosswind. Purty cool. Landing back at Bolton was pretty bad - it was one of those where for some reason I don't get the throttle fully closed in the flare. Even 100 extra rpm makes a big difference with a light plane like the RV. It usually causes a big bounce, and it did again today.
At least that's the way I remember it. I'm usually concentrating so much during a landing that there's no extra brain capacity left for making notes.
Sunday, November 27, 2005
Now THAT'S an oil change
Time to change the oil again, and this time I decided to include a couple of other projects. I've been wanting to install a quick drain plug, and I've been wanting to change the direction of the cowl hinges that hold the top and bottom cowl halves together.
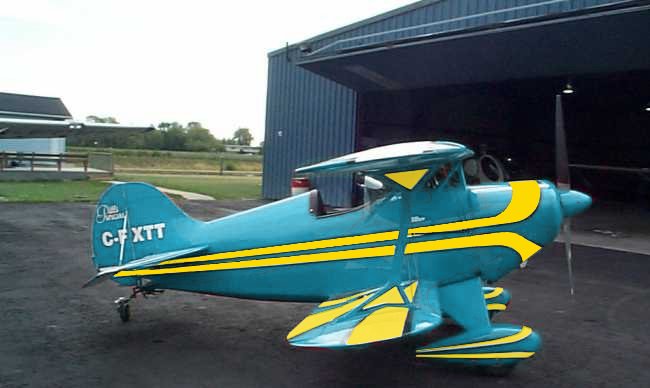
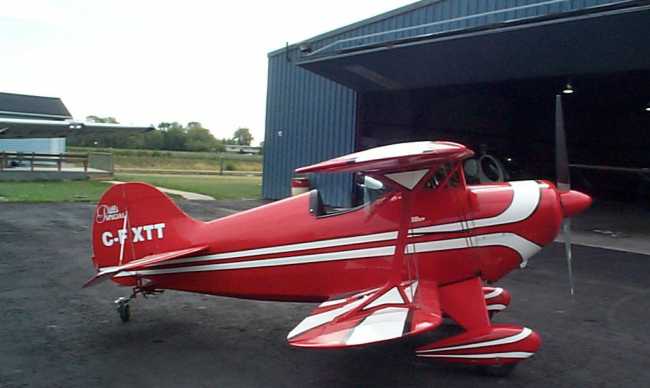
I had a four day weekend to work with, so I thought it a good time to get these done. I pulled the cowls off and took a look around the engine area. It's always nice to get a good, close look at stuff under the cowl and re-convince myself that everything is firmly attached. I've been reading quite a bit on engine-related stuff in the Bingelis On Engines book I bought, so everytime I look I learn something new about Papa Golf. This time I noticed that I have a conical engine mount, rather than the Dynafocal mount I'm used to. The difference in the two is the angle that the four attachment bolts go into the engine. The conical mount bolts go into the engine case perpendicular to the back of the engine. A dynafocal mount puts the bolts in on a diagonal pointing towards an extended focal point from the inner ring of the mount. The difference is cost vs. smoothness. The conical mount is a few hundred dollars cheaper than the dynafocal, but it doesn't dampen engine vibrations as well. That goes a long way towards explaining why I feel so much more vibration in the RV than I did in the Tampico, something I've been wondering about.
You can see both types of mount here. The first pictures show a conical mount on an RV-6, and pictures further down the page show the dynafocal mount.
I also discovered that it's pretty darn hard to get the oil drain plug out when the ambient temperature is 25 degrees F. After nearly rounding it off completely, I managed to get a big enough wrench on it to get it off of there, but let's just say it's a good thing I was replacing it with the quick drain valve anyway. In my glee at finally getting the recalcitrant bugger off of there, I nearly forgot to remove the plug from the oil catch pan before letting the dirty oil pour out. Co-pilot Egg was there to remind me and save the day. What an unbelievable mess that would have been!
I thought my troubles were over once the drain plug was loose, but the oil filter was just as reluctant to come off as the plug had been. Winter sucks. After enough struggling with the filter wrench, it finally broke loose. By this time, of course, the plastic grocery bag I had positioned over the filter as a prophylactic against oil spilling all down the back of the engine had slipped out of position and a torrent of inky black oil did just that. I keep plenty of paper towls and kitty litter on hand for just this kind of thing, but it sure is nasty work.
The cowl hinge pins will work just like the old ones in holding the cowl halves together, but because they will be installed from the front, rather than through the instrument panel, they will be shorter and thus less prone to bending when being pushed in. They have screw tabs on them to hold them in place, so a couple of nutplates needed to be installed. I got some help with that from Rick, who's building a Vans RV-9A. We glued the nutplates in, but I left the cowl out in the garage over night where it was too cold for the epoxy to set correctly. Since the glue didn't thicken up like it would have in a warmer environment, it all ran down the side of the cowl instead of staying on the nutplate. I brought the cowl inside and re-glued the nutplates. You wouldn't think you'd see things like this in the house of a non-builder:

The glue was nicely set this morning, so the cowl is ready to go back on the plane. Hopefully I can get that done today and get back in the air!
Update:
Cowls went back on with no problems. Co-pilot Egg was able to assist, thus proving that the job can be accomplished by one moderately competent adult and an extremely competent almost 12 year old. The new cowl pins from Vans worked great! They were so much easier than the old pins, and I don't have to worry about any hidden bulges back behind the panel masking the fact that the pins aren't fully in.
Wednesday, November 23, 2005
A mini-editorial
I don't do much editorializing on this blog, but I have to say, this is stupid:
http://www.mccookgazette.com/story/1109870.html
Brosius said Malleck told him it was "the most hair-raising experience" of his life. Malleck said the situation went from bad to worse. "First I had two people in trouble -- the pilot and mechanic in the plane," he said. "Then we added the driver and the two men in the pickup, and I had five people in potential trouble."
Yeah, no kidding! I like the way he makes it sound like the bad situation was done to him, rather than by him.
He goes on to say that he got the idea from seeing a TV news report about someone else doing the same thing.
In my opinion, he should have seen a news report about someone doing the same thing, and being prosecuted for it. That is the message that should be sent: the FAA will not tolerate this kind of stupidity.
Thursday, November 17, 2005
Camera Quandry Resolved
I went with the Olympus. It's a generation newer than the Nikon, comes with twice the lenses, and with the 10% off sale at BestBuy, it was pretty close to the same price as the Nikon.
It's supposed to ge delivered today, so watch for some test photos soon!
Update:
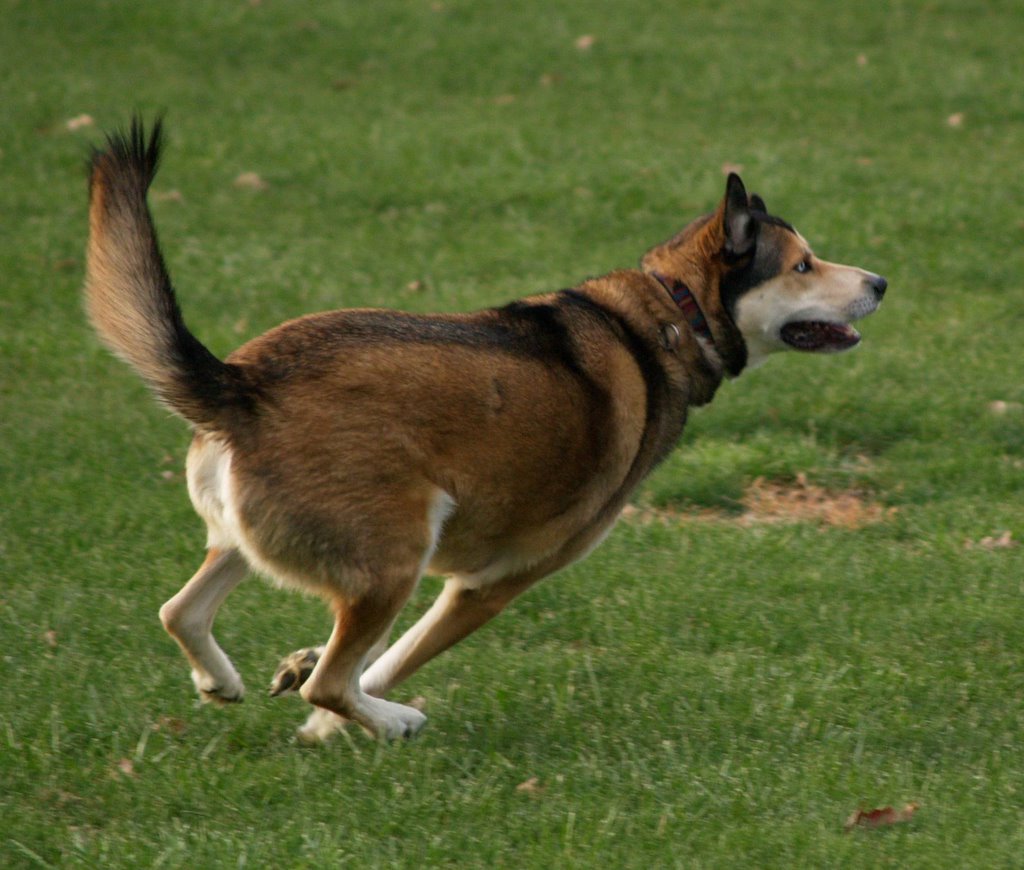
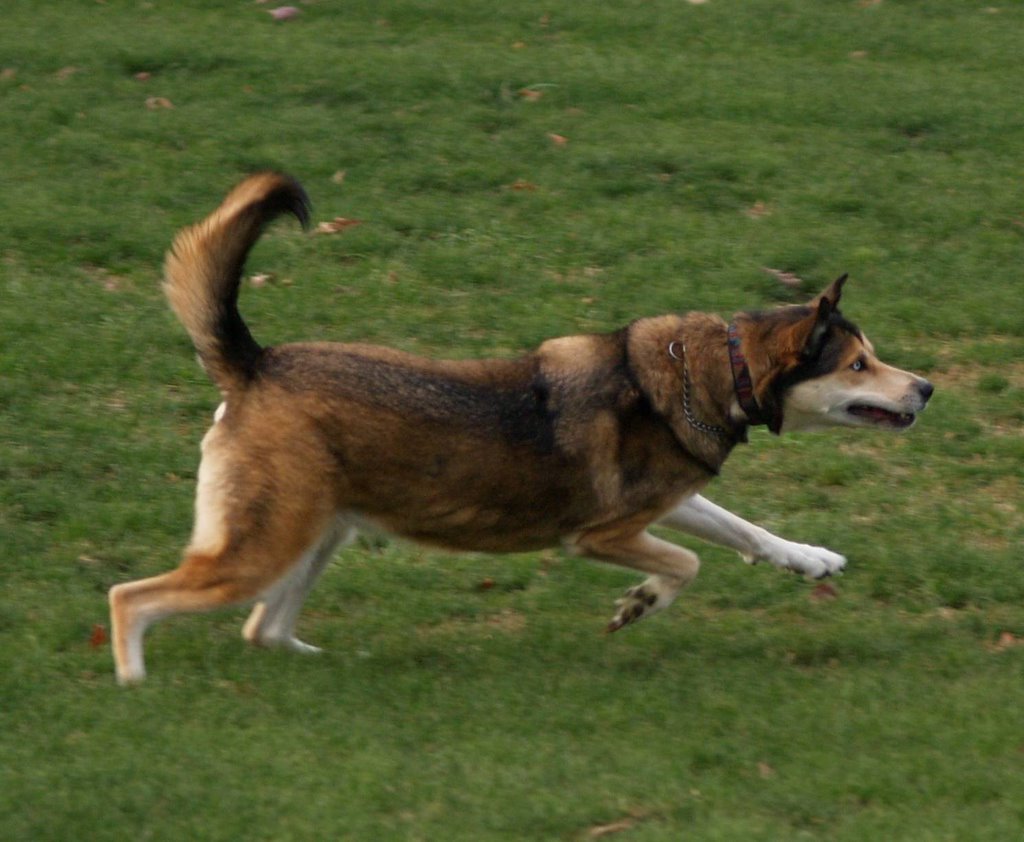
Nice weather this weekend, but just couldn't find the time to fly. I did get away long enough to take the dog for a walk and get a few practice shots with the new camera, though:


It's supposed to ge delivered today, so watch for some test photos soon!
Update:
Nice weather this weekend, but just couldn't find the time to fly. I did get away long enough to take the dog for a walk and get a few practice shots with the new camera, though:


Wednesday, November 16, 2005
More educashun
I had so much fun at the electrical wiring class last month that I started thinking seriously about getting an A&P certificate. For those that aren't sure what that is, an A&P certificate (Airframe and Powerplant) is the FAA license required to work on airplanes. I don't necessarily need it to work on Papa Golf because it's an Experimental, but if I wanted to be able to work on store bought planes or sign off the annual condition on a homebuilt, including Papa Golf, I would need the certificate.
I had thought about doing it before since there is a school that has a program for it right on Bolton Field and you just can't beat that for convenience, but I thought I'd have to do the whole two year Associates Degree program. This turns out to not be true; I can take just the classes required for the FAA certification. They offer classes at night, but due to scheduling challenges and only wanting to take one class at a time, it will take 3 - 5 years to complete the training. That's fine by me - there's no real hurry to do it. This is long-term planning for when I'm ready to semi-retire, and since I'm only 44, that will be awhile.
I've been looking at the curriculum and it's pretty exciting. My first class will be Aviation 117 (basic aviation maintenance), which I believe is concerned mostly with tools and safety practices. There's a lab component too, so there must be some wrenching on airplanes and/or engines involved. It is descibed thusly in the course catalog:
Develop an understanding of basic aviation maintenance procedures and the tools used by the aircraft technician. Covers identification and selection of materials used in aircraft construction. Practice in fabricating and installing fluid lines and fittings. Select and perform non-destructive inspection processes.
There are no prerequisites for the class, but I will at some point have to go backwards and take:
AVI 111 Aviation Theory (A,SP)
Basic science for the aviation maintenance technician, including aerodynamics and flight stability, mathematics, physics, and weight and balance effects
and
AVI 115 Aircraft Maintenance Regulations, Pubs., and Records (A,SP)
Application of Federal Aviation Regulations to aircraft maintenance and the aircraft technician. The use of aircraft maintenance forms, records, publications, and other pertinent technical data.
It starts to get really interesting after that. I should have a head start on this one with my Air Force history, the smattering of EE classes I took, and my recent EAA class:
AVI 121 Basic Electricity (W,SU)
Inspect and service batteries. Determine the relationship of voltage, current, and resistance in electrical circuits. Measure voltage, current, resistance, and continuity, calculate and measure power, read and interpret aircraft electrical circuit diagrams including solid state devices, and logic functions. Calculate and measure capacitance and inductance, and operating principles of generators, alternators, and motors.
The AVN117 class starts Jan 3rd. Watch this space for updates!
Monday, November 14, 2005
Update: Improved Columbus picture
I thought I was doing pretty well just getting the morning haze out of the Columbus picture, but evidently I left a little bit on the table:

If I could find a way to fit Rick Lee inside my camera, I'd get shots like this all the time!
I guess there's more to this than knowing where the "I'm Feeling Lucky" button is in Picassa!
Thanks Rick!

If I could find a way to fit Rick Lee inside my camera, I'd get shots like this all the time!
I guess there's more to this than knowing where the "I'm Feeling Lucky" button is in Picassa!
Thanks Rick!
Saturday, November 12, 2005
Our first UFO
The Ohio Valley RV Group periodically have functions they refer to as UFO's. I think it stands for Ultimate Fly Out, but I'm not 100% sure of that. Basically a UFO involves a mini fly-in at a designated airport. This one was at New Philadelphia (KPHD) Harry Clever Field, over towards the eastern side of Ohio. The weather was terrific for flying again, so I launched out of Bolton at about 9:30 and headed east.
 Downtown Columbus as seen from my lofty perch
The skies were severe-clear, and I had a pretty good tailwind out of the west, so I climbed to 5500' to get over the Columbus class C airspace and enjoyed a smooth, relaxing flight at 165 knots. About 20 miles out of New Philly, I began a 500 foot per minute descent and watched as the GPS speed approach 180 knots. It finally topped out at 184. My thrill in this was tempered by the realization that I was going to be going against those same winds on the way home, but it was still a great feeling!
 Approaching New Philly
As I approached the airport from the west, it appeared that everyone had managed to arrive at the same time. In reality, there were only four other RVs in the pattern, but the difference in patterns that they were flying caused a bit of crowding at the end of the runway. As I turned final behind one of the RVs, another that had flown a closer pattern turned in front of me. That's not all that unusual, and as long as everyone communicates what's going on and what their intentions are, it all works out fine. He heard me on the radio confirming that I had him in sight and would be landing right behind him, so he compensated by landing a bit long and leaving the near end of the runway for me. It was nowhere near as tight as the landing clearances at Oshkosh, and the level of cooperation and competance kept everything neat and orderly.
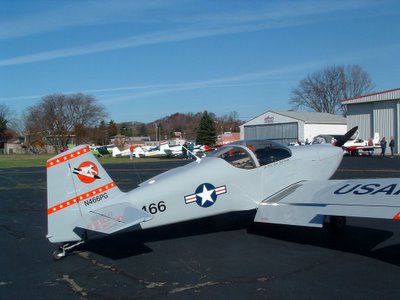 Parked on the flightline
 Closer look at the tail art
I didn't make a formal count, but there had to be between 15 and 20 RVs there. It's always fun to walk around looking at them and seeing how other builders did things. Today I was particularly interested in looking at the cowl hinge wires that hold the top and bottom cowl halves together. The large majority used the front-to-back method, and I'm not sure if any of them used the through-the-panel method like my plane has. Those that had the front-to-back were pretty much evenly split between those that had a fancy custom plate to secure the end of the hinge and those that had a simple screw into a nut plate. I'm convinced that I'm going to change mine to the front-to-back method since 1) it will make a huge difference in the maintainability of the plane, and 2) it looks to be a very straightforward job. I went ahead and ordered the Vans cowl hinge kits to get started. The only thing that I will have to figure out is how to install nut plates on the cowl to hold the retaining screw.
I visited with some of the other RV folks and had a nice lunch. As I meet more and more RV pilots, I continue to be struck by how many of them are professional military or airline pilots. They seem to really gravitate to the Vans planes. I like to think it's because the RVs fly like small, light fighters. Wish I had thought to ask one of them how they compare to various military jets in their flying qualities.
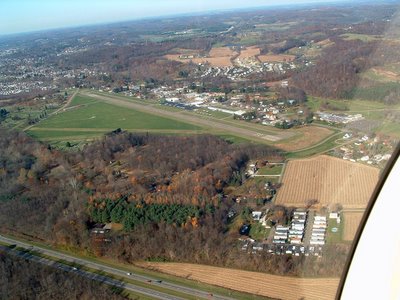 Departing New Philly
As predicted, the flight back to Bolton took a bit longer. I tried to stay low, hoping the winds would be lighter, but the bumps at 3500' encouraged me to try for a smoother ride a little higher. It smoothed out considerably at 4500, but I was only making 125 knots. I consoled myself with the idea that I would have only been doing 75 - 80 in the Tampico, which seemed to help.
The winds at Bolton had really picked up while I was gone, and I was a little surprised to hear "winds 190 at 14" when I contacted the tower. That's a pretty healthy crosswind, but I was able to get her settled in with only a few small bounces. I could feel the wind tugging at the stick as I taxiied in.
One of the nicest things about flying this time of year is that there are very few bugs. Clean-up was a cinch, so I was able to get the bird bedded down with a minimum of fuss and get home just in time to catch the last few minutes of the football game.
What a great way to spend a Saturday! I'll have to play catch-up on my chores tomorrow, but it's worth it!
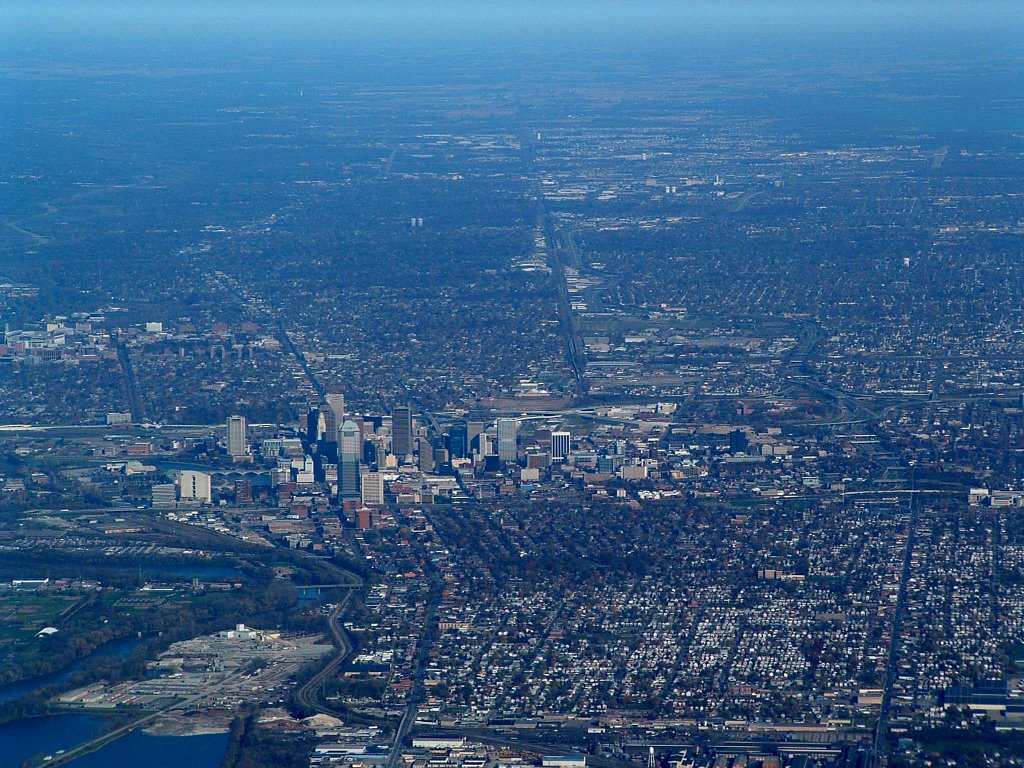 Downtown Columbus as seen from my lofty perch
The skies were severe-clear, and I had a pretty good tailwind out of the west, so I climbed to 5500' to get over the Columbus class C airspace and enjoyed a smooth, relaxing flight at 165 knots. About 20 miles out of New Philly, I began a 500 foot per minute descent and watched as the GPS speed approach 180 knots. It finally topped out at 184. My thrill in this was tempered by the realization that I was going to be going against those same winds on the way home, but it was still a great feeling!
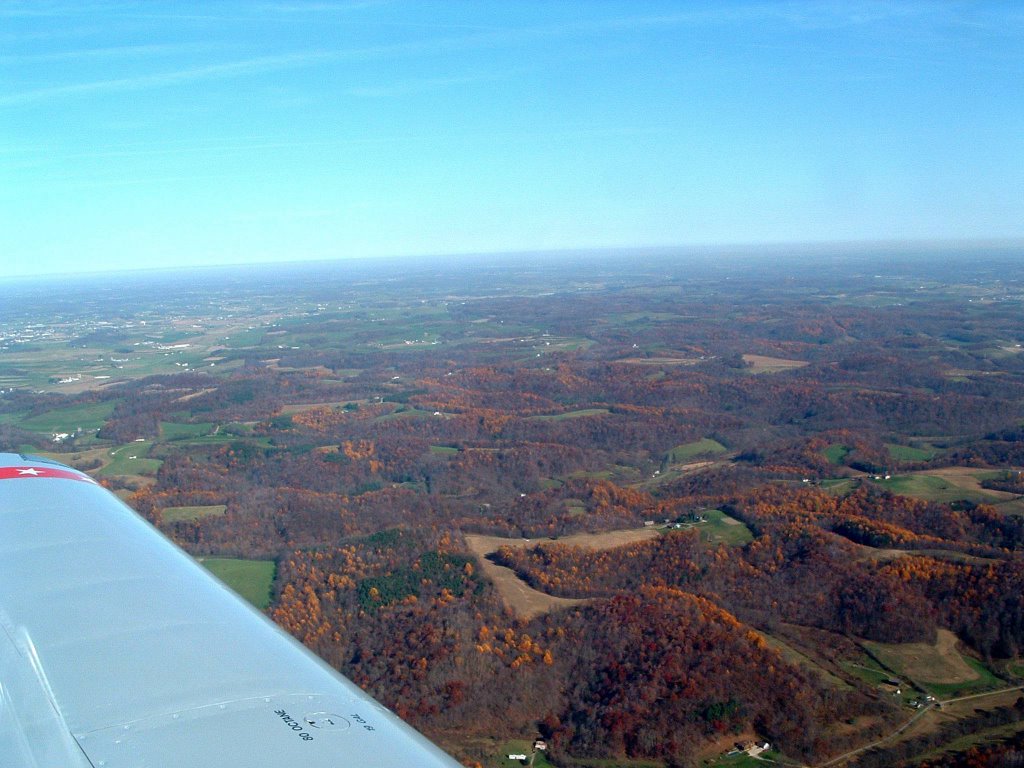 Approaching New Philly
As I approached the airport from the west, it appeared that everyone had managed to arrive at the same time. In reality, there were only four other RVs in the pattern, but the difference in patterns that they were flying caused a bit of crowding at the end of the runway. As I turned final behind one of the RVs, another that had flown a closer pattern turned in front of me. That's not all that unusual, and as long as everyone communicates what's going on and what their intentions are, it all works out fine. He heard me on the radio confirming that I had him in sight and would be landing right behind him, so he compensated by landing a bit long and leaving the near end of the runway for me. It was nowhere near as tight as the landing clearances at Oshkosh, and the level of cooperation and competance kept everything neat and orderly.
 Parked on the flightline
 Closer look at the tail art
I didn't make a formal count, but there had to be between 15 and 20 RVs there. It's always fun to walk around looking at them and seeing how other builders did things. Today I was particularly interested in looking at the cowl hinge wires that hold the top and bottom cowl halves together. The large majority used the front-to-back method, and I'm not sure if any of them used the through-the-panel method like my plane has. Those that had the front-to-back were pretty much evenly split between those that had a fancy custom plate to secure the end of the hinge and those that had a simple screw into a nut plate. I'm convinced that I'm going to change mine to the front-to-back method since 1) it will make a huge difference in the maintainability of the plane, and 2) it looks to be a very straightforward job. I went ahead and ordered the Vans cowl hinge kits to get started. The only thing that I will have to figure out is how to install nut plates on the cowl to hold the retaining screw.
I visited with some of the other RV folks and had a nice lunch. As I meet more and more RV pilots, I continue to be struck by how many of them are professional military or airline pilots. They seem to really gravitate to the Vans planes. I like to think it's because the RVs fly like small, light fighters. Wish I had thought to ask one of them how they compare to various military jets in their flying qualities.
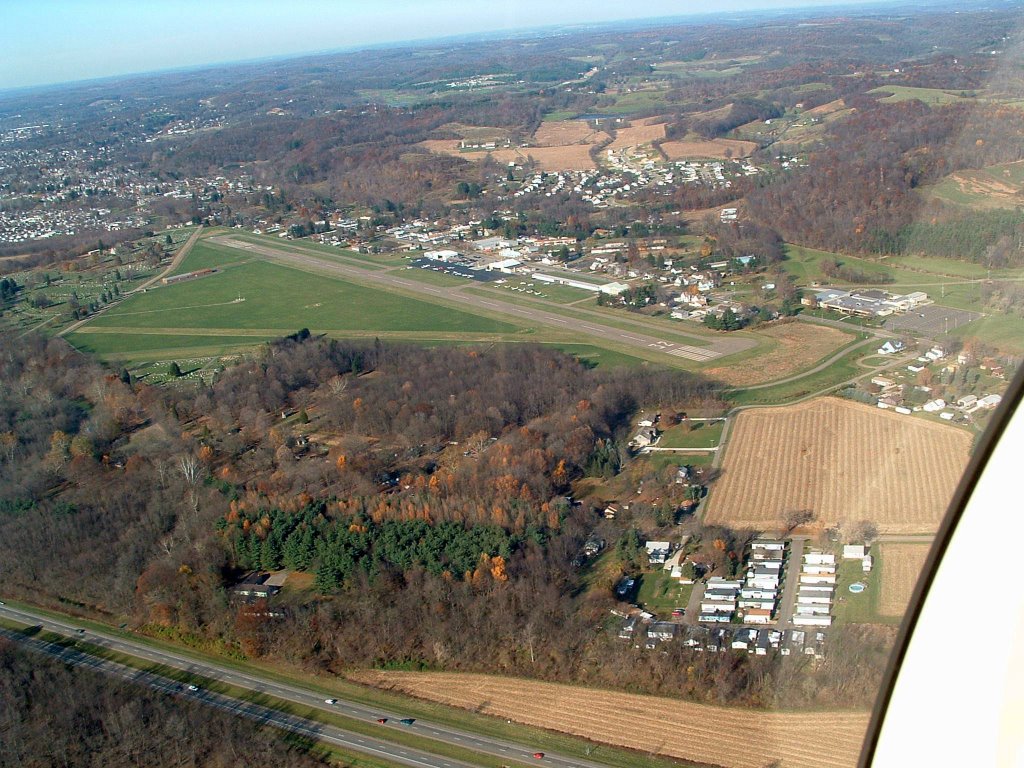 Departing New Philly
As predicted, the flight back to Bolton took a bit longer. I tried to stay low, hoping the winds would be lighter, but the bumps at 3500' encouraged me to try for a smoother ride a little higher. It smoothed out considerably at 4500, but I was only making 125 knots. I consoled myself with the idea that I would have only been doing 75 - 80 in the Tampico, which seemed to help.
The winds at Bolton had really picked up while I was gone, and I was a little surprised to hear "winds 190 at 14" when I contacted the tower. That's a pretty healthy crosswind, but I was able to get her settled in with only a few small bounces. I could feel the wind tugging at the stick as I taxiied in.
One of the nicest things about flying this time of year is that there are very few bugs. Clean-up was a cinch, so I was able to get the bird bedded down with a minimum of fuss and get home just in time to catch the last few minutes of the football game.
What a great way to spend a Saturday! I'll have to play catch-up on my chores tomorrow, but it's worth it!
Veterans Day Flying
As a veteran of five years active duty in the Air Force, and another six years in the Ohio Air National Guard, I decided it was about time that I took a day off of work to celebrate Veterans Day, and decided that there could be no better way to celebrate our freedoms than to go flying. I had a bit of an ulterior motive: my transponder was out of date on its required two year inspection and I needed to get that done.
The transponder is an electronic device in the airplane that "listens" for air traffic control radar, and when it detects it, enhances the signal by encoding the current altitude of the plane and transmitting it back. This allows the controllers to see me clearly on the radar screen and know what my altitude is. Because the controllers need that altitude data to work other traffic around me, it needs to be accurate. To ensure that requisite accuracy, the FAA mandates an inspection and/or calibration every other year. It's an easy enough job for the most part, and only takes a few minutes, but getting the plane to the shop and waiting for them to get to it can take days.
My new favorite fuel airport, Highland County, has an avionics shop on the airport, and I was able to arrange with them to fly the plane in and get the calibration done while I wait. It's a pretty laid-back place, as you would expect from a friendly, quiet country airport. The avionics guy that I had been swapping voicemail with suggested that I get down there "first thing in the morning, and we'll git 'r done."
Now, it isn't always the case that I want what I call a "gitterdunner" working on the plane, but this is a pretty routine operation so there were no worries there. I checked their shop hours, which are 8am - 5pm. Between that and "first thing in the morning," I assumed we were agreeing that I should be there at roughly 8:15 am, and that's exactly what I did. I forgot to factor in the gitterdunner factor, and realized my error when the guy showed up at 10am. It was a gorgeous fall day, so that was no big deal. The neat thing about country airports is how darned friendly and open everyone is. It was a nice couple of hours just chewing the fat with the guys that attend the airport during the day.
The inspection itself revealed no problems with the transponder, and after another hour of shooting the breeze with the avionics guy, it was done. This left the rest of the day open for whatever I wanted to do, and the obvious answer was fly some more. Now that the transponder is legal again, I can fly near the big cities like Cincinnati and Cleveland. I had been putting off a trip to Sporty's since it's in what's called the Mode C Veil around Cincy and the Mode C veil requires a legal encoding transponder to be in the plane and fully functional. I really wanted to get doen there because I wanted to buy a carbon monoxide detector, and since they only cost $9.95, I didn't want to pay shipping costs. I need the CO detector before I will use the cockpit heat since the heat source is a cuff around one of the exhaust pipes. If there is an exhaust leak and you use the heater, you're just pumping the cockpit full of carbon monoxide, which will eventually knock you out, more than likely resulting in a fatal crash.
From Highland to Sporty's is only 15 minutes or so, so I decided to go get the CO detector and next year's AOPA calendar, another item I like to have bit don't like to pay shipping on. That all went well and I headed back to Bolton. Along the way, I saw a plane slightly ahead of me and at my 2:00 position (off to my right). He was below me, but on a converging course. As we got closer, I could see that I was going to catch up with him and pass over him. As he came through on my left side, he was slightly behind me. Here's the point: I passed him (in other words, I was going faster than him) and he was in a Bonanza! Bonanzas are pretty fast planes, but they use a lot of horsepower to do it. I passed him with 150hp. Of course, it's not all about speed: he could carry 5 or 6 people and a lot of baggage very comfortably, whereas I can carry two people, a little baggage, and it's relatively cramped. Still...
I made three landings yesterday, and all were very good. It helps that there was very little wind, but it was still gratifying to not botch a single one.
All in all, I don't think there's a better way to spend a nice fall day that flying around Ohio with your pants off. (Wheel pants, that is! I haven't put them back on since the tire change, and I'm not sure I will. Don't really need them for the short trips I take, and they block the view of the brakes, which I want to keep an eye on for awhile).
Tuesday, November 08, 2005
Camera Quandry
I'm looking for a new camera to assist in chronicaling the adventures of N466PG. The 3 megapixel Fuji digital I have now is pretty good for what it is, which is essentially an unsophisticated snapshot camera with a fairly decent lens, but it falls short in a number of areas. With the Fuji, I just figure if I take enough pictures, one or two are statistically bound to turn out fairly well. There're times, though, when a "hope for the best" approach doesn't cut it. Oshkosh was a good example of that. I got a few good pictures, but I was also very disappointed that some (many!) of the others didn't turn out because of weaknesses in, or lack of manual control over, exposure, focus, shutter lag, and depth of field.
So, I'm looking for a new camera. I want at least 6 megapixels to enable much tighter cropping, a multi-zone auto-focus, a multi-segment light meter, and the ability to manually override all of the above. I want a hot shoe for the flash so I'm not beholden to the in-camera flash, I want to be able to 'bracket' pictures with exposure/focal length settings, I want to be able to use various lenses, and I want almost instantaneous response to power-up and shutter release.
In short, I want a digital SLR. And I want it to be realtive small and light.
I have narrowed my choice to these two:
- Olympus Evolt E-500
- Nikon D-50
As usual, both have strong pluses and minuses. Prices are comparable, so that won't be the deciding factor. Right now I'm leaning towards the Olympus based on its somewhat more ergonomic design (have you ever wondered how I get in-flight pictures? Hint: one hand on the camera, the other flying the plane) and its 2.5 inch LCD screen. On the down side, it takes more that a second to power up due to the sensor shaker that removes dust from the sensor, but its shutter release is as fast as the Nikon's. Tough, tough call.
Saturday, October 29, 2005
Fall Colors
The bad thing about Fall is that it is the precursor to Winter. The good thing about it, though, is days like today. A deep azure sky, comfortable temps, and smooth air. Well, it wasn't all that smooth today, but that's ok. I took the RV down to Highland Co. (KHOC) to get some gas, and while I was there took a walk down by the lake.
I like to take the camera with me when I go down there since it's such a nice area. Here are some of the snaps I took today:
Turning downwind, runway 23:
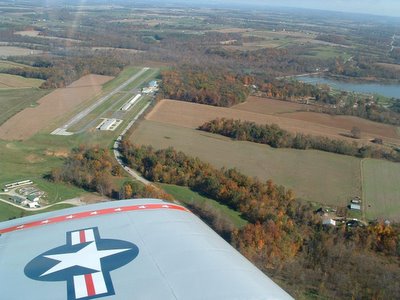
Turning left base:
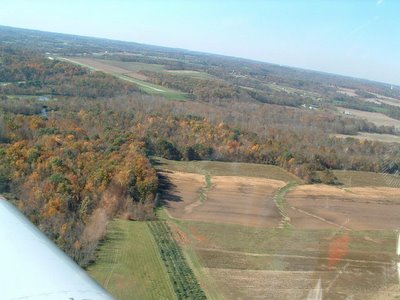
Parked on the ramp:
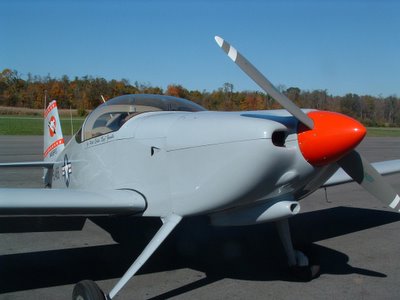
Out the window:
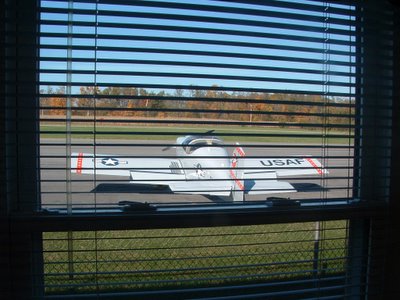
Trees and such:

I call this one "The Optimist":


Heading home:
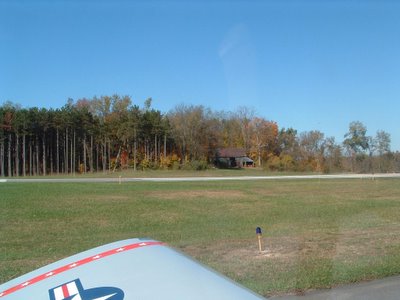
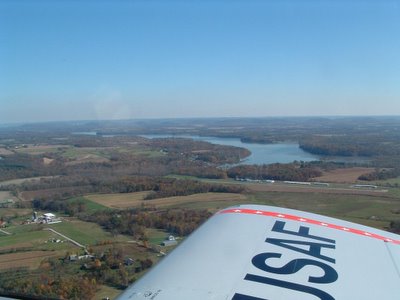
While I only flew 70 miles or so, by the time you add in the walk and the time spent visiting with airport buddies, it was a 4 1/2 hour trip. As they say: Time to spare? Go by air!
Subscribe to:
Posts (Atom)