Wednesday, June 28, 2006

New Brackets for Old! New Brackets for Old!

The title comes from an old vinyl LP of the story of Alladin's Lamp ("New Lamps for Old!" - I remember it like it was yesterday, which these days is actually synonomous with saying "I remember it like it was 30 years ago") that I used to listen to when I was a kid. It seemed appropriate today since I got both of the old wheel pant brackets replaced with the new ones today. I had thought it might take awhile since spacers need to be measured, cut, test fitted, cut, and test fitted until they hold the bracket .032 to .096" from the brake disk. This would have been time consuming since the wheel and outside brake pad need to be removed/replaced for each cycle of measure, cut, fit, swear.

This is the old bracket:


This is the new bracket:


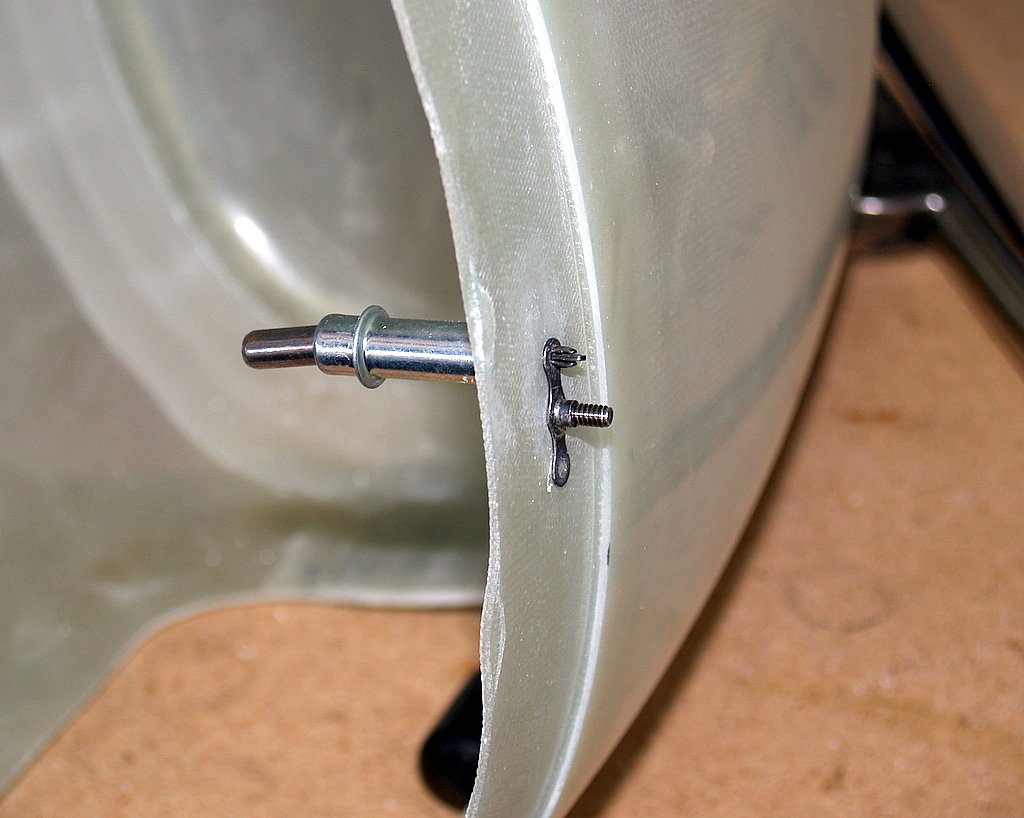
'Twas not to be though. The old bushings fit just fine. I thought the right side gap was too large so I removed a set of washers, but I think I'm going to put a thinner set back in to try to get a bit more gap than I have without the original washers. I don't want the bracket to be too close to the brake disk because that leads to the possibility of it rubbing against the brake disk, which intuitively seems like it would meet the general description of being "a bad thing." The brackets still need to come off of the plane one more time to install the nut plates that the cowl halves will screw into, so it's no extra effort to add a set of washers.

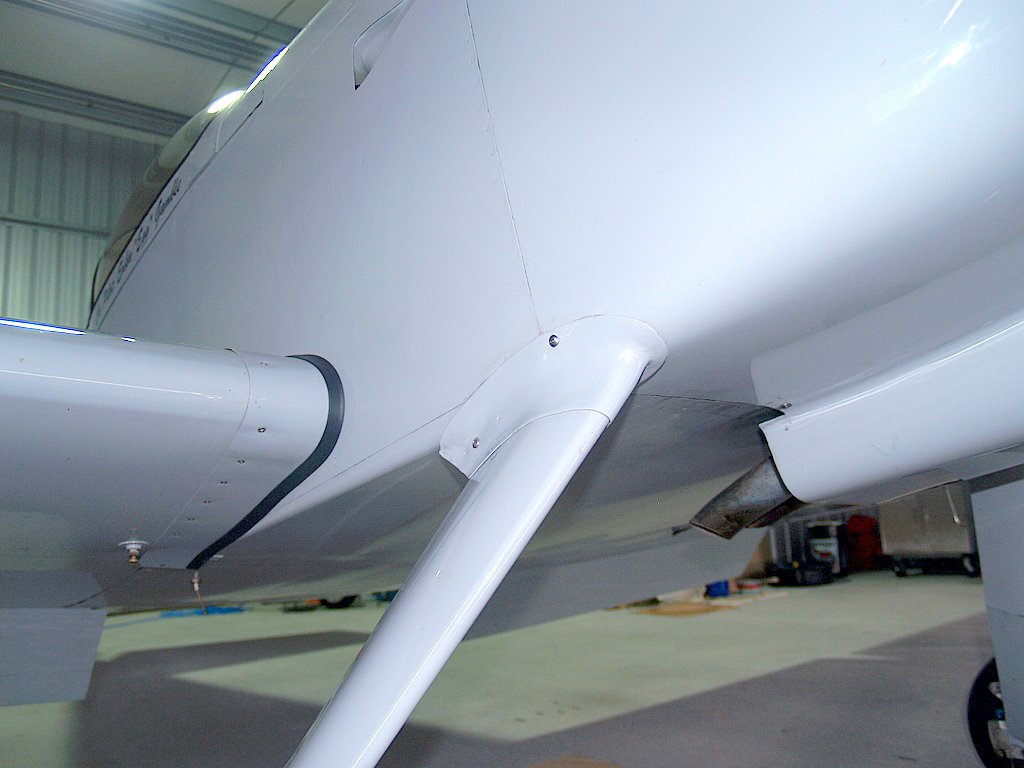
You can see the insufficient bracket-to-disk gap here:


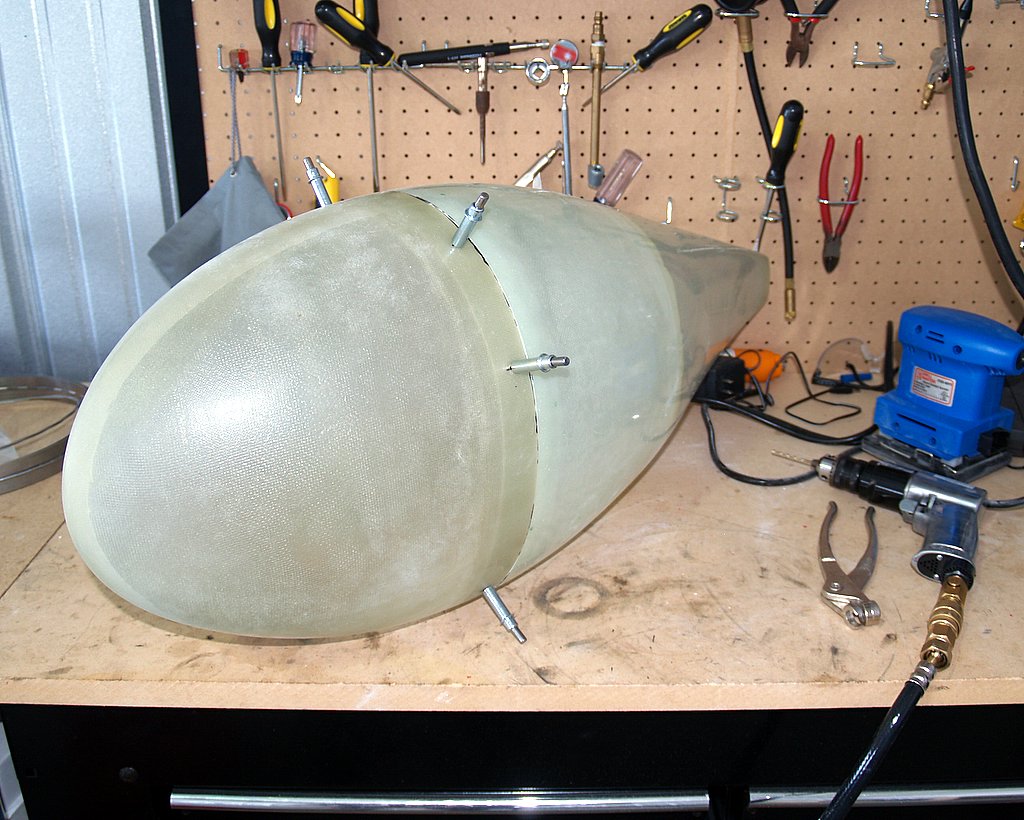
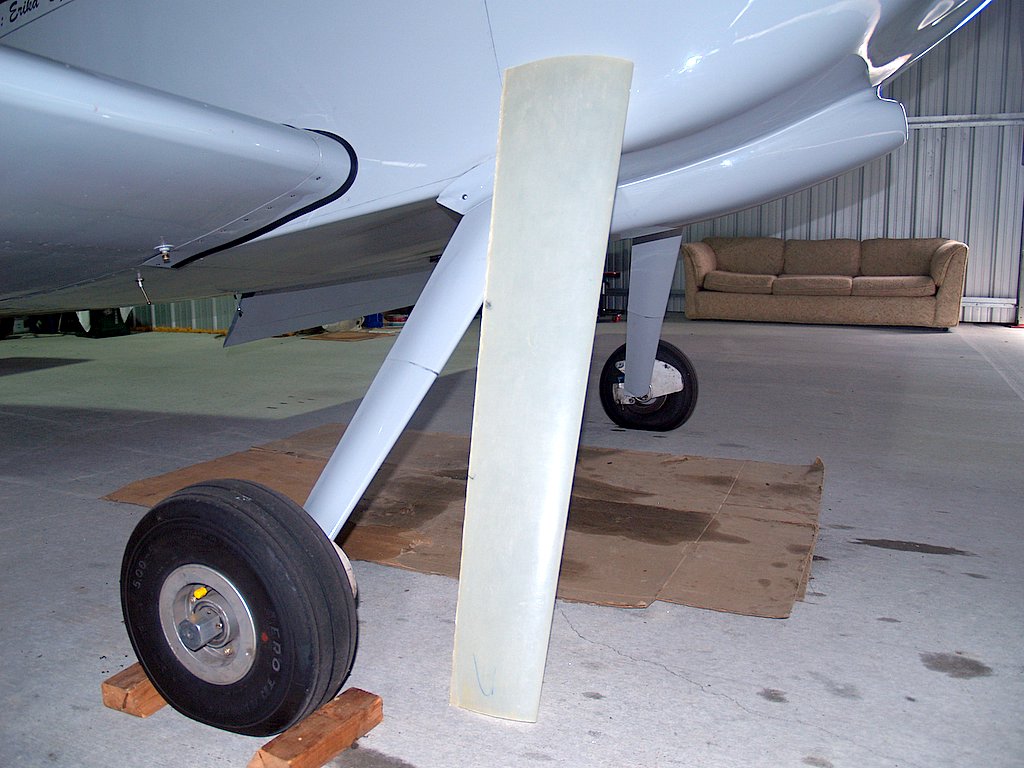
Since the brackets went in so easily, I had plenty of work time left over. The next step in the manual is to position the pants correctly and drill the holes for the mounting screws. To get the pants level with the airplane as it is in flight, the tail needs to be lifted onto a stand and the plane leveled by placing a bubble level on the canopy sill. That done, I made the cuts in the bottom of the pants to enlarge the opening to fit the size tires I use. I installed a cutting disk on the $15 Harbor Freight die grinder, drew some guidelines on the pants with a Sharpie marker, and commenced surgery. The cutting disk moved easily through the fiberglass, but created clouds of nasty dust. It also was unable to negotiate any curves in the cutting line, so I'll have to go back later and clean up the corners. I couldn't find any indication in the manual or on the plans telling me how wide the opening should be, or how large the gap between the side of the tire and the edge of the opening should be. I searched around the web (there are a ton of builders sites out there!) and decided to allow approximately 1/2" gap between the tire and the edge of the opening.

The new HF (Harbor Freight, of course) respirator helped a great deal in avoiding beathing in the fiberglass dust, and it got a lot more comfortable once I realized I could get the straps to stop abrading my ears if I wore the headpiece higher.


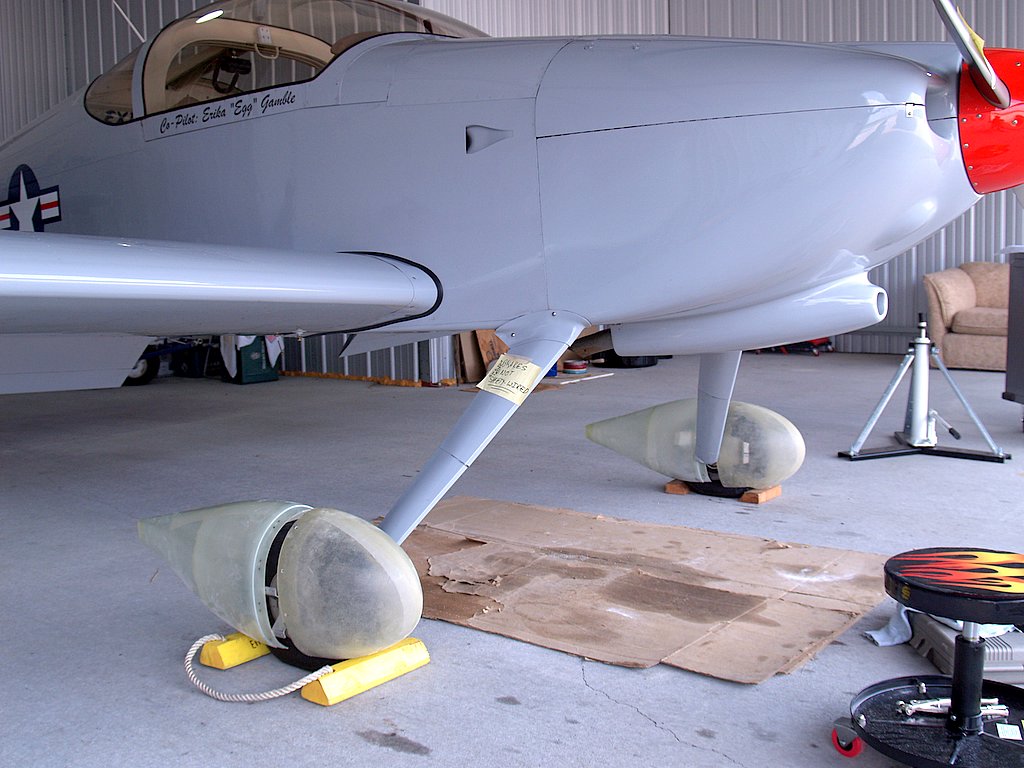
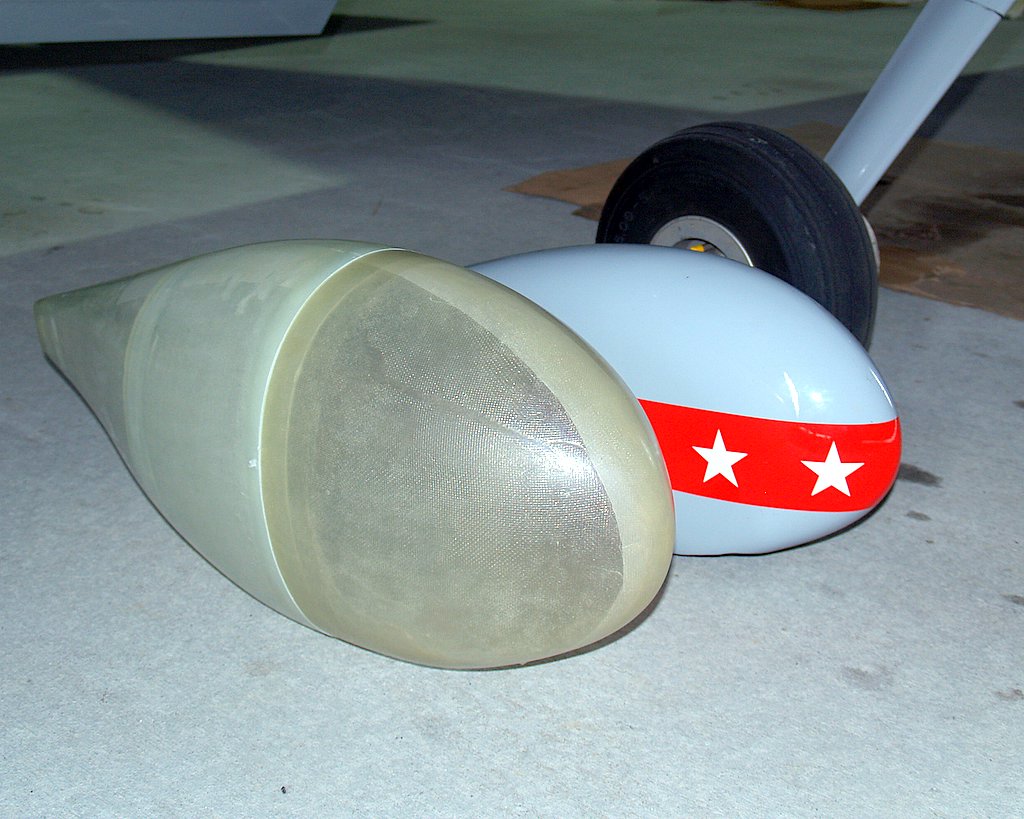
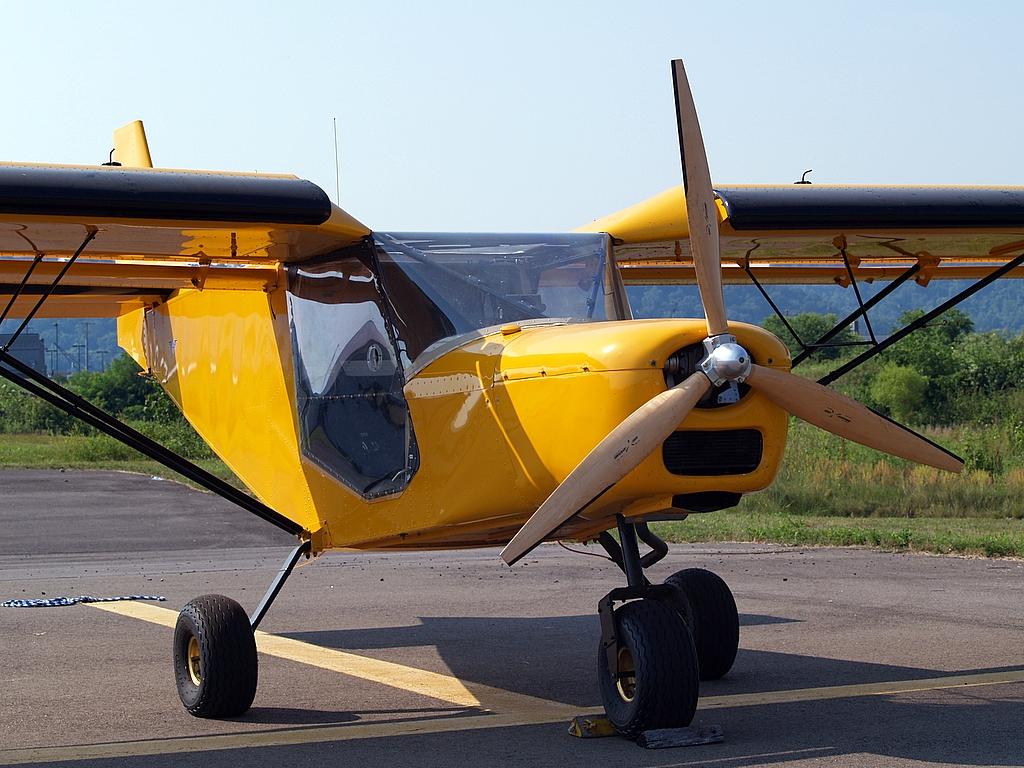
I finished up the day with fitting the pants to the plane as far as they would go without cutting the axle relief in the leading edge of the aft pant (which is the next step once I get the plane levelled), so you can get a pretty good idea of what they will look like when they're done.

Sunday, June 25, 2006

Zipping my pants

Well, not exactly zipping, but I did attach that front and back halves today. I had finished up the sanding of the joint line between the front and back halves yesterday, so today was the day to make the first real "please let me get it right the first time" steps.

I started by measuring the outer rim of the front halves to determine where the screw holes should go, and drilled a #40 hole in each location. I used #40 as a pilot hole, knowing that I'd final drill to the size of a 6-32 screw later. The #40 has the advantage of being just the right size to allow a snug fit with clecos.


I had to separate all the pieces/parts for the fasteners out from the mixed bag of parts provided by Vans. The nut plates on the left get riveted inside the inner edge of the back halves, and the screws and washers go through the outside of the front halves into the nut plates. Because the pants are fiberglass rather than aluminum, I can't use my rivet gun to set the rivets since it would probably do major harm to them. To set these rivets I would need a rivet squeezer, a tool I don't happen to own. Thankfully, Rick rode to the rescue!


There is a tool available that makes easy work of correctly positioning the holes for the nut plate and its rivets, but I haven't got one of those either ($38!! Pfffft - my drill press was $40) so we had to do it the old fashioned way. First, the nut plate is placed on the outside of the pant, and the screw is put in from the inside.


This will hold the nut plate in place tightly enough to allow the #40 hole for the first rivet to be drilled, and a cleco inserted to hold it in place while the second rivet hole is drilled.


This works very well in positioning the holes, but it's a bit time consuming. They came out looking pretty good, though.

Each of the rivet holes needed to be countersunk on the outside to make room for the head of the flush rivet, and that was easily accomplished using a countersink bit. Normally the countersink bit is driven by a drill, but fiberglass is so easy to cut that I was able to do it by hand. Once the countersinking is done, the rivets are squeezed into place. The rivets used in this case are only 3/32" in shank diameter, so they squeezed pretty easily. I'll be working with 4/32" rivets later which are much harder to squeeze, but they will be set in the aluminum bracket and thus can be done with the rivet gun. The whole job ended up taking a couple of hours, but the results were gratifying.


There was even enough time left in the afternoon for a quick hop over to MadCo for gas. Gentle winds, not-too-bad landings.

Saturday, June 24, 2006

Payback

One of my favorite jobs to date was the two years I spent at Executive Jet Aviation, now known as NetJets. The computer programming work was interesting and I always believed that it was a very professionally and ethically run company, but the biggest attraction for me by far was that I got to fly in the jets now and then. The pilots were very generous in allowing me to ride along on training or positioning flights, so when I was contacted by a current NetJets pilot wanting to know a bit about RVs, I couldn't help but to offer him a ride. He flies the Hawker 400XP as his day job, but he's thinking about building an RV-8 to, as he puts it, put the fun back into flying.


I understand where he's coming from with that sentiment, it having been a very conscious decision of mine to not pursue flying as a career. I've always intuitively felt that the vast difference between flying because you want to and flying because you have to would suck the magic and joy out of flying entirely, and I couldn't stomach the idea of that happening. Additionally, I'm not sure people fully appreciate what a difficult job and lifestyle working as a professional pilot can be. I'm far too much of a home body to relish the idea of seven days on the road, not knowing where you'll be on any given night.

As I was walking out the door sans camera, I reminded myself of my recent re-affirmation of the "always bring the camera" rule, and I'm glad I did, although I'm going to make you scroll down to the bottom of this posting to see why. We had agreed to meet at the airport gate at 9:00, but I showed up at 8:45 reasonably confident that he'd be early. They always are. The weather was far better than forecast with essentially no clouds, great visibility, and an easily managed 6 knot wind from the north-ish. We saddled up and flew up to Urbana-Grimes for breakfast. Urbana has a nice turf runway right next to the paved runway, and since I hadn't had a grass runway landing since the fiasco up at Allen Co., (I know you're wondering, but I'd rather not say) I decided to avail myself of the opportunity for a refresher. I ended up a bit high and slow in the flare so I didn't have a whole lot of energy left for an extended flare, but I timed the one shot I had at a smooth-ish landing pretty well and avoided a humiliating plop to earth in front of a professional jet pilot by the barest of margins.

Upon taxiing in, we got a closer look at an unexpected airplane parked right by the restaurant, this WWII B-25 medium bomber:


I naturally couldn't avoid the photo op with my faux-fighter escort:


I wish I had parked it a bit closer, but as it was I got growled at by some form of officious airport employee wondering if I intended to move the plane elsewhere. And good morning to you too, kind sir!

As if the great weather, tasty breakfast, fun flying talk, and getting some nice shots of a very pristine B-25 weren't enough, I managed to absolutely grease the landing back at Bolton. The kind of landing where you can feel the wheels spinning up as they lightly kiss the runway are so few and far between that they are immensely gratifying no matter when you get one, but to butter one on like that with a professional jet pilot as a witness is, as they say in the credit card commercials, priceless!

Friday, June 23, 2006

Time to put on my pants?

I've finally gathered together a quorum of pieces-parts, using my usual inefficient method of ordering stuff as I think of it rather then batching the entire order up and placing it all at once. To date I have received the Vans wheel pants, the F1 Rocket leg fairings and intersection fairings, and the 6' length of aluminum hinge and pin from Vans.

The project will start with the pants, then proceed to the leg and intersection fairings. In this picture, you can see the difference between the older style pants that were on the airplane when I bought it and the new style pants I will be installing.


Looking at how much larger the new pants are than the old, you'd think that they would make the plane slower, but the exact opposite is true. I took a few aerodynamic engineering courses in college, but didn't retain nearly enough to be able to explain why it is that the larger pants will provide an increase of 3 to 4 mph over the old ones.

The pants are split in fore and aft sides, unlike the old pants which were one piece. The joint where the front and back sides meet needs to be sanded to give a better fit than they have right off of the factory mold. You can see the gap in the first pair:


I marked the edges that were meeting with a Sharpie marker, pulled the halves apart, and used my $8.99 electric orbital sander from Harbor Freight to sand away the marked areas. I repeated that step six or seven times until the fit looked acceptable. I don;'t think it's possible to get such a tight fit that the butt joint between the halves is effectively invisible, but I want to get them as nice and flush as I can.

The first pant is pretty close, the second I'll work on tomorrow.

Once the pants are done, I will move on to the new leg fairings. In this picture you can see the new fairing along side the old. The fairing that was on the plane when I bought it is the old two-piece aluminum style. The new F1 fairing is fiberglass. In comparing the new to the old, you get a feeling for just how much customization is required when fitting parts to hand made airplanes!


You get directions and drawings, but they take a bit of reading and studying to fully comprehend before making the next step.


Part of the job of installing the new leg fairings will be to install new upper intersection fairings too. I've always thought the intersection fairings that came on the plane were a little unsightly, so I bought a pre-molded set from F1 Rocket at the same time I bought the leg fairings.


It looks like it will take a few days to get the wheel pants put together, but the rest of the work will involve jacking up the plane and removing the wheels and brakes. I'm not sure when I'm going to want to do that since I hate having the plane grounded at all this time of year.

Sunday, June 18, 2006

Gallipolis: it's a KGAS KGAS KGAS, man

There was a fly-in scheduled for Saturday morning at Gallia-Meigs airport (KGAS), which is 76 miles down south, right on the norther bank of the Ohio River. The forecast was for hot and humid, so an early start seemed best. Tromping around on the black tarmac of the typical airport ramp is not the wisest choice when it comes to ways to spend time in the sun, so I usually like to have the bird back in the barn by the time the afternoon sun kicks in. The air was glassy smooth on the way down there, but as usual when our weather is being dominated by a summer high and a southerly wind, that came at the cost of visibility; it was hazy down below 4,000' feet and the usual lush, forested scenery was for all practical purposes invisible.

The approach to KGAS from the north is a bit different from the normal airport in that you can't see the runway until you're just about on top of the airport. The northern approach is blocked by a line of hills that are perfectly positioned so as to completely block the entire airport from sight. I tucked in nice and tight on the northern side of the hills and made a sweeping left base leg around the westernmost peak to land on the northeast facing runway. The landing was fairly good, but that was mostly a factor of having very little wind to deal with.

Being early ensures a nice parking sopt, but being really early ensures that there won't be much going on when you get there. That's no problem if there are restaurants nearby, and while the half mile hike to BK wasn't exactly right on the airport, it was close enough that sitting in the "dining room" drinking a big mugga BK's finest Columbian Roast, watching the teenage employee setting the letters in the marquee to read "NOW HIRING ALL SHIFTS" but deliberately delaying the application of the letter 'F' until he had time to photograph the resulting scatalogical variation with his cell phone, was worth the walk.

By the time we got back to the airport, a few more planes had arrived. There was a bevy of five or six very small homebuilts and ultralights, and a CH-701 had come in.


The CH-701 is a fascinating airplane, able to takeoff and land in less than 100yds, fully loaded. Of course, that kind of high lift capability is incredibly draggy, so the top cruise speed is a paltry 85 mph. Still, it's an intriguing bird due to some of its aerodynamic features. The leading edge of the wing has full-time slats, and the horizontal stab is clearly designed to provide a lot of authority at very low airspeeds. The construciton is almost totally done with blind rivets which greatly simplifies the building process.


One of the hangars had its door open, and the Globe Swift inside had for sale signs on it. The asking price is $58k, which seems pretty reasonable at first glance. I'd want to know quite a bit more than I could find on a cursory external inspection, but it sure seemed like a sweet little classic 2-seater for a pretty fair price.


A helicopter flew in to give short rides over the town for $30 per, and they seemed to be doing a fairly good business considering how awful the visibility was for aerial photography, but that's probably something that's pretty hard for the customers to realize from the ground since they don't know the indicators. I usually can tell what the airborne visibility in general will be just by looking at how well defined the haze line is on the horizon.


I always like it when my plane attracts admirers:


At this point, they seemed fascinated by the folded up mountain bike behind the seats. That's not surprising - it shocks me too every time I'm able to successfully get that thing in there!

Sunday, June 11, 2006

Middle Bass Island

The weather this weekend continued to baffle the pronosticators this morning, when rather than the second dismal day in a row we received a nice, fairly high and steady overcast. The morning forecast promised ceilings no lower than 6000' until possibly after 6:00. Having had a long-anticipated camping trip cancelled due to the Saturday rains, it was a welcome break from the rainy weather and decided to make use of it. It was still pretty iffy early, so I decided to work before play and mow the lawn. During the hour and a half it takes to do that, I got rained on for at least 45 minutes.

The weather looked good enough to make a trip up to the islands, and having been to both Kelleys Island and Put-in-Bay quite a few times in the past, I decided to try something new. The next island in the chain north of Put-in-Bay is Middle Bass Island, and they just got a nice new airport built not too long ago. It's not a huge runway at 1800', but that's pretty much the norm for the islands, and the RV doesn't need anywhere near all of it. I folded up the new bike that I've been dying to take on a trip since I bought it at Xmas, grabbed the camera, and headed north.

As I mentioned, we had an overcast such that I was pretty close to it at 5500'. Having the cloud layer hanging just over my head was like swimming underwater and seeing the surface of the water like a ceiling - it was not quite claustrophobic, but
still a little disconcerting. Once I got near the lake, though, the skies cleared and I was able to revel in basking in the warm sun and blue sky.

I flew east of Put-in-Bay and set up for a right downwind to runway 10, and with the winds coming primarily out of due east, it looked like I wouldn't have to deal with a crosswind while landing. I don't think it would have been much of a problem, though, as the runway is nice and wide.


I planted it right on the runway numbers and rolled down to the end of the runway, although had I wanted to use the brakes a bit more energetically I probably could have been off by the first taxiway. It's a short runway, though, so there really wasn't any point to that. I taxied in and unpacked the bike. It only took a few minutes to get it out of the plane and put together, and we were ready to ride.


I headed out to the little, thin northeastern tip of the island first. One of the first stops I had to make was to get some pictures of the state wildlife area:


At the tip of the island I discovered a second airport, this one having a grass runway and surrounded by houses.


That would be a sweet weekend home! I turned around and went back the way I had come, and started heading towards the southern tip of the island. I stopped at this little church to take a picture of it and the small graveyard behind it.


There's a small state park on the island which seemingly is comprised of naught but a restroom (and thank-you for that!), a small beach area, and a forgotten playground. The beach would have been a nice place to sit and relax for a few minutes had it not been for the very large and very dead fish that got there before me, and was making no moves to leave any time soon.


Continuing down at very southern end of the island, I found the Lonz Winery.


The ferry was just coming in so there was a lot of pedestrian and motor traffic, and it was thus too hectic for me to stay around for long. I headed back to the airport and got the bike folded up and put back in the plane. I always worry about the engine not starting or some other mechanical failure stranding me 100 miles, and in this case four hours of road travel, from home. No problems there, though, although I did make a very thorough and complete pre-flight before making the somewhat intimidating takeoff. The end of the runway is right at the edge of the island, so a failed takeoff has a very distinct possibility of dumping the unfortunate pilot right in the lake.


Before turning back to the mainland, I orbited the airport once to gain enough altitude to give me some gliding options in the event of an engine problem. On my way by, I took a picture of the Perry Peace Monument on Put-in-Bay:


In what's getting to be a habit, I arrived back at Bolton in a rain shower. It was quite an enjoyable trip, and it just amazes me that I did it in less than two hours flight time. It also got me thinking (AGAIN!) about one of the biggest problems an RV-8 or an F1 Rocket would have for me: there's no way I could carry that great bike in either of them. That would be hard to give up.

Wednesday, June 07, 2006

A new RVer?

I flew up to Lima Allen Co. this morning to pick up a guy that recently divested himself of his half share of a store-bought plane and decided to find, and hopefully buy, an RV-4. We were flying down to West Virgina to take a look at one he had heard about. The forecast indicated that the weather should be suitable until at least 2pm, so I took off right around 8:00, thinking that would put me in Lima at 8:30, and we'd make it to Parkersburg between 9:30 and 10:00. We'd have a couple of hours on the ground before we needed to head back home in time to beat the weather.

The interesting thing about the way I read forecasts, particularly on short-ish trips, is that I tend to concentrate on the departure weather and the arrival weather, and sometimes get surprised by slightly more inclement weather enroute. That happened to a small degree today - about halfway to Lima I flew through an area of light rain. This is kind of a pain, actually, because counter to conventional wisdom, flying at 170 mph through rain does not actually make the airplane cleaner. Rather, it finds all the accumulated crud in gaps, nooks, and crannys and washes it all down the sides and bottom of the plane.

One of the large landmarks between Columbus and Lima is the Honda test track just outside of Marysville:


Google found the following regarding the test track:

...around 1975 the State of Ohio built a 4500-acre proving ground called Transportation Research Center (or TRC) north of Columbus, hoping to cash in on all the federally required auto testing. The property became part of the successful effort by Ohio to persuade Honda to build its first U. S. automobile manufacturing in the buckeye state in 1988. Ohio State University actually operates the testing site with Honda merely the number-two customer after the NHTSA, even though the Japanese firm is the landlord. Other auto companies also rent the facilities, with OSU somehow ensuring that secrets are maintained.

I also noticed this round barn just south of the airport:


Amish, I suppose.

The ride from Lima to WV was nice and smooth, and as my passenger was the one footing the bill for the fuel, I let him do most of the flying. Typical of a lot of West Virginia airports, the approach can appear somewhat intimidating, particularly if you have the habit of landing slightly short of the runway:


While we were down there, we ran into Rick Gray, who it seems can never have enough pictures of his airplane. Well, we were there, and we both had cameras, so we were happy to oblige:


More rain on the trip back to Lima, but it cleared up by the time we got there, albeit with a 10 knot direct crosswind which I handled with my usual lack of aplomb. That wasn't the situation back at Bolton, though. I landed in a light rain, and actually got a bit wet getting out of the plane and getting it pushed back into the hangar. It was pretty light rain, though, so I was only mildly moistened.

The plane was put away wet, of course, so I will have to go back later to clean off the inevitible water spots. I was able to get the bugs off before they took a set, though, so it's not really time critical that I get over there for a cleaning. All in all, it was 3 hours of flying, every bit of it enjoyable.