Saturday, October 29, 2005

Fall Colors

The bad thing about Fall is that it is the precursor to Winter. The good thing about it, though, is days like today. A deep azure sky, comfortable temps, and smooth air. Well, it wasn't all that smooth today, but that's ok. I took the RV down to Highland Co. (KHOC) to get some gas, and while I was there took a walk down by the lake.

I like to take the camera with me when I go down there since it's such a nice area. Here are some of the snaps I took today:

Turning downwind, runway 23:


Turning left base:


Parked on the ramp:


Out the window:


Trees and such:


I call this one "The Optimist":


Heading home:


While I only flew 70 miles or so, by the time you add in the walk and the time spent visiting with airport buddies, it was a 4 1/2 hour trip. As they say: Time to spare? Go by air!

Thursday, October 27, 2005

Keeping the rust at bay

It's getting to be the time of year when I don't really make a lot of trips, mostly because it's cold and gets dark early. Even with the Tampico, I always tried to make sure I was flying at least every two weeks or so just to keep the skills up. With the RV-6, I'm trying to make that at least once a week since the challenges are a little higher with a 150 knot taildragger than they were with the ultra-simple Tampico.

Last night was this week's fly night. It was cool and cloudy, and the winds were 8 knots from the northwest, giving me some good crosswind practice. Landings are steadily improving, although I can still count on at least a couple of small 'rebounds' when landing at Bolton. Directional control is good, though, and that's what is most important.

I've been asked a few times why the tires seemed to wear out so quickly on the RV. I've heard a number of theories, none of which seemed right to me. I personally think it comes down to how sensitive the brakes are. It takes only a little foot pressure on the rudder pedals to get some brake drag, and I've begun to really concentrate on only using the balls of my feet against the very bottom of the rudder pedals on takeoff. If I position my feet in the normal place on the pedals, I can feel a burst of acceleration when I takeoff. This indicates that I'm dragging the brakes during the takeoff roll. When the wing starts to list, but the tires are still in at least some contact with the ground, I'm probably eating the tread off of tires.

It's a theory. We'll see how it plays out if I continue to concentrate on not applying even the slightest brake pressure during takeoff.

Thursday, October 20, 2005

Done at last!

I finished cleaning up the nose art picture after a total of at least ten hours of detailed work. I got better at it as I learned new techniques, but better doesn't necessarily imply faster.

In any event, I couldn't wait to Photoshop (GIMP, actually. A free alternative to the very pricey Photoshop) it onto the RV. So, here it is:

Tuesday, October 18, 2005

Nose Art update

I was only able to spend a couple of hours on it tonight:


The parrot and gun are done, and I did a lot more cleaning up of the background.

Monday, October 17, 2005

Tonight's progress

The weather was nice: clear skies, 8 knots of wind right down the runway. I took the opportunity to break in the new brakes, and fly aimlessly around for 20 minutes.

Then, back to the drawing. Here's tonight's progress on the nose art:


I started on clearing out the background, finished up the mustache, and started on the parrot.

Sunday, October 16, 2005

Nose Art update

After months of trying on various ideas for nose art, the final selection has been made. The art will be a custom design portraying a familiar cartoon pirate character who is saying "AARRR V-6" in pirate speak, in a terribly punny play on "RV-6." (I'm already wondering how many times I'll have to explain it to people who don't get the joke.)

The artist and I decided that it would be prudent to use drawings to have a custom vinyl decal made rather than paint directly onto the airplane. To do that, I have to have an electronic copy of the drawing to avoid expensive shop rates on digitizing a hand drawing. I got the drawing today and took it out to the hangar to try it on for size:


Since I don't have a scanner, the only way to begin the digitizing process was to take a picture of it with the digital camera, and clean up the resulting photo by hand. The problem is that the decal maker will want a few solid colors, rather than the thousands of colors that make up a digital photograph. I don't know of an easy way to do it, though.

Here's the photo I started with:


It turned out really well. It's easy to see the delineating black lines between all of the colors, and the colors themselves are all solids.

It's still going to take a few hours, though. This is a closer look at how many colors are in the picture:


The larger areas are easy enough, but the detailed areas around the black lines required work at a much finer level. This picture shows the level of detail I work at when converting to solid colors:


I worked on it for about four hours tonight, and here's how much I got done:


He's done from the neck up and the mustache has been roughed in. His left sleeve is just about done too. It's going to take a few more nights of work to get it done, but you can already see how great it's going to look!

Thursday, October 13, 2005

Right side done

I got the ride side tire and brake pads done tonight, and will do the left side tomorrow. I couldn't get both sides done before the FBO maintenance shop closed. With the shop closed, I wouldn't be able to use the cleaning sink and grease presser for re-lubing the wheel bearings, so I decided to defer the left side until tomorrow night.

It all went quite easily. The new jack makes it trivial to get the wheel off the ground. It's a simple matter to remove the cotter pin and single axle nut, and it was also very easy to remove the brake caliper. The caliper doesn't really get fully removed, you just remove the backing plate that holds one of the brake pads, and slide the caliper off far enough to remove the other pad. I carted the whole lot down to the maintenance shop along with the little tool I bought for removing and replacing the brake pad rivets. I got the head mechanic to walk me through replacing the first rivet, cleaning and re-packing the first wheel bearing, and taking the wheel apart. I did the rest myself back at the hangar.

Getting the new tube in was far easier than I had expected, as was getting the wheel and brake pads back on the airplane. I aired up the tire, safety wired the brake caliper, and had the mechanic come down to inspect the work. Everything looked good to him, so tomorrow I'll do the left side solo.

I can't express enough how helpful everyone is at the airport. The mechanics are always willing to lend some advice, and other owners at the airport are always ready to jump in and help. What a fantastic community!

Wish they'd hurry up!

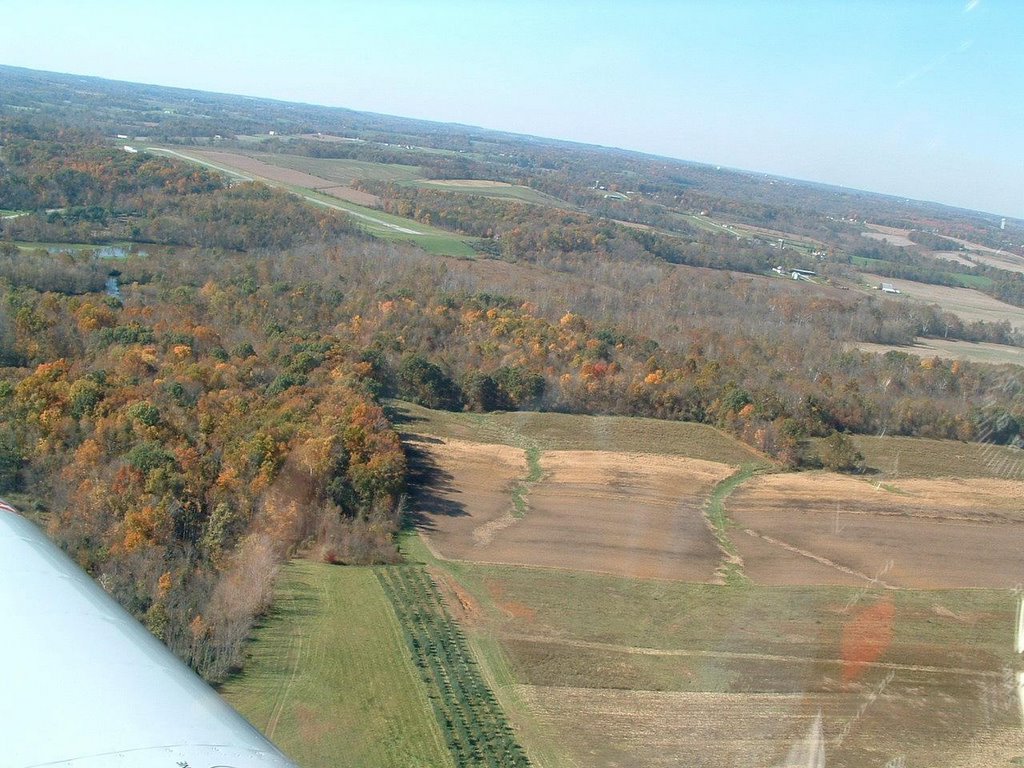
There's been a lot of re-paving and other construction work at Bolton over the last couple of weeks. They've got a lot of the old pavement removed, so there are sharp bumps and a lot of loose gravel lying around. It's keeping me from flying!

I did break down and order a wing jack, which arrived yesterday. I can get going on my tire changes as soon as I get some free time.

Somoeone was asking me about maintenance, and how much I can do myself since I didn't build the plane and don't have a repairman's certificate. The FAA regulations are pretty clear on this topic.

The pertinent rules for what the FAA calls preventative maintenance are in Part 43 of the regs. In Appendix A of Part 43, the FAA explicitly details what maintenance items can be performed by an aircraft owner, whether the aircraft is a factory-built certificated model or a homebuilt experimental like mine. The same appendix lists items that are considered major alterations/repairs, which entail a completely different set of requirements.

Needless to say, I have absolutely no desire to dabble in the major alterations/repairs category - should anything arise that requires that level of work, I will be hiring a licensed mechanic to perform the job. It's not that I can't legally do them, it's just that they are flagged as 'major' for a reason and I'd be much more comfortable having a professional mechanic involved. Anything having to do with the engine other than routine maintenance, for example, is something I will hire a mechanic for.

The list of allowable preventative maintenance items includes things like tire changes, oil changes, cleaning and greasing wheel bearings, upholstery work, repair/replacement of non-structural fairings, light bulb replacement, cleaning/gapping/replacing spark plugs, and servicing/replacement of batteries. Note that these are things that can be performed on any airplane, as long as the person doing the work is a licensed pilot and a registered owner of the aircraft. This is the rule that allowed me to do oil changes on the Tampico.

The interesting thing about Part 43 to an owner of an Experimental plane is that one of the very first things it says is that the rules don't apply. This is a quote from the EAA (Experimental Aircraft Association) web site:

FAR Part 43 specifically states that the rules of that part do not apply to experimental, amateur-built aircraft. Therefore, any work (not just maintenance) on an experimental aircraft can be performed virtually by anyone regardless of credentials. (This does not apply to the condition inspection). Let common sense be your guide as to what maintenance you conduct yourself.

This does not completely absolve responsibility for compliance with certain other requirements such as an annual inspection because those requirements are written into the operating limitations section of the airworthiness certificate by the FAA examiner that approves the plane for flight. For example, my certificate explicitly requires an annual inspection, and it requires that it be done by either the holder of the repairman certificate (the builder) or a licensed A&P (Airframe and Powerplant) mechanic. It looks something like this:

No person shall operate this aircraft unless within the preceding 12 calendar months it has had a condition inspection performed in accordance with the scope and detail of appendix D to part 43, or other FAA-approved programs, and found to be in a condition for safe operation. This inspection will be recorded in the aircraft maintenance records. Condition inspections shall be recorded in the aircraft maintenance records showing the following or a similarly worded statement: "I certify that this aircraft has been inspected on (insert date) in accordance with the scope and detail of appendix D to part 43 and found to be in a condition for safe operation." The entry will include the aircraft total time in service, and the name, signature, certificate number, and type of certificate held by the person performing the inspection.

There are other similar clauses in my operating limitations. One, for example, states that if I want to fly the plane IFR I have to get the same two-year inspection on the pitot-static system that a factory built plane (like the Tampico) is required to have. They're all pretty much common sense, and are very easy to live by. As you might expect, they concern themselves primarily with things that could create problems for other people, like the IFR equipment inspection. No one wants a 747 to fly into an RV-6 because the RV-6 was reporting an incorrect altitude. Other than things that affect public safety, the FAA is pretty content to let us do whatever we want. For some people, that means building an entire airplane in their garage. For others, like me for example, it means I can do the things I'm comfortable with, but defer the more complicated jobs to professionals. It's a pretty good deal.

Sunday, October 02, 2005

Better than flying?

Well, no. But still a very good way to spend a weekend. I attended the EAA Sportair Electrical Systems workshop this weekend. It was very professionally done and I learned far more than I expected to. I can heartily recommend this program to anyone even remotely interested in building a plane, and I think even owners of certificated airplanes would learn some valuable things about the electrical workings of their planes. For example, I didn't realize how essential the battery is to protecting the delicate and expensive electronic equipment. With a fully dead battery, running the engine (and by extension the alternator) is practically a recipe for burning up the radios. Anyone that has killed their battery by leaving the master swtich on and hand propping the engine to get it started is running a much larger risk than they realize.

There were many of these little tidbits of knowledge mixed in with a lot of hands-on practical exercises. The instructor was incredibly experienced and he shared quite a few interesting things hen had done in his career. He'd been in military aviation in many capacities (including test flying and aerial missions of North Vietnam) and had tons of general aviation experience too.

The class was held at the Bolton branch of the local community college. This is the building that houses the A&P program. I have thought about taking some A&P classes, and having seen the facility and been exposed (albeit in a very small chunk) to some of the training that would be involved, I think I might pursue that idea further. I doubt if they have many night classes, though, so I'm not sure I could get through the entire A&P program. Still, something to look into.