The meeting with the aviation program administrator that was scheduled for Wednesday night was rescheduled for last night. I was expecting to have to jump around between different classes as they came available, and it looks like that's the way it's going to be. He told us that the school has determined that they will only run a class if they can get at least four students in it. Even then, they take a financial loss for that class, but they're willing to do it to keep people in the program. Problem is, the three younger guys in the class are moving to day classes next quarter, and the older guy has had almost all of the other classes. I'm all alone next quarter!
Well, not entirely. Apparently there is a student that is very close to graduating, but needs one more class. He needs environmental systems, so they're thinking of offering it Spring quarter and letting me jump in, despite having none of the pre-requisites. I'm not at all worried about that and don't think I'll have any trouble keeping up, although it does concern me a bit that I'll be missing the first week of classes. I'll have some catching up to do. It's also not a subject that is applicable to my interests as the owner of a small, relatively simple airplane (environmental control in my plane is open/close a vent) but that was going to happen sooner or later anyway. So, I'm keeping an open mind and will take whatever they offer whenever they offer it. He did ask if I could attend four nights a week (the other choice on some of the more in-depth classes is to split the class across two quarters); I told him no, I couldn't do that and still work my way through six grade math again with co-pilot Egg.
Once we got through his visit and a quiz on micrometers, we moved on to the last of the precision measurement devices on the curriculum. We talked about dial indicators, which look more like an old pocket watch than a measurement tool. Basically, they have a stem that is placed against a (nominally) flat surface. As the surface is rotated, the dial indicator will show any warping or bends in the surface. This is useful for determining if a crankshaft is bent, or if the flange that the propellor is bolted to is warped. Being a small night class, we were able to go to the engine lab and try it out on a couple of crankshafts they had lying around.
After that we started on our next topic, which is aircraft materials. We're starting with metals. Typical of the FAA approach to learning new things, we started out by talking about definitions of the qualities of metals. We talked about hardness, ductility, malleability, tension and compression loads, and shear loads. We also got into the topics of work hardening and annealing. Work hardening is something you can see for yourself pretty simply: just get a coat hangar and keep bending it back and forth. Eventually the metal where you're bending will get hard and brittle, and more than likely, break. This work hardening can be reversed by the process of applying heat, which is called annealing. This is pretty basic, but also pretty important, stuff. The next topic will probably be alloys, and how each particular alloy has different properties.

Tuesday, January 31, 2006
Saturday, January 28, 2006
Breakfast Fly-out
The Ohio area RV crowd was planning on meeting at Urbana-Grimes for brunch this morning, and being only 30 miles or so away I decided to go on up and join them. The only concern was the forecast for 2,500' ceilings, but that just meant I'd have to fly 500 feet lower than normal, and that's no big deal at all. It was nice to wake to clear blue skies, having only a thin layer way up high where the airlines play. The wind was ok, 8 knots or so right down the runway. It was enough wind to make the unseasonably warm day just chilly enough to remind you that it is, in fact, still January. It's hard to complain about weather like this in January, but I do wish I had worn a slightly warmer coat!
The flight to Urbana was nice, although I was a little disappointed in the 130 knot airspeed. It sure didn't take me long to get spoiled - the Tampico could get up to 130 knots, but it could only sustain it for as long as it takes a plane in a vertical dive to hit the ground. And here I am now, griping because that's the fastest I could go in level flight!
 Parked for brunch.
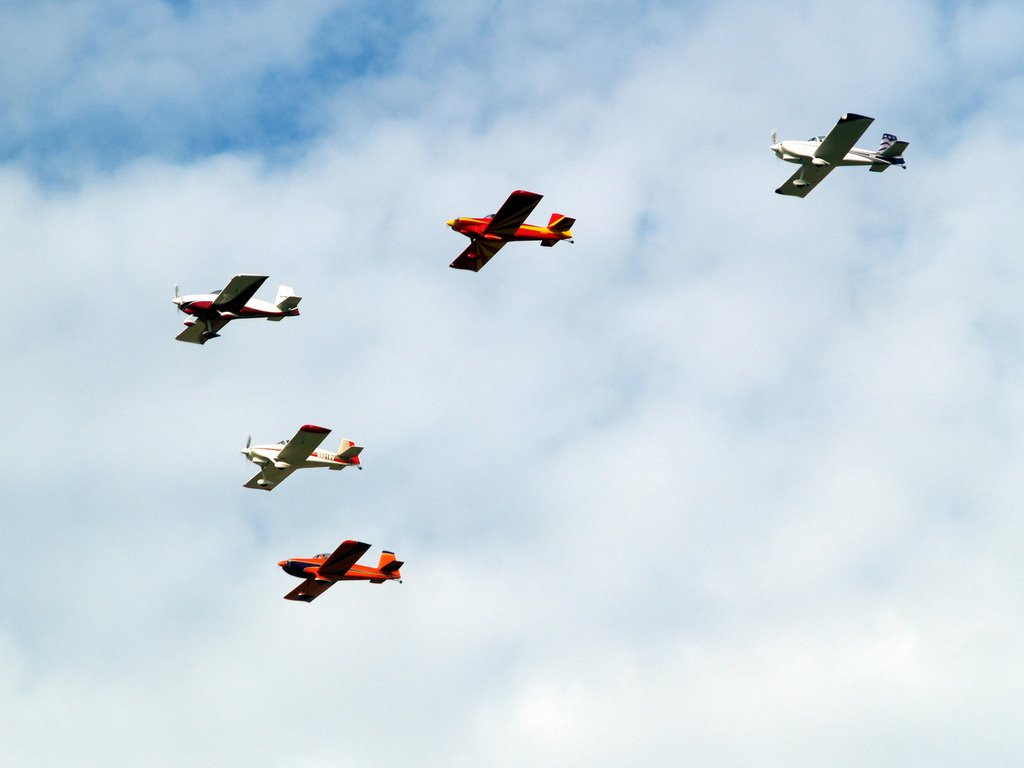
After we ate, a portion of the formation crowd went out to do their thing:


I just love the sound of the five engines combined into a deep, throaty rumble. It sounds almost like a B-17 going over, and the way these guys fly a tight formation, the spacing of the engines is probably about the same as is would be on the wing of a b-17!
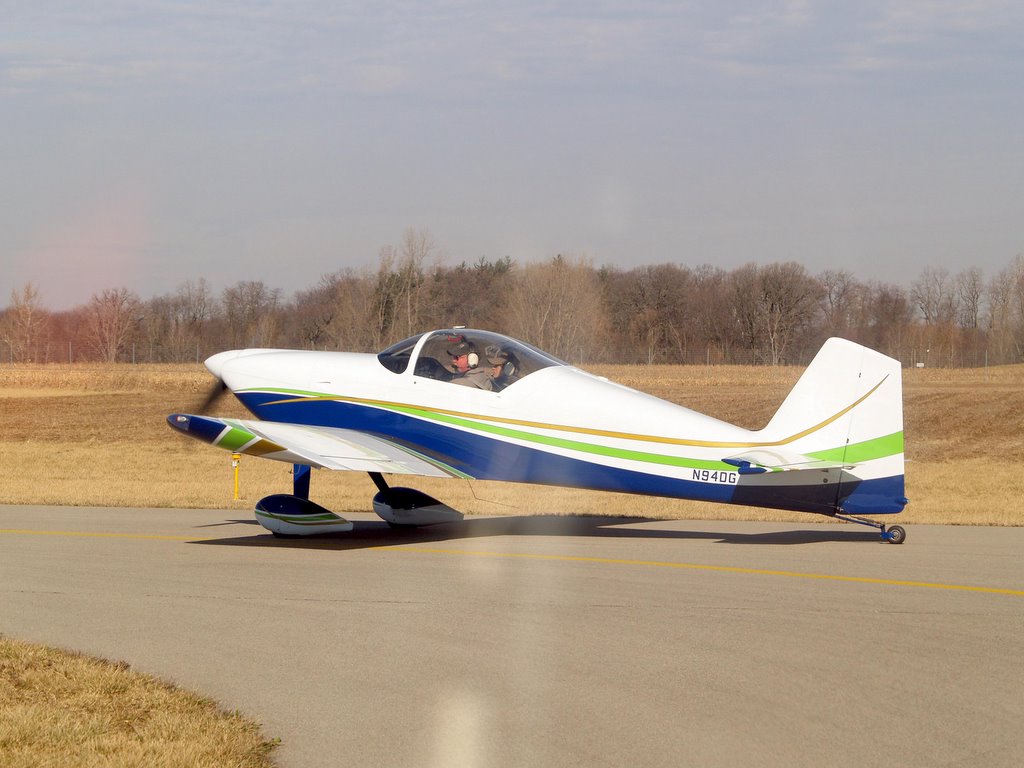
The other RV-6 at based at Bolton, which carries the unique distinction of being the nicest RV-6 I've ever seen, was lined up for takeoff just in front of me as I was leaving:

It's gorgeous, inside and out!
Both landings were good, despite the fairly windy conditions. Slowing down to 70mph on final has really made a big difference. It still feels horrible, but I'm getting used to it. I think the biggest factor of slowing it down a bit is that the elevator isn't quite as effective, so I don't have the tendency over-flare like I used to. Flaring too early to too much leaves you dangling over the runway, just waiting for the bottom to fall out. You either get into a porpoising problem where you just keep bouncing down the runway, or you get such a humongous drop to the runway that your first reaction is to look over at the wings to see if the landing gear came all the way through the top, or just left a dent.
It's after 2pm now and the sun is still out, despite the dire predictions from the weather guessers. It's over 50 degrees, so I think I'll get the new bike out and get some exercise.
The flight to Urbana was nice, although I was a little disappointed in the 130 knot airspeed. It sure didn't take me long to get spoiled - the Tampico could get up to 130 knots, but it could only sustain it for as long as it takes a plane in a vertical dive to hit the ground. And here I am now, griping because that's the fastest I could go in level flight!
 Parked for brunch.
After we ate, a portion of the formation crowd went out to do their thing:

I just love the sound of the five engines combined into a deep, throaty rumble. It sounds almost like a B-17 going over, and the way these guys fly a tight formation, the spacing of the engines is probably about the same as is would be on the wing of a b-17!
The other RV-6 at based at Bolton, which carries the unique distinction of being the nicest RV-6 I've ever seen, was lined up for takeoff just in front of me as I was leaving:
It's gorgeous, inside and out!
Both landings were good, despite the fairly windy conditions. Slowing down to 70mph on final has really made a big difference. It still feels horrible, but I'm getting used to it. I think the biggest factor of slowing it down a bit is that the elevator isn't quite as effective, so I don't have the tendency over-flare like I used to. Flaring too early to too much leaves you dangling over the runway, just waiting for the bottom to fall out. You either get into a porpoising problem where you just keep bouncing down the runway, or you get such a humongous drop to the runway that your first reaction is to look over at the wings to see if the landing gear came all the way through the top, or just left a dent.
It's after 2pm now and the sun is still out, despite the dire predictions from the weather guessers. It's over 50 degrees, so I think I'll get the new bike out and get some exercise.
Thursday, January 26, 2006
Another Oshkosh picture
I was looking through my Oshkosh pictures and came across this one, never before seen by the general public:

I like taking pictures tight on the nose like this since it's the only way you can get a picture that doesn't have a noisy, airshow background.

I like taking pictures tight on the nose like this since it's the only way you can get a picture that doesn't have a noisy, airshow background.
Wednesday, January 25, 2006
Tonight's topic: precision measurement
It was a far more cerebral night than usual tonight. Our discussion for tonight had to do with precision measurement tools like micrometers and calipers. Micrometers measure down to .0001", but require meticulous practice and attention to detail to make a consistent measurement. Calipers measure down to .001", an order of magnitude less precision, but are easier to use consistently.
Size matters too. Calipers can measure up to 6.000", while a typical set of three micrometers ($39, Harbor Freight) will have three sizes, ranging in measure-width from 1" to 3".
Older style vernier calipers are tricky to read. I bought a dial caliper instead (on sale for about $14 at Harbor Freight) and have found it much easier to use. The FAA remains certain that we shall all be thrown 80 years back in time at any moment so mandates that we demonstrate the ability to read vernier calipers, but it's not likely that I'll ever need to do it. At least I can explain it to Rick now.
The micrometers take a little effort to read, too, but with a little practice it gets a lot easier. For another $20 or so, I could probably have gotten one with a digital electronic readout, but I kind of like the mechanical style. They have a nice feel to them, tactilely exuding an aura of supreme confidence in their accuracy. We won't really be using them much until engine shop, but as tonight's small class perk, we went to the engine shop to measure stuff. We get to do a lot more than the day classes do, and it really makes the time fly by. Of course, the biggest benefit is that the depth of discussion goes far deeper than what you could do in a 30 student class. It's been a long time since I've had such an interesting and thorough educational experience and I'm enjoying every minute of it!
Tonight was my first visit to the engine shop, and it has me re-considering whether I want to try to take only airframe classes in a rush to get at least half of the A&P done, which had been my previous plan. Now I'm wondering if I should just take the classes that would be of interest to me in either category, and save the stuff that's really not applicable to what I want to do with the certificate until later. The engines sure looked intriguing - I wanted to dig right in!
It's kind of a shame that the FAA doesn't distinguish between piston and turbine in the powerplant certificate. All the turbine engine stuff is going to be a waste for me, at least in my current thinking. It's hard to imagine how I could ever end up working on a jet engine. It'll still be interesting, though, and I guess there's no big hurry on the ratings. That said, considering what the classes cost, if the jet stuff was optional I wouldn't take it.
The administrator of the aviation program is coming to talk to us next week about scheduling. Since there are so few night students (the school takes a loss at anything under 13 students), he wants to talk to us about what classes to schedule for summer quarter to keep us all enrolled. I'm not sure what I want the most. Electrical would be the most useful when I start to build the new panel, but I already had that weekend class in October, and I think I learned everything I need to know to at least get started on the that. The one that I think I'd really like is aircraft structures. That's a big one - it takes two quarters to finish. I want to take it before they drop the fabric covering aspect of it, which they are talking about doing in the near future. It also covers construction techniques for sheet metal and composites, and I believe there's a section on welding too. I've always wanted to learn to weld, so that will be fun. If the rest of the class agrees, maybe I could take it for summer and fall.
Monday, January 23, 2006
Ok, enough with the safety wiring already...
It was a clear, sunny afternoon so I squeezed a flight in between work and school. The fuel tanks were low after the trip to Columbiana County and I don't like to let them stay at anything less than full in the winter, the conventional wisdom being that to do so is an invitation to condensation in the tanks. Tinfoil hat wearers may believe that engines would run on water if Halliburton would just stop killing off the scientists that know how, but the reality is that condensation in the tanks is a very bad thing. Or so I've been told. Does it matter? The plane needed gas and it was a pretty day, so I jumped over to MadCo to fill up. Just for the record, fueling up at MadCo, flying to and from Columbiana County, and returning to MadCo for more gas burned a total of 21.8 gallons. I'm not 100% sure of the economics of buying gas at MadCo rather than paying the higher price at Bolton, but again: it's an excuse to fly.
Nailed both landings. That alone maeks it worth it.
School was all work tonight. We started in the lab, where we learned to safety wire the turnbuckles that provide tension on control cables. I'd never done it before and I had been looking forward to it. Truth be told, now that I've done it, I think it would be nice to never do it again.
First of all, it requires using the thicker .041" wire, rather than the thinner and thus easier to work with .032" wire. Second, there's no fancy tool to make it easier. It's like learning to play the guitar: the wire hurts your fingers until you build up callouses. Third, and this didn't really become an issue until we went to the hangar to do it on planes, turnbuckles seem to be invariably buried deep in the hot, constrained bowels of the airplane.
The day classes don't do safety wiring on actual airplanes; that's a "benefit" reserved for us lucky night guys. Our instructor feels it important that we "get an appreciation" for what's it like in the real world. I jockingly asked if my five years on the Air Force flight line would allow me to test out of that, but no go. We all wandered around trying to pick an airplane that would have at least reasonably accessible turnbuckles. I started on the Comanche by removing the aileron bellcrank inspection plate (which came off quite willingly since it's probably been removed once a week for 30 years), but the turnbuckles there were very inaccessible, and actually saftied with clips rather than wire. I tried a greasy and very difficult to remove panel on the belly, but that only got me to the spar joint.
I finally gave up on the Comanche and moved to the Cessna 210 Centurion. This one had a rat's nest of an interior, the benefit of that being that the aileron cable turnbuckles were plainly visible inside the shredded headliner. Unfortunately, the cables run right up against the bottom of the wing, so there's very little room to work. The turnbuckles were all freshly safety wired, but the student prior to me had cheated and used .032 wire. No way I was going to be able to get away with that! It took 10 minutes and one very deep safety wire puncture in my finger to get the old wire removed. It took a very sweaty half hour to replace it. It looked pretty good, though, and it sure made the class fly by.
We didn't get to precision measurement tonight, which is kind of a shame since I've been practicing with the nice new micrometers I bought on my most recent unchaperoned visit to Harbor Freight. Wednesday will come soon enough, though, and it really was fun to do some challenging work in the hangar.
Sunday, January 22, 2006
Columbiana County
Today I made one of those trips that really show the value of a fast, efficient airplane. Co-pilot Egg and I flew up to Columbiana County (02G) to visit my little sister and her family. Normally, this would entail a three hour drive each way, and as driving has joined other things on the list of things I never thought I'd get sick of, but have, it's a trip I don't make nearly as often as I should. Papa Golf can do it in just under an hour.
I got to thinking about the economics of trips like this. The last 50 hours of flying Papa Golf has shown me that I can pretty reliably plan on burning 8.5 gallons for every hour of flight. I could probably improve on the a little bit by leaning the mixture more agressively, but without any kind of engine temperature gauges like cylinder head temp or exhaust gas temp, I don't like to. So, straight line from Bolton to 02G is 123 miles. Add 5 miles for going around the Columbus Class C airspace and you get pretty close to 130 nautical miles. It took .9 of an hour to get there (54 minutes), so I burned an estimated 7.65 gallons of gas. That works out to about 17 nautical miles per gallon, which is about 19.5 statute miles. My Subaru would probably have gotten 22 - 24 miles per gallon for that trip, so a comparison of 19.5 isn't too bad. Of course, this doesn't really paint an accurate picture of the associated costs since I don't burn $2.25/gallon auto gas in the plane, although I could if I wanted to. The gas I'm burning costs $3.35/gallon.
So, it costs a bit more, but as one that will always choose to pay for convenience if the perceived benefit is high enough, it's worth it to me.
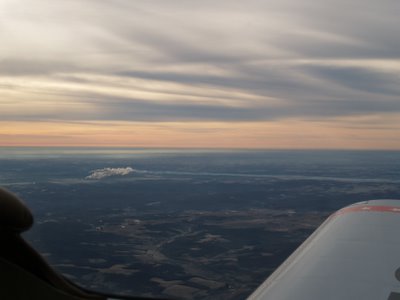
The weather was flyable, but it wasn't the prettiest of days. It actually seemed pretty gloomy. Witness this picture of what appears to be an albino golf course:

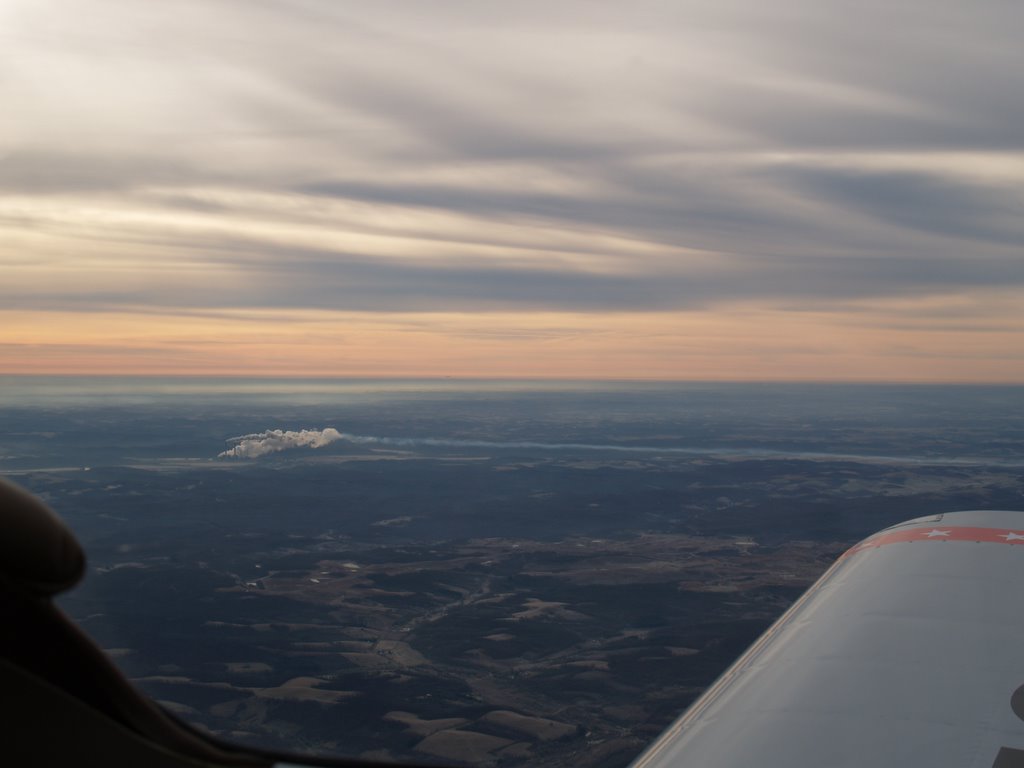
The hundreds of square miles we could see from 5,500' all seemed to have this blanched, gloomy look. Here's another gloomy shot:
The air was very smooth, though, and the visibility was at least ten miles, so it was a pleasant enough flight. The airport (02G) is surrounded by hills, and the hills are often topped with high tension power lines and the accompanying towers, so it's not one of my favorites on take-off. Every now and then, you just have to trust your airplane. Places like Put-in-Bay, Kelleys Island, or airports surrounded by wooded hills or dense housing don't offer a lot of options if you have some kind of engine problem on take-off, and Columbiana County is definitely on that list. I've said it before, and I said it again today: I love a 200 hour engine!
I got to thinking about the economics of trips like this. The last 50 hours of flying Papa Golf has shown me that I can pretty reliably plan on burning 8.5 gallons for every hour of flight. I could probably improve on the a little bit by leaning the mixture more agressively, but without any kind of engine temperature gauges like cylinder head temp or exhaust gas temp, I don't like to. So, straight line from Bolton to 02G is 123 miles. Add 5 miles for going around the Columbus Class C airspace and you get pretty close to 130 nautical miles. It took .9 of an hour to get there (54 minutes), so I burned an estimated 7.65 gallons of gas. That works out to about 17 nautical miles per gallon, which is about 19.5 statute miles. My Subaru would probably have gotten 22 - 24 miles per gallon for that trip, so a comparison of 19.5 isn't too bad. Of course, this doesn't really paint an accurate picture of the associated costs since I don't burn $2.25/gallon auto gas in the plane, although I could if I wanted to. The gas I'm burning costs $3.35/gallon.
So, it costs a bit more, but as one that will always choose to pay for convenience if the perceived benefit is high enough, it's worth it to me.
The weather was flyable, but it wasn't the prettiest of days. It actually seemed pretty gloomy. Witness this picture of what appears to be an albino golf course:

The hundreds of square miles we could see from 5,500' all seemed to have this blanched, gloomy look. Here's another gloomy shot:
The air was very smooth, though, and the visibility was at least ten miles, so it was a pleasant enough flight. The airport (02G) is surrounded by hills, and the hills are often topped with high tension power lines and the accompanying towers, so it's not one of my favorites on take-off. Every now and then, you just have to trust your airplane. Places like Put-in-Bay, Kelleys Island, or airports surrounded by wooded hills or dense housing don't offer a lot of options if you have some kind of engine problem on take-off, and Columbiana County is definitely on that list. I've said it before, and I said it again today: I love a 200 hour engine!
Wednesday, January 18, 2006
Back to School - more safety wiring
We finished up (well, almost) safety wiring tonight by heading out to the hangar and finding poor safety wire jobs on some of the planes and re-doing them. Practicing in the classroom is one thing, working on an actual plane is another. I knew that, of course, since I've been safety wiring since way back in my air force days. Still, it was fun to try to find challenging areas on the planes to fix. We spent quite a bit of time doing that, then went back to the classroom to start talking about precision measurement devices such as micrometers and calipers. We'll dig deeper into that next Monday. We will also visit safety wiring one more time as we tackle the subject of safety wiring turnbuckles. That's something I've never done, so I'm looking forward to it. In the meantime, I snagged a few pieces of scrap aluminum to take to my hangar and practice drilling holes. I picked up a cheap pneumatic drill at Harbor Freight and a nice collection of 110 drill bits to go with it. It's not a super nice drill, but it will work well enough for practice and any holes I may end up needing to drill.
Sunday, January 15, 2006
Over the rivers and over the woods, la la-la-la la la-la...
One of my favorite and most common day trips is to Darke Co. Versailles airport (KVES), 67 nm to the west of Bolton. This airport is only five miles from my parents' house so it's a convenient way to visit if I don't want to spend 3 hours on the road.
I've finalized my new cold weather starting routine. It was below 30 degrees this morning and the plane has been on the preheater for the last two days, and the rule for that is two shots of primer. Had it not been on the preheater I would have given ot three shots. Temps in the teens require three shots if the preheater has been on, and it's a no-go if not. One of the great things the builder did was put prime lines on every cylinder, so it's a pretty safe bet that at least one of them will fire within two or three blades. Once one gets going, the rest will soon follow.
I've been making this trip for a long time. In fact, it was the first trip I took after I finally got my license. Back then I didn't have GPS, so I got in the habit of going over Urbana-Grimes airport on the way to ensure that I was sufficiently north of the controlled airspace around Dayton International. Now that I have a good moving map GPS, I've found that I can to direct from TZR to VES without worrying about encroaching Dayton's airspace. I really just recently started doing this, so that's why I probably never noticed this barn about 8 miles southeast of Urbana:

That, or it's new. Could be either, I suppose. Even today I didn't notice it until I was already past it and saw it in my peripheral vision as I was doing a horizon scan. The beauty of VFR flight in a little fighter like the RV is that it was a simple matter to turn around and go back for a picture.
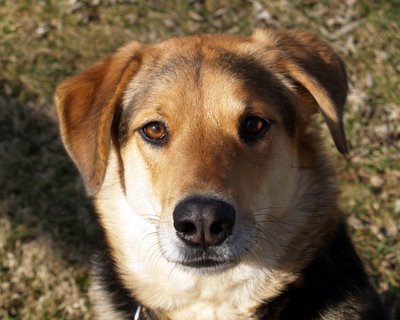
I also took a few shots while walking around the farm with Faygo, who isn't really much of a camera hound (it was pure luck that I managed to get this shot - she insisted on profiles) but is clearly photogenic:
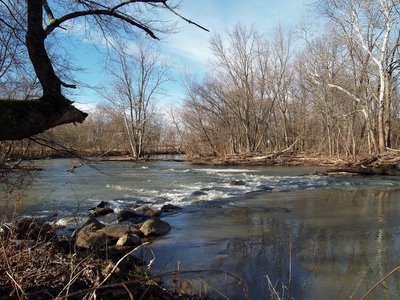
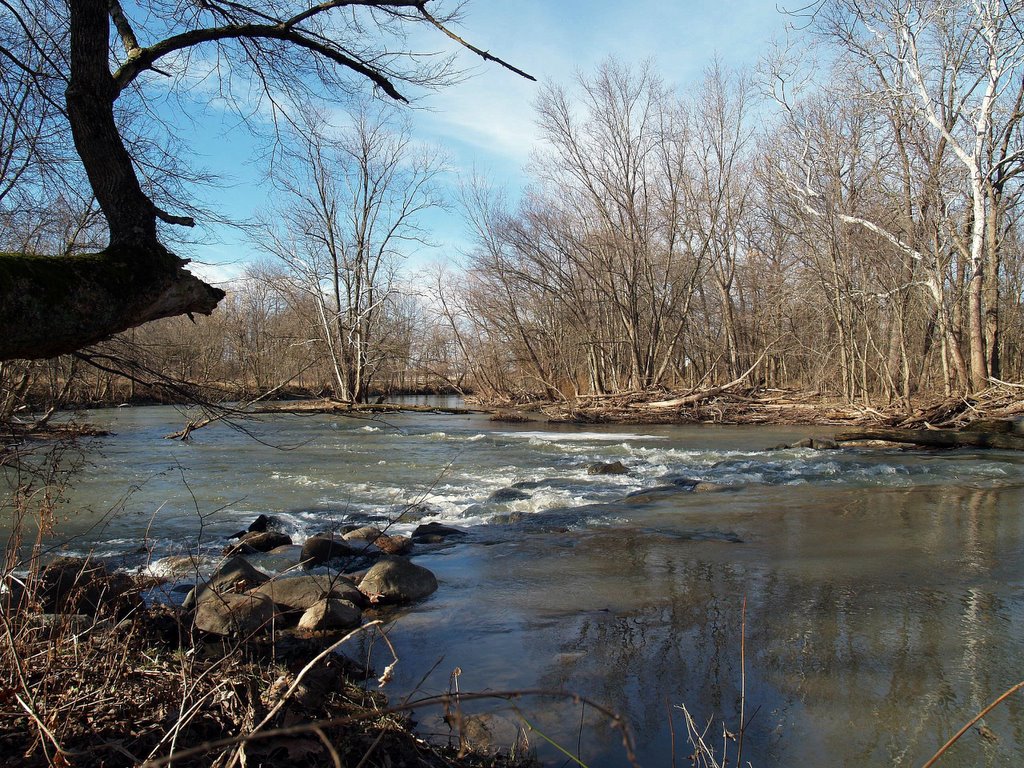
This is the falls. We didn't get it done last year, but this is normally the place where we try to camp at least once a year. I'm not sure if it comes out in the picture, but what caught my eye was the vibrance of the bare sycamore (?) trees:
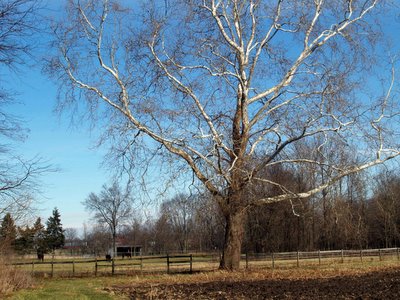
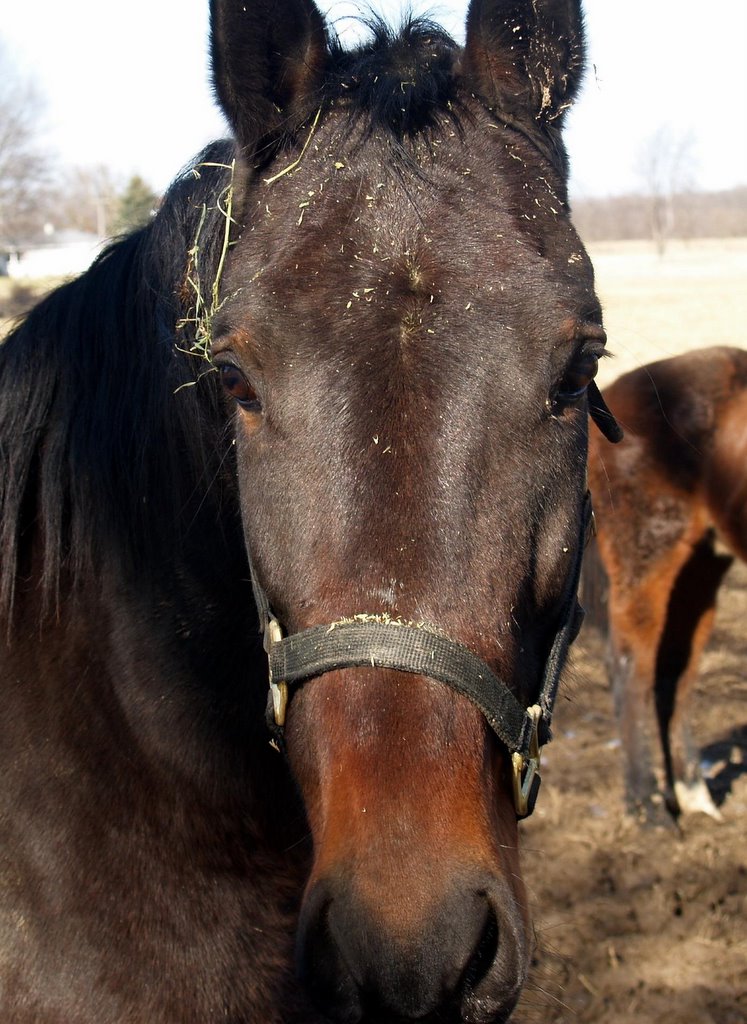
This tree caught me in pretty much the same way. It seemed to dominate the entire landscape around it, but I wanted to get a few of the horses in there too so that it wasn't just a picture of a tree:
As we continued our walk, Faygo and I came across this insolent fellow:

Discretion being the better part of valor, we agreed to give him a wide berth to avoid trouble.
It was a very nice ride both ways. What few clouds we had were in the 20,000' range, so I was able to climb high enough to get out of the light chop below 4,000'. This is finger-tip cruising weather - the ride is so smooth that I can just lightly press a couple of fingers against the stick to maintain control. Also of note were the two excellent landings. The first was, of course, at KVES, one of those airports that never treats me fairly. No matter what the prevailing wind is every where else, it is a direct crosswind at the approach end of runway 27. And gusty. Always gusty. Today, though, I had a very, very good landing. I assumed that meant I had caught my limit and the return at Bolton would exact Karmic revenge, but apparently I'm running a tab. The landing back at Bolton reminded me of dropping a feather onto a pillow. Extra points for greasing one in front of a waiting Taylorcraft, itself being a taildragger and all.
And best of all, I was back in time to watch the 4th quarter of the Steelers-Colts game!
I've finalized my new cold weather starting routine. It was below 30 degrees this morning and the plane has been on the preheater for the last two days, and the rule for that is two shots of primer. Had it not been on the preheater I would have given ot three shots. Temps in the teens require three shots if the preheater has been on, and it's a no-go if not. One of the great things the builder did was put prime lines on every cylinder, so it's a pretty safe bet that at least one of them will fire within two or three blades. Once one gets going, the rest will soon follow.
I've been making this trip for a long time. In fact, it was the first trip I took after I finally got my license. Back then I didn't have GPS, so I got in the habit of going over Urbana-Grimes airport on the way to ensure that I was sufficiently north of the controlled airspace around Dayton International. Now that I have a good moving map GPS, I've found that I can to direct from TZR to VES without worrying about encroaching Dayton's airspace. I really just recently started doing this, so that's why I probably never noticed this barn about 8 miles southeast of Urbana:
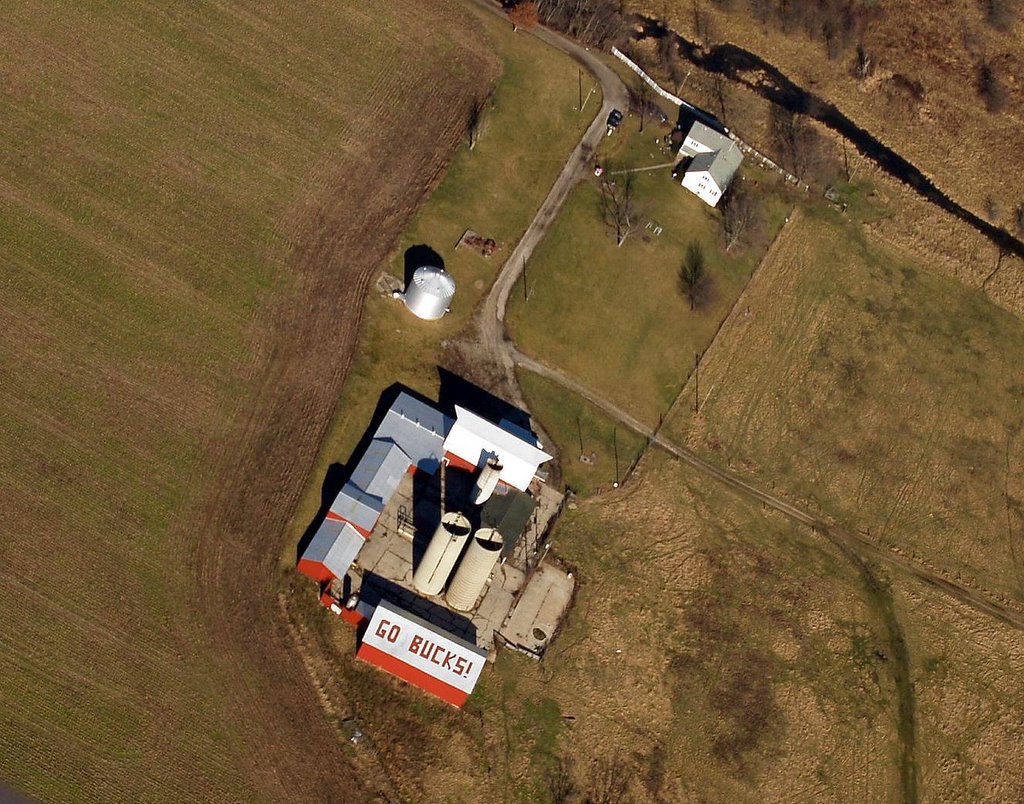
That, or it's new. Could be either, I suppose. Even today I didn't notice it until I was already past it and saw it in my peripheral vision as I was doing a horizon scan. The beauty of VFR flight in a little fighter like the RV is that it was a simple matter to turn around and go back for a picture.
I also took a few shots while walking around the farm with Faygo, who isn't really much of a camera hound (it was pure luck that I managed to get this shot - she insisted on profiles) but is clearly photogenic:

This is the falls. We didn't get it done last year, but this is normally the place where we try to camp at least once a year. I'm not sure if it comes out in the picture, but what caught my eye was the vibrance of the bare sycamore (?) trees:
This tree caught me in pretty much the same way. It seemed to dominate the entire landscape around it, but I wanted to get a few of the horses in there too so that it wasn't just a picture of a tree:

As we continued our walk, Faygo and I came across this insolent fellow:
Discretion being the better part of valor, we agreed to give him a wide berth to avoid trouble.
It was a very nice ride both ways. What few clouds we had were in the 20,000' range, so I was able to climb high enough to get out of the light chop below 4,000'. This is finger-tip cruising weather - the ride is so smooth that I can just lightly press a couple of fingers against the stick to maintain control. Also of note were the two excellent landings. The first was, of course, at KVES, one of those airports that never treats me fairly. No matter what the prevailing wind is every where else, it is a direct crosswind at the approach end of runway 27. And gusty. Always gusty. Today, though, I had a very, very good landing. I assumed that meant I had caught my limit and the return at Bolton would exact Karmic revenge, but apparently I'm running a tab. The landing back at Bolton reminded me of dropping a feather onto a pillow. Extra points for greasing one in front of a waiting Taylorcraft, itself being a taildragger and all.
And best of all, I was back in time to watch the 4th quarter of the Steelers-Colts game!
One of my classics

I snapped this old Bonanza at a grass runway airport near Waynesville, OH. I ran it through a photo editor and applied an oil paint filter. I'm planning on getting it printed onto canvas-like art paper at Kinkos.

Wednesday, January 11, 2006
Back to School - Night Three
It was a bit of a rush to get from the airport to class on time as my flight back from a business meeting in Dallas didn't land until after 4:30 and class starts at 6:00. The topics of discussion tonight were still tools. Tonight we talked about wrenches, including torque wrenchs.
The lab work tonight started with the proper way to remove screws. Like I said before: you probably think you know how to remove a screw, but you might be surprised at some of the things you've been doing wrong, at least as far as the FAA is concerned. For example, I didn't know that the proper way to remove a screw involves turning the screwdriver so that the teeth are engaged, then starting out with a sharp rotation. This is as opposed to a smooth application of torque. The idea is to break the screw loose before it has a chance to round the slots. The same method is used, albeit with a wrench, to remove a spark plug. I got to remove the bottom plug from cylinder one of an IO-540 that they have on a test stand. It was pretty easy, probably because that plug gets removed roughly 30 times a month.
From there we moved on to safety wiring. On this topic I thought I was on a pretty solid footing, considering that I had been trained by the Air Force to do saftey wiring on the SR-71. Still, there was a new twist. (Pun intended. HA! I just crack me up!!) Rather than jump right in and use safety wire pliers, we did the first few by hand. I had never done that before, and truth be told, I hope never to do it again. It's not much fun to do by hand, and doing so certainly convinced me that a good pair of safety wire pliers are by no means a luxury tool. I consider them a must-have. Which, of course, begs the question of why the school doesn't have any! Good thing I stopped by the hangar and picked mine up!
No school again until next Wednesday. Hopefully I'll get some flying done in the meantime. This mechanic stuff is fun, but I still miss flying.
Monday, January 09, 2006
Back to School: Night 2
This was the first real night of class - the full four hours. The FAA, understandably, has to assume that you may have never seen a hand tool before, so we had to go through the four major categories: holding, cutting, turning, and pounding.
You would think this would be pretty dull, but you'd be surprised to learn that you have probably been using at least one tool incorrectly for your entire life.
Interspersed with the lecture discussion were trips to various shops and to the hangar to look at examples of various tools and airplane features. Finally, we were ready to actually pick up some tools and do a little lab work. Tonight we worked on center punching aluminum and drilling straight holes through it with a pneumatic drill. The center punch is intended to put enough of a dimple in the aluminum to keep the drill bit from "walking" as you start to drill the hole. For the most part my holes were nice and straight, but one was pretty embarassing: I could still see the mark from the center punch! That's a pretty bad miss!
We talked a little bit about riveting, in the context of oversize holes leading to very bad riveting. As a pilot, the instructor thought it interesting to point out that most airplane wings are only flush riveted on the first 1/3 back from the leading edge. This is where the air over the wing is still laminar, or "attached" to the wing skin. Flush riveting here reduces drag. Further back on the wing where the air has separated, most manufacturers will not use flush rivets because it is more expensive and time consuming, and offers no benefit in return.
Interestingly, the wings on the RV are flush riveted all the way back to the trailing edge, as is the fuselage. There's no aerodynamic benefit to this that I know of, but it sure looks good!
As part of the hole drilling exercise, I asked the instructor about deburring the holes and the edges of the piece of scrap aluminum I was working with. I wanted to try this out since I will be doing a lot of this when I fabricate the new instrument panel. I had also hoped to try out a fly-cutter on a drill press, but that's a later lesson. The fly-cutter is a somewhat intimidating bit that I'll have to use to drill the 3 3/4" holes for the round instruments. I'd also like to practice a little with tin snips since I will need to cut rectangular holes for the radios, GPSs, and VM1000. Hopefully that will come in a later class as well. And I did confirm that we will be learning to rivet, too. This just gets better and better!
Saturday, January 07, 2006
More thoughts on the panel
I'm still very comfortable with the additional electronics to add to my panel - the safety issues alone justify their cost. Contrast this with the other additions I considered such as replacing the gyro and pitot/static instruments with new solid state electronic stuff. The gyros are good enough for a day VFR plane, and that's what I consider Papa Golf to be. Deciding to ditch the King 89b and put both a new 396 and my existing 296 in the panel, however, might be a bad idea.
I originally thought the 89b would just be dead weight since having two other GPSs to use would really relegate the King to wasted panel space. I figured I'd get more utility out of a map box. I'm re-thinking that now, though.
I want to leave my options open for a Trio Ez-Pilot autopilot or similar, should I ever decide to buy one. This means I will need to reserve space for the control head, and it means that I will have to keep the 89b. The beauty of these new autopilots is that they are not based on inputs from the mechanical gyros, instead using a single onboard solid-state gyro. Mechanical gyros are to some degree somewhat untrustyworth, so removing them as a point of failure for the autopilot is nice.
To supplement the solid-state gyro, the autopilot uses GPS inputs. The 89b, being a true panel mount GPS, provides the outputs required by the autopilot. The Garmins I have do not. I still like the idea of having the 296 and the 396 since they both have nice color moving map screens, so to have all three GPSs I will have to forget about the map box. I also need to reserve space for a the control head.
Like so:
Update:
I forgot that the EZ-Pilot replaces the mechanical turn coordinator too. That looks like this:
The old turn coordinator would work well as eBay fodder.
I originally thought the 89b would just be dead weight since having two other GPSs to use would really relegate the King to wasted panel space. I figured I'd get more utility out of a map box. I'm re-thinking that now, though.
I want to leave my options open for a Trio Ez-Pilot autopilot or similar, should I ever decide to buy one. This means I will need to reserve space for the control head, and it means that I will have to keep the 89b. The beauty of these new autopilots is that they are not based on inputs from the mechanical gyros, instead using a single onboard solid-state gyro. Mechanical gyros are to some degree somewhat untrustyworth, so removing them as a point of failure for the autopilot is nice.
To supplement the solid-state gyro, the autopilot uses GPS inputs. The 89b, being a true panel mount GPS, provides the outputs required by the autopilot. The Garmins I have do not. I still like the idea of having the 296 and the 396 since they both have nice color moving map screens, so to have all three GPSs I will have to forget about the map box. I also need to reserve space for a the control head.
Like so:

Update:
I forgot that the EZ-Pilot replaces the mechanical turn coordinator too. That looks like this:
The old turn coordinator would work well as eBay fodder.
Wednesday, January 04, 2006
Back to School - First Night
I had the first night of A&P classes tonight. It was pretty light - mostly an introduction to the program, the implications of being an FAA Part 147 school, and a read-through of the curriculum. I had to buy books ($152 worth!) and we have a reading assignment for Monday. They say it's mostly hands-on, though, which I prefer.
The instructor is a pilot, and a very experience one at that. He has a Cessna Citation type rating, ATP, CFII, multi, yada yada yada. He owns a Piper Super Cub that he keeps hangared at Bolton. He's been teaching the A&P program for 16 years, and in fact taught my favorite mechanic over at Bolton. We had a nice chat about the RV-6, flying to Oshkosh, the joys of maintaining our own planes, and all kinds of other aviation related stuff.
It's a small class, only six students. Two of them are older than me. One is a pilot that wants to take a few classes and just learn more about how the plane works, thinking (correctly, in my opinion) that it will make him a better, safer pilot. The other has a long background in electronics and avionics, and says he takes the classes simply because he enjoys them.
The younger guys are more career oriented. One doesn't really care about planes; he wants to get on a good race team as a machanic. That makes more sense than you may realize - the tools and techniques are very similar. There's a 19 year old that is really into cars, and works at a local BMW dealer. The third is looking to get on with a major airline.
The curriculum looks great! Lot's of tool stuff, fabricating fluid lines, and non-destructive inspection techniques. All very applicable to maintaining the RV, so worth doing even if I never finish the program. Truth be told, though, I think I'm going to enjoy this so much I'll have the rating before I know it. I can easily see doing this for the next four years. Fascinating stuff!
It's GIMPtastic!
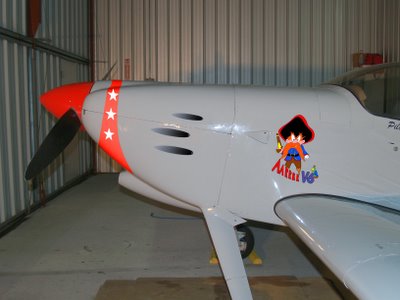
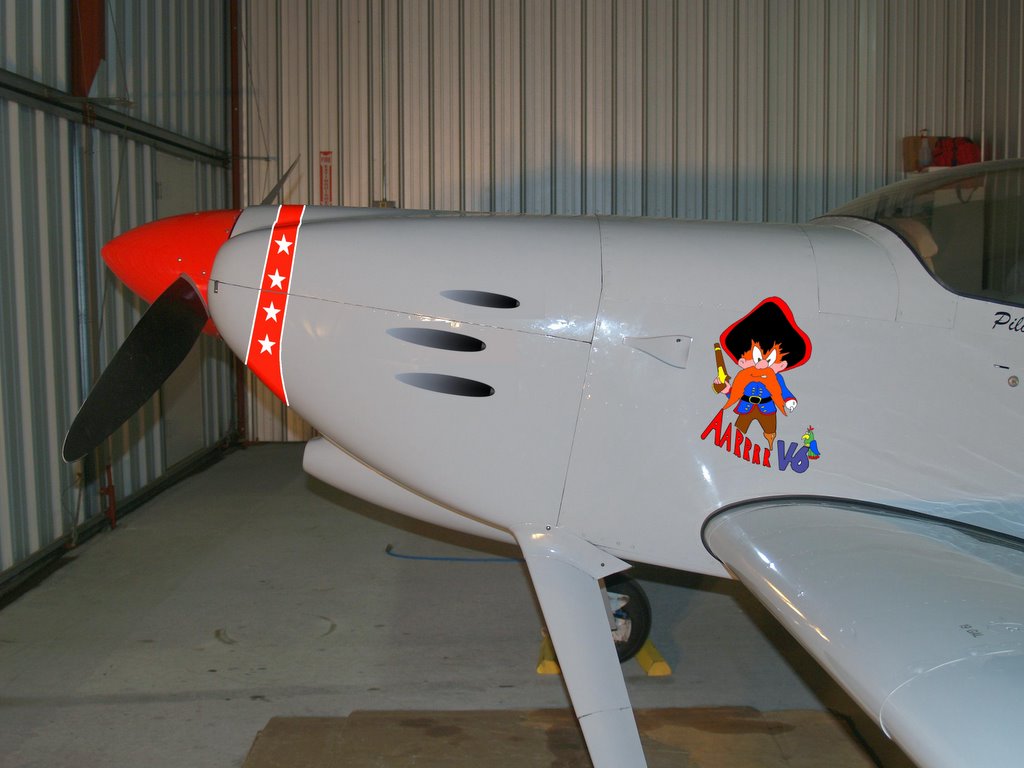
Courtesy of Tom Webster, a local RV builder and graphic artist, I have really nice gun port images. I put those one a not-so-great picture of Papa Golf, along with the red stripe that I really think it needs, and the pirate. The gunports and pirate would go on as vinyl decals, but I think I'd paint the stripe.
So, here it is, love it or hate it:

The more observant long-time readers of this blog will have noticed that the pirate "nose art" isn't actually on the nose. I'm ok with that, though, because upon further review, I have found indisputable video evidence that this is appropriate (although it also indicates that I have more work to do on the shape and width of the stripe):


Actually, I'm not sure I should copy the F-86's stripe exactly as it is. The rest of the red stripes on the RV are pretty narrow, and I think I'd be better off staying with that style. We'll see. I'll GIMP it around some more and see if I can come up with a good compromise.
I also wonder how the pirate would look with that red half-ellipse under it...
Eh, I don't know how to draw a half ellipse, but I did take another shot at the stripe:
So, here it is, love it or hate it:
The more observant long-time readers of this blog will have noticed that the pirate "nose art" isn't actually on the nose. I'm ok with that, though, because upon further review, I have found indisputable video evidence that this is appropriate (although it also indicates that I have more work to do on the shape and width of the stripe):
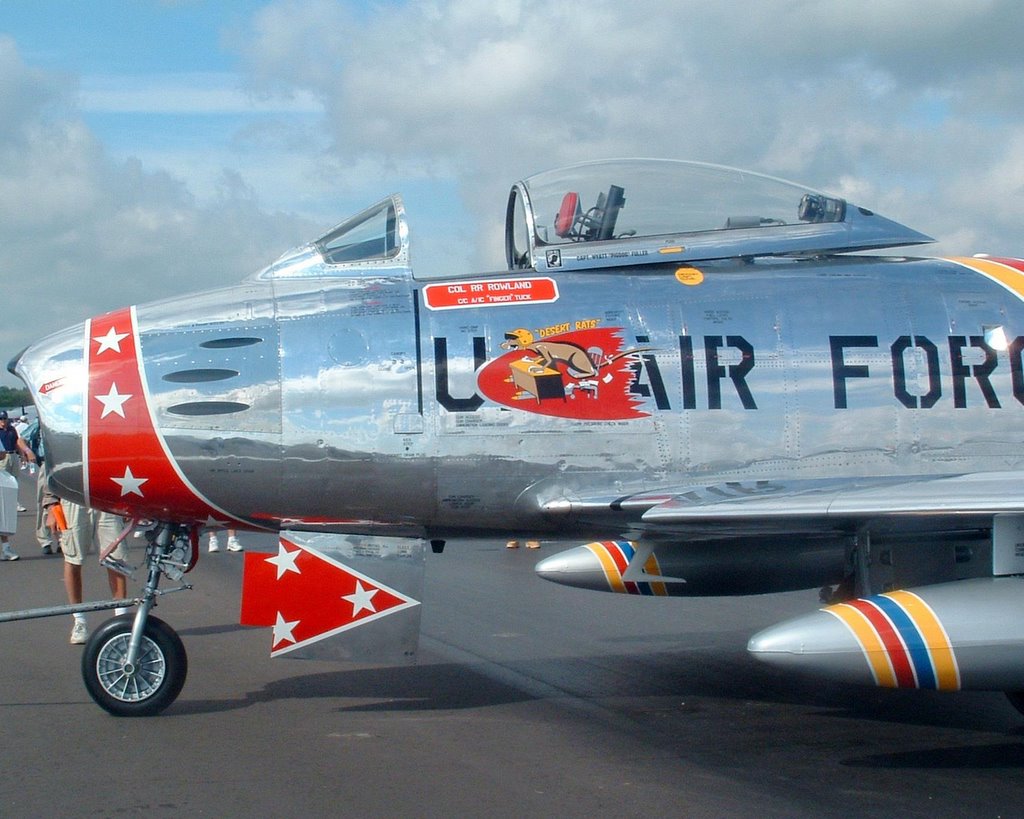

Actually, I'm not sure I should copy the F-86's stripe exactly as it is. The rest of the red stripes on the RV are pretty narrow, and I think I'd be better off staying with that style. We'll see. I'll GIMP it around some more and see if I can come up with a good compromise.
I also wonder how the pirate would look with that red half-ellipse under it...
Eh, I don't know how to draw a half ellipse, but I did take another shot at the stripe:

Monday, January 02, 2006
Thoughts about the panel
Even before I bought Papa Golf, I had been thinking about what I might want to do with the panel of ehatever RV I eventually bought. There are some really interesting things out there for Experimentals these days in both primary avionics and graphical engine monitors. The wildest dreams had me doing a full panel rebuild, using all of the modern "glass" boxes. In fact, one of the reasons I wanted a tip-up RV-6 is that the panel is screwed to the airframe using a couple of extended braces (more on that later) while other styles typically had the panel riveted in. A builder might consider drilling out the rivets to remove the old panel, but I'm not a builder. I'd rather concentrate on building a screw-in replacement panel.
After months of thought, I've finally designed the panel I think would best fit the mission of the airplane, which is a VFR airplane that could be asked to traverse 500 miles of weather in a single hop. I think back to my trip back from Oshkosh when I departed in great weather, but ran into a lot of low, scuddy clouds in Indiana. I could get over the clouds, but I didn't know for sure if conditions were clear in Ohio and I didn't want to get stuck on top and low on fuel when I got there. There are ways of getting an in-flight weather report, but are now better ways, and I decided that should be the first area to improve the panel.
The design I came up with adds another Garmin portable GPS to the Garm 295 I have now, and places both of them in flush mounts in the panel. This takes room that is currently occupied by engine instruments, so I also planned on replacing the engine gauges with a graphical engine monitor. That would not only free up a lot of space, it would afford me an acroos the panel improvement in the quality of my engine management and monitoring gauges. And, referring again back to my Oshkosh trip, I decided to include a fuel totalizer option so I'll have a far more accurate reading of how much gas I have left.
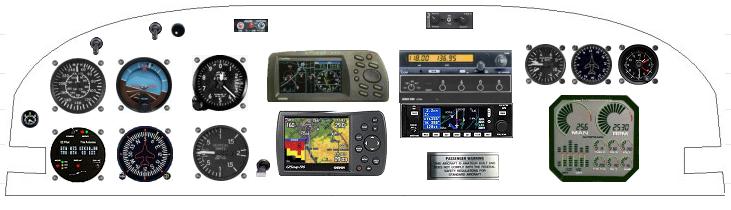
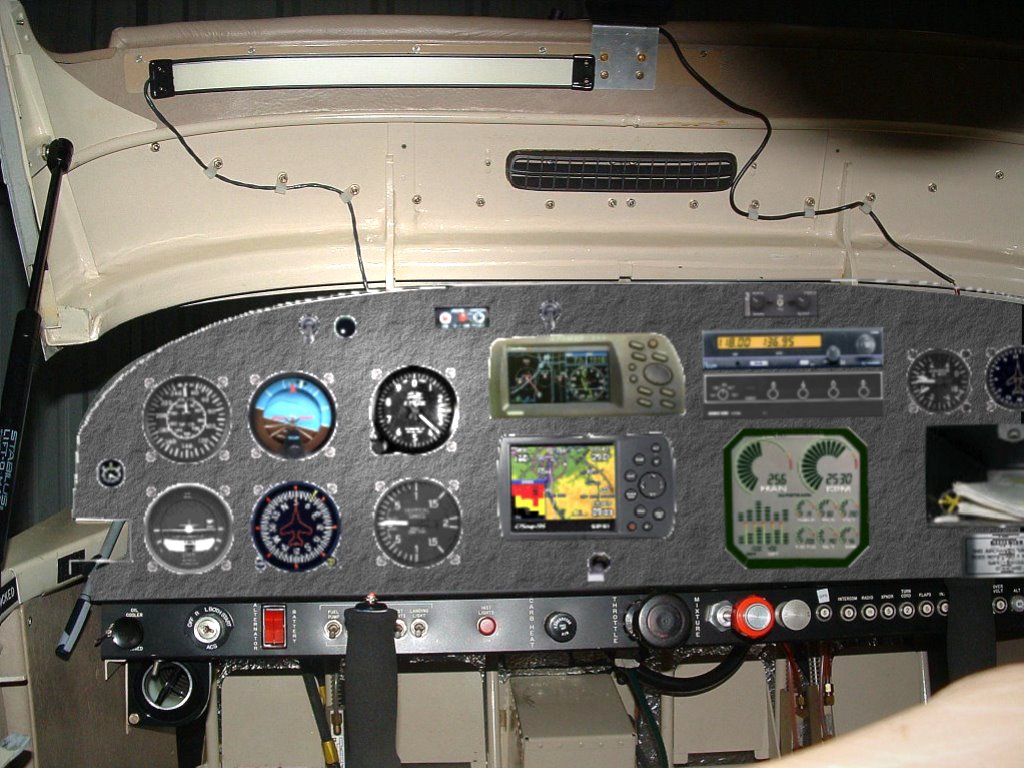
I used www.ePanelBuilder.com to sketch out the panel with the new instruments, then grabbed a screen shot of the new panel. I imported that into GIMP and painted it gray rather than black to make the instruments stand out a little better. I pasted that onto a picture of the current panel, but it looked pretty bland. GIMP has a nice rendering feature that let me kind of lighten it up and make it look more natural. I continue to be amazed not only at the powers of GIMP and the fact that it's absolutely free, but how useful it is in prototyping stuff for the plane!
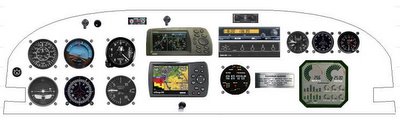
Here's the before and after:


The new panel carries over most of the stuff from the old panel, primarily in the interest of cost containment. I didn't bring over the old mag compass since I really prefer the vertical card model. In the new panel picture, I have the vertical card compass sitting on top of and between the attitude indicator and the altimeter.
The Garmin 295 that currently hangs from the canopy glare shield gets moved into a flush mount holder. Just below it is another flush mount holding a new Garmin 396. This is the first shockingly expensive new part. The benefits, however, are manifest and justify the $2500 price tag. The first and foremost benefit is the XM sattelite weather download. Having access to almost real-time NEXRAD radar and FAA weather observations right there in the plane is a huge safety deal. That alone would be worth the price, but the 396 also shows terrain elvations around where you're flying. I decided to put both the 296 and the 396 in the panel so I could use the 296 for the HSI display and the 396 for the moving map.
The repercussion of panel mounting the GPS units is that there is no room to keep all of the mechanical engine gauges. I looked at a lot of alternatives, and finally decided on the Grand Rapids Technology graphical engine monitor. It has everything currently on my panel plus more, but takes far less space. It's likely to be more accurate in a number of areas as well:

This is the second shockingly expensive decision. With the fuel flow option, this thing runs $3400. Yow! Bit again, the increased capabilites over what I have now in the critical area of engine management make that pill easier to swallow. Having both EGT and CHT measurements on all four cylinders is the only way to really know what's going on with your engine. The fuel totalizer is also a huge help in managing what's in the tanks and when it's time to get more.
I also think it would be instructive to do the installation of the panel and the related engine probes. In fact, this idea is competing for funding with the idea of restoring a Pitts biplane or something similar. One factor I'll have to consider is this: if I choose to spend this money on the RV, the cost is the cost. Once it's done, it's done. In rebuilding a Pitts, buying the plane is just the beginning. There will be thousands to spend on fabric, paint, tools, and engine parts, if not a complete major overhaul. One other consideration, though, is that I can't stretch out the panel project like I could the Pitts because I can't go that long without a flyable airplane.
Chances are I'll end up doing neither. But at least I'm getting better with GIMP!
Later:
I'm not sure why I kept the King KLN-89b GPS in the panel. I don't use it now, so I'm not very likely to start using it when I have the second Garmin. I suppose I could sell it on eBay, but I don't think I'd get much for it. Getting it out of the panel would probably free up enough space to move the engine monitor over to the left a bit, and might even free enough room for a map box. That would solve yet another problem: there's very little room to carry maps and other stuff in the cockpit.
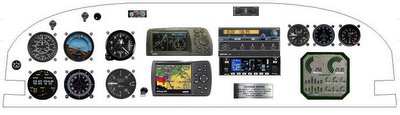
I also found a lower priced engine monitor:

It gives me everything I want, but for $1000 less.
A sloppy GIMP rendition of losing the King GPS, using the VM1000 instead of the GRT, and adding a map box:

After months of thought, I've finally designed the panel I think would best fit the mission of the airplane, which is a VFR airplane that could be asked to traverse 500 miles of weather in a single hop. I think back to my trip back from Oshkosh when I departed in great weather, but ran into a lot of low, scuddy clouds in Indiana. I could get over the clouds, but I didn't know for sure if conditions were clear in Ohio and I didn't want to get stuck on top and low on fuel when I got there. There are ways of getting an in-flight weather report, but are now better ways, and I decided that should be the first area to improve the panel.
The design I came up with adds another Garmin portable GPS to the Garm 295 I have now, and places both of them in flush mounts in the panel. This takes room that is currently occupied by engine instruments, so I also planned on replacing the engine gauges with a graphical engine monitor. That would not only free up a lot of space, it would afford me an acroos the panel improvement in the quality of my engine management and monitoring gauges. And, referring again back to my Oshkosh trip, I decided to include a fuel totalizer option so I'll have a far more accurate reading of how much gas I have left.
I used www.ePanelBuilder.com to sketch out the panel with the new instruments, then grabbed a screen shot of the new panel. I imported that into GIMP and painted it gray rather than black to make the instruments stand out a little better. I pasted that onto a picture of the current panel, but it looked pretty bland. GIMP has a nice rendering feature that let me kind of lighten it up and make it look more natural. I continue to be amazed not only at the powers of GIMP and the fact that it's absolutely free, but how useful it is in prototyping stuff for the plane!
Here's the before and after:

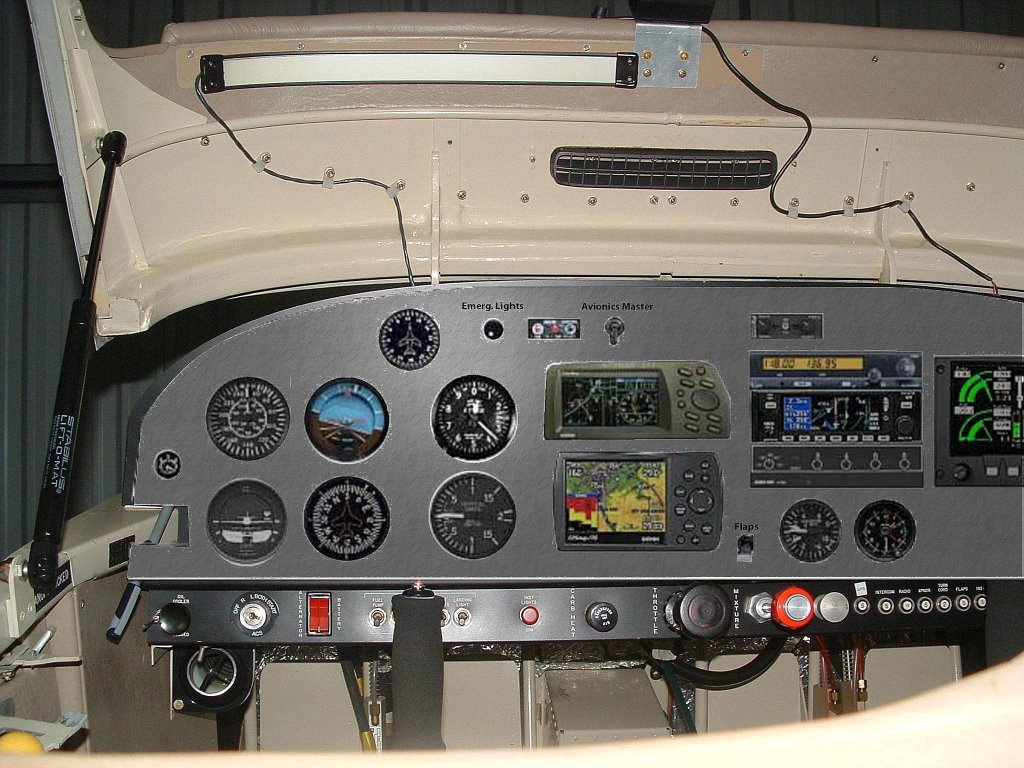
The new panel carries over most of the stuff from the old panel, primarily in the interest of cost containment. I didn't bring over the old mag compass since I really prefer the vertical card model. In the new panel picture, I have the vertical card compass sitting on top of and between the attitude indicator and the altimeter.
The Garmin 295 that currently hangs from the canopy glare shield gets moved into a flush mount holder. Just below it is another flush mount holding a new Garmin 396. This is the first shockingly expensive new part. The benefits, however, are manifest and justify the $2500 price tag. The first and foremost benefit is the XM sattelite weather download. Having access to almost real-time NEXRAD radar and FAA weather observations right there in the plane is a huge safety deal. That alone would be worth the price, but the 396 also shows terrain elvations around where you're flying. I decided to put both the 296 and the 396 in the panel so I could use the 296 for the HSI display and the 396 for the moving map.
The repercussion of panel mounting the GPS units is that there is no room to keep all of the mechanical engine gauges. I looked at a lot of alternatives, and finally decided on the Grand Rapids Technology graphical engine monitor. It has everything currently on my panel plus more, but takes far less space. It's likely to be more accurate in a number of areas as well:

This is the second shockingly expensive decision. With the fuel flow option, this thing runs $3400. Yow! Bit again, the increased capabilites over what I have now in the critical area of engine management make that pill easier to swallow. Having both EGT and CHT measurements on all four cylinders is the only way to really know what's going on with your engine. The fuel totalizer is also a huge help in managing what's in the tanks and when it's time to get more.
I also think it would be instructive to do the installation of the panel and the related engine probes. In fact, this idea is competing for funding with the idea of restoring a Pitts biplane or something similar. One factor I'll have to consider is this: if I choose to spend this money on the RV, the cost is the cost. Once it's done, it's done. In rebuilding a Pitts, buying the plane is just the beginning. There will be thousands to spend on fabric, paint, tools, and engine parts, if not a complete major overhaul. One other consideration, though, is that I can't stretch out the panel project like I could the Pitts because I can't go that long without a flyable airplane.
Chances are I'll end up doing neither. But at least I'm getting better with GIMP!
Later:
I'm not sure why I kept the King KLN-89b GPS in the panel. I don't use it now, so I'm not very likely to start using it when I have the second Garmin. I suppose I could sell it on eBay, but I don't think I'd get much for it. Getting it out of the panel would probably free up enough space to move the engine monitor over to the left a bit, and might even free enough room for a map box. That would solve yet another problem: there's very little room to carry maps and other stuff in the cockpit.
I also found a lower priced engine monitor:
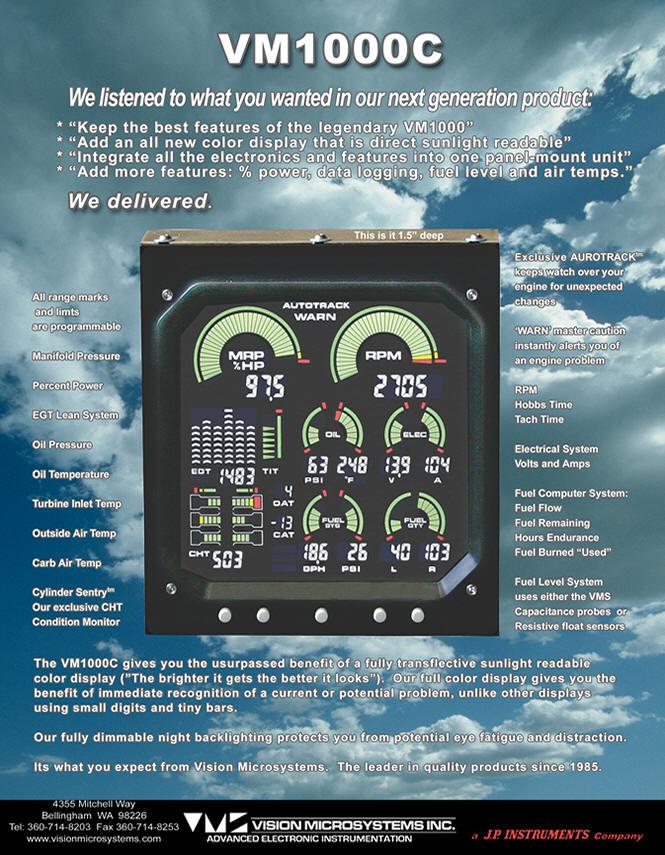
It gives me everything I want, but for $1000 less.
A sloppy GIMP rendition of losing the King GPS, using the VM1000 instead of the GRT, and adding a map box:
Sunday, January 01, 2006
I bounce so much, I should buy a trampoline!
The weather cleared enough today to let me get out and make some practice takeoffs and landings. I flew down towards southwest Ohio first, just to take a look at some of the scenery. It's hilly down there, and mostly wooded. It's a nice change from the completely flat area around Columbus.
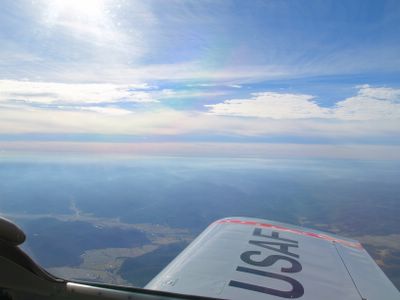
Nice sky!
My first landing at Madison Co. was an abomination. I flared it in from about 6' up, resulting in a series of very large bounces. These were the ones that are so high, you worry about letting the plane drop from up there. In cases like this, I give it a burst of power at the top of the bounce to flatten it out. This landing was a 3-burster: probably a new record. I wanted to buy gas while I was there, but didn't relish the idea of getting out of the plane in front of a group of guys that had at a minimum heard the commotion I was making out on the runway. I decided to taxi back, take off, and try another landing. On the way out, some character in a Cessna pulled out his hangar right in front of me. It's a terrible idea to get in front of a taildragger and expect the guy driving it to yield. Why? Because he probably can't see you!
The next landing was better, but still not good. The third was the charm. I think I was flaring too high on the first two, which is likely caused by the disparity in runway widths between MadCo and the more familar Bolton. Bolton's runway is twice as wide, so the narrower runway at MadCo makes it look like I'm lower (closer to the runway) than I actually am, so I flare high. The trick to not doing this is to look at the very end of the runway and gauge height from that, but that doesn't always work either. It was a bit windy with a gusty crosswind from the right, and I could feel little gusts in the flare, ti which I over-responded with the stick. Finally, back at Bolton I had one of those landings that are so smooth you can feel the wheels starting to roll as they brush across the concrete.
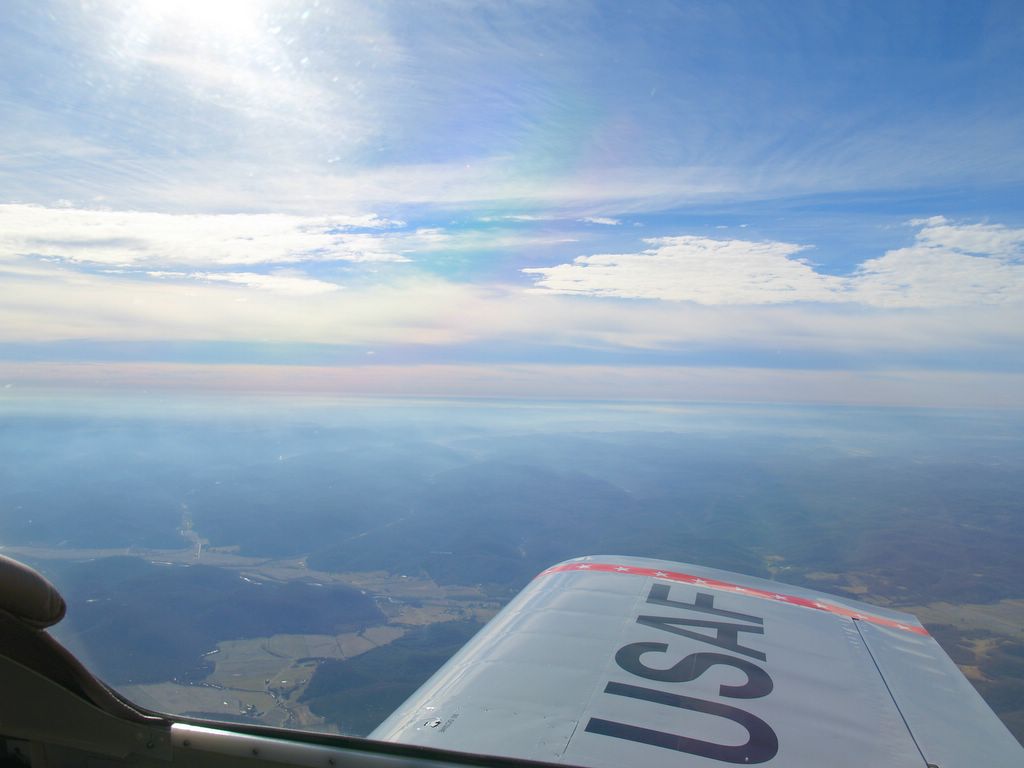
Subscribe to:
Posts (Atom)