Friday, December 29, 2006

A fairly riveting tale

Time has been tight the last few days but I made some progress on the leg fairings. It's been difficult to get to the hangar for any meaningful amount of time, so I stopped by long enough to cart home the drill press and as many other tools and such as I could fit in the Subie and carted it all down to the provisional basement shop.

The goal was to get the hinges installed on the leg fairings to hold them closed at the back. I cut some hinge material to a length that would leave some overhang on each end of the fairing for clamps to get a grip on and clamped it into place. I then drew a line centered on the hinge and running the length of the fairing. This is mostly for show, of course, and should not be construed as providing any effective means of keeping me from drilling a line as straight as a Navy formation the day after a three day shore leave in the Phillipines. Any excuse to use my Harbor Freight drill press is welcome, though:


I clecoed every hole as I went, horribly paranoid that I'd get one drilled off center. This practice so sorely taxed my extraordinarily limited cleco inventory that purely out of necessity I soon got over my fears. They looked nice all in a row, though:


After countersinking the holes (I love working with glass - countersinking by hand is easy, easy, easy), I squeezed in the first set of rivets. They're small rivets and squeeze easily. It was easy to get at the first row since the fairing could be opened, but the second row was a bit more difficult. I had left the hinge wire in the hinge as long as I could, again out of a minor case of alignment paranoia, but now it had to be removed. Just to be overly safe, I pulled it out just enough the allow the fairing to be opened enough to fit the rivet squeezer in, and worked my way down to the end a rivet and a pull on the hinge wire at a time.


It took about an hour to finish up both fairings. I had Egg's iPod setup down there with me playing a series of beautiful clarinet solos recorded at one of my father-in-law's concerts and ex-copilot Hogarth at my side. Quite an enjoyable morning, truth be told.


I'm a huge fan of El Nino weather (at least the type we get), and took advantage of today's uncharacteristically moderate temperature to run over to the hangar and get the notchs cut in the tops of the leg fairings to form the tabs used to clamp the fairing to the leg. Once I got the die grinder and cutting disc all set up, I realized that I hadn't trimmed off the excess hinge material before riveting it on. Well, just the job for the cutting disc! I believe I was on the sixth cut of the eight required cuts when I broke the cutting disc, and darned if it wasn't my last. Ah well, I always enjoy a trip to Harbor Freight. New pack of discs and a few cuts later, the fairings are clamped to the legs. Well, after a protracted struggle with the hose clamps, stubborn little buggers that they are.


I'm going to turn that clamp around so the screw head is facing forward. I also need to do something about this:


The fairing is thicker than the gear leg, so the tab is being pulled down by the clamp. I'm afraid that could cause undue stress on the tab, and I don't want to be fixing it all the time. I'm thinking about cutting a thin aluminum doubler plate to rivet inside the tab to give it more strength, and to thicken that area up a bit so the tab doesn't have to bend as much.

Saturday, December 23, 2006

How fare the fairings?

Quite well, thanks. With the rough fitting finished yesterday, today's goal was to get the leg fairings mounted. The overall plan is to get the leg fairings aligned and mounted, then go back to working on the upper and lower intersections later. This allows me to defer the fitting problem I noticed yesterday with the lower fairings, but that's not the actual reason to back burner them for now. The gear leg fairings have to be aligned with the in-flight airflow so they don't act as forward rudders and impart unwanted yaw input in flight. Since it is the alignment of the leg fairings that is aerodynamically critical, it needs to be done before fitting the uppper and lower intersection fairings. The responsibility for any required give & take (positionally speaking) will be borne solely by them.

The starting point for today was with both leg fairings clamped to the legs:


The final alignment will require the plane to be up on jacks, but for now I had a nearer term task: the leg fairings are prevented from swivelling around after being aligned by means of a hose clamp that goes around a tab created by a couple of notchs cut in the top of the leg fairing. In order to cut the notchs in the right place, the fairings had to be pretty closely positioned to their final alignment.

I started by running some twine from each leg fairing back to the rear of the plane, where I duct taped the loose ends to a pair of jack stands:


The strings were held in place with pieces of tape:


It was the inside string on each side that I primarily interested in, and I wanted them each to run parallel to the centerline of the airplane. The centerline was determined by dropping a plumb bob from the center at both the front and rear of the plane, and connecting the two spots on the hangar floor with a chalk line. Each inner string was then measured for equal distance from the centerline at the front and back:


With the strings correctly aligned, it was easy to then align the leg fairings. I marked the lines I will later cut to make the tab that the hose clamp will hold. I've read that these tabs can be problematic as stress and vibration can break them, so I brought the leg fairings home along with my two-part epoxy and some fiberglass cloth. It's too cold in the hangar for the epoxy to set up. Once the chemicals get up to room temperature later tonight, I'll lay up some reinforcing flberglass in the areas that will become tabs.

I also spent some time planning the next steps. I'm planning on installing some rivnuts in the side of the fuselage and cowls and use screws to hold the fairings in place. Rivnuts are pretty cool - just as with a blind rivet, you don't have to have access to the back side of the surface to install them. You just drill a hole and push the rivnut in. It has a flange to hold it against the surface. You then screw a rivet puller mandrel into the rivnut and squeeze the handles. That pulls the mandrel, which causes the walls of the rivnut to compress against the inside of the surface.

Well, I wanted to practice installing some rivnuts in a lower consequence environment than the actual airplane. As you'll see, that was a fantastic decision! I tried both a size 8-32 and a size 6-32. The 8-32 went ok (it's on the left in the picture below) but required quite a bit of squeezing. I started on the 6-32 and was just noting how much easier it was to squeeze than the 8-32 when POP! went the mandrel. It just broke in half, leaving the remainder of its original length deep inside the rivnut. Had this happened on the airplane, I would have been (please forgive the vernacular) screwed. At this point, I do believe I will be using the 8-32s.


Here's another little job that I'm going to be facing. The blue fitting with the slant-cut face is the fuel tank vent, and as currently configured, it would be covered by the upper fairing. This I do not want. The slant-cut part is just a simple AN fitting that has been cut/ground down, so what I'll do is order an unmolested fitting of the same size and a matching female fitting. I'll get a short length of aluminum tube and borrow a flanging tool to make a short extension by attaching the female fitting to the end of the tube. I'll slant cut the end of the tube where it emerges from the fairing to preserve whatever the intended effect was of the slant-cut of the original fitting. I'll have to replace the male fitting too, and without even looking at the plans I fearlessly predict that getting to the other side of the fitting to remove the fuel vent tube is going to be an absolute bugger.

Oh, I'll see what I can do about touching-up the rusty spots on the leg mounts.

Friday, December 22, 2006

Fairing the gear legs

I've been flying around with the new wheel fairings for a few months now and actually have myself 90% convinced that they aren't going to fall off or in some way run afoul of the rotating bits down there, so I finally started changing out the old aluminum leg fairings for new fiberglass fairings. This also entails replacing the old upper intersection fairings with new, and adding lower leg fairings where none had existed previously.

As I've said before, what with this being essentially a hand made airplane there is no such thing as "off-the-shelf" parts. That said, pre-made fiberglass parts are available (at a fairly dear price!) that theoretically enable novices such as myself to at least get two-thirds done with a project (by starting us out half way) before throwing in the towel. They do the hard part of creating the molds and laying up the glass, and leave the easy stuff like fitting and installation to us. It's a pretty fair deal all in all, and I relish in the regulatory freedom that allows me to do it. And hey, it's fiberglass, and you all know what I say about working with glass: the great thing about it is you can trim a lot of material away quickly and easily. The horrible thing about it is, of course, that you can trim a lot of material away very quickly.

The first step is pretty obvious: remove the old stuff. Here's the naked leg exposed (and yes, I do expect an uptick of Google hits from using that phrase):


Probably more for reasons of ease in production than any kind of necessity, the gear fairing as it comes out of the box is far larger than what the final trimmed length will be. I made an eyeball measured rough cut on the left fairing and fitted it to the gear leg. The unmolested right side fairing is propped up for comparison:


The upper fairings come as a closed piece, but there's no way to install it that way. The old fairing was cut open in the back to allow it to slide over the gear fairing, so I went with that strategy. It was easy to get a nice, straight cut with a hacksaw:


Once the cut was made, I could slip the upper fairing into place and get an idea of how much more the leg fairing would need to be trimmed to get it to a length that allowed the upper fairing to fully enclose the leg fairing. You can see that there's still a good half inch of the leg fairing sticking out the back of the upper fairing in the picture below. It ultimately required another 3" to be trimmed off the top of the leg fairing to achieve the best fit. I, as is my wont, removed 3.5".


As I shortened the fairing, I had to keep reminding myself to trim from the top rather than the bottom so I could slide the fairing higher up the leg, thereby reducing the width that the upper fairing needed to cover.

Here's all the pieces/parts thrown into the general vicinities of where they will ultimately end up:


I haven't trimmed away any of the excess material around the lower fairing, but I can already see that I'm going to have a fit problem between the Team Rocket lower fairing and the Van's wheel fairing. I'm stumped as to how to better fir the lower fairing. I have a heat gun, so I could try heating the piece to see if I can get it to re-shape, or I could build it up with more fiberglass. The jury is out.


This is what it will look like when done (well, in general. I don't intend to use the making tape, for example, and there will be a lot of trimming on the upper fairing. Oh, and there will be paint, too.):


I posted a question in the Vans Airforce forum regarding what to do with the lower fairing, and in the meantime I'm going to go ahead and get the leg fairing properly mounted. That will require a little more cutting, a little bit of additional glass layout, and a fairly complicated operation intended to correctly align the leg fairing with the in-flight airflow. I'm actually kinda dreading that last part.

Later: less than an hour after I asked, I have a couple of answers. One suggests laying up some glass on the wheel fairing and the other calls for major rhinoplasty on the fairing. The wheel fairings aren't painted yet, so it would be no big deal to add more glass.

Sunday, December 17, 2006

Starting to hibernate

The weather has been unseasonably warm this weekend and I did take advantage of it for a short flight yesterday, but for the most part I've been concentrating on in-house projects. Yesterday we had winds from the south at 11 gusting 15 and a high overcast at about 25,000' which was fine for a short hop to exercise the equipment and brain, but wasn't really a clarion call to spend a lot of time outside.

Since I was to be flying simply for the sake of flying, I picked an item from my practice list to work on. I deciced to do a few stalls, then investigate the edges of the stall around the type of crossed-control situations that cause spins. One of the more deadly traps a pilot can fall into is the "stall-spin" while landing. A number of things can lead to the stall-spin, but they fundamentally all share some constants: cross-control input (right rudder & left aileron, for example) and insufficient airspeed (or excessive angle of attack; they go hand-in-hand for the most part). A stall-spin from the landing pattern typically occurs on the base to final leg turn, where your altitude doesn't allow for a recovery before hitting the ground.

I started at 4,500' and slowed to stall speed, adding more and more rudder as I slowed. I counteracted the rolling tendencies from the rudder with opposite aileron. The normal stall in the RV-6 is a bit more abrupt than that of the typical rental, but not shockingly so. The cross-controlled stall (aka spin entry) is similar, but much more spectacular. A couple of fast burbles and BAM! I'm facing 180 degrees opposite heading and the nose has dropped to what appeared to be a nearly vertical attitude. Releasing the controls (keeping the rudder in would have kept the rotation going and I would have been in a spin) and gently pulling out of the resulting dive resulted in at least a 500' drop, probably more, before I achieved level flight. I climbed back up and did a few more like that, and some of the more benign straight ahead stalls before heading back to an acceptable crosswind landing.

As I arrived at Bolton, I assessed my normal landing pattern in light of what I had just learned about the stall characteristics of my plane. I fly a fairly wide pattern and I usually try to compensate for the winds just like we all practiced in those interminable ground reference maneuvers way back when, so I don't typically present myself with a reason to over bank or get my airspeed too slow. I did seem to keep a slightly keener eye on the airspeed indicator, though....

The hibernation project that allowed a brief 20 minute flight to sufficiently address my flying needs is to assess and review another piece of PC hardware attached to my PC-based flight simulator. Every now and then, a new piece of gear comes along that addresses a long-hated hassle in the control interface between human and virtual airplane. The most recent had been the NaturalPoint TrackIR system that captures my real-world head movements and translates them into the electronic commands that command an indentical movement in the virtual world. TrackIR, by far, was the coolest thing that every happened to fight sims. With the computer view tracked to physical head motion, it was as close to actually being in a cockpit as you can get, except for one thing: to operate switches, knobs, etc. it was necessary to "look" at the knob, then click on it with the mouse cursor. Well, that wasn't that easy. It was very hard to hold my head still enough to keep the knob from moving away from my mouse cursor. There was a way to lock the view while I clicked on the knob, but that was extremely invasive to the flying experience. Similarly, I also hated having to use the keyboard to type certain commands, primarily digits associated with menued ATC responses.

Enter the CH Products Multifunction Panel (MFP). It's basically a collection of 25 individual buttons, very much like the buttons on your keyboard. Each button can be placed anywhere on a 9" x 6" clear plastic surface. A printed picture can be inserted underneath the plastic surface. Each of the 25 buttons can be programmed to emulate a keyboard stroke. These mappings can then be used within the flight simulator to perform various functions.

After a few hours of figuring out how to program it, I had a configuration that let me set comm and nav radio frequencies, set the CRS and HDG bugs on the PFD, choose appropriate responses from the ATC menu, and use the Direct and Menu buttons on the GPS. I then made a series of IFR flights in the G1000 equipped Cessna 172, Mooney Something-or-Other, and Beechcraft Baron. The difference was astonishing! After swearing never to "fly" without the TrackIR again, I easily spent 4 hours using the 2D panels (no TrackIR) and the CH MFP. Once I get my USB hub moved from the other PC onto the fligth sim PC, I'll be able to use both!

Beyond being more realistic, it was also much easier to interact with the radios and ATC by using the buttons. It helped that I had taken a screenshot of the G1000 from within the flight sim and printed it on my photo printer. That made it easy to locate the buttons I needed to perform various functions with just a glance over at the MFP.


I have a lot more research to do with the MFP before I can write a full review, but so far this looks like it will be on the list with the TrackIR as another must-have item for flight sim flying.

Tuesday, December 12, 2006

A tour of Columbus

Sunday morning I decided to make one more attempt at getting the microphone to work by purchasing a cheap little amplifier to boost the microphone signal a bit more, but to no avail. I'm going to have to give up on the audio for now.

The weather was nice, albeit with winds from the southwest at 10 gusting 15. That's right down the runway at Bolton, so it wouldn't be a problem. I thought I'd head over to MadCo to gas up, but take an aerial tour of Columbus on the way. Well, it's not exactly "on the way" - it's actually the exact opposite direction. The plan was to climb above the class C airspace that surrounds Port Columbus Airport and tour the OSU campus on the way downtown. With the relatively high pressure and cool temps, the climb to 5,500' went very quickly.

I'm getting better at managing the limited resources of battery power and recording tape in the camcorder, and in fact I thought I had this video thing down to a science. Well, not quite as it turns out. It seems that the camera must have gotten bumped and knocked slightly off alignment since it now has a constant bank to the right, but I didn't notice it until I got back and was watching the tape on the computer. When I realized that I had been leaning to the left in my chair for 10 minutes, it finally hit me that the camera wasn't level.

Here's the video:


(this video was captured at 640x480, so you can click on it to go to its page on YouTube and watch in a larger window)

I couldn't find anything to talk about in the last few minutes of narration, so I just left it silent. That's when I really wish I had engine and comm radio sounds in the background!

Sunday, December 10, 2006

Time for a Bleg

A "bleg" is a blog beg, for those of you not in the know. Here's the deal: I'm having far more difficulty getting an external mike to work with my Canon ZR 200 than I had imagined possible. The ZR 200 has inputs for external video and stereo audio, via a plug that came with it. The plug has RCA inputs for audio and video, and works fine when I attach something like a VCR to it. It also works fine with the bullet cam attached as you've no doubt seen in previous posts. But... I just can't get it to work with an external microphone. I tried a passive mike, a powered lapel mike, and a powered lapel mike run through an amplifier. Nothing seems to generate any sound into the camcorder. I even tried unplugging the RCA audio plugs from the camcorder and plugging them into a stereo. Still no audio. I'm now quite sure there is something I'm missing in my Lego-style glomming together of cables, adaptors, and microphones.

The fundamental question is this: how can I get an audio signal from a powered lapel microphone with a 1/8" stereo mini-plug into an RCA plug audio recorder?

Saturday, December 02, 2006

Still no audio

The little microphone I ordered arrived a couple of days ago, so today seemed a great opportunity to try it out. It fit nicely in one of the cups of my headset, but the adaptor that I had to match the mini plug of the microphone to the RCA input of the camcorder was the wrong size. I'll have ot make a visit to Radio Shack to find the right adaptor. I didn't know it wasn't working until after I got back to the house, but the video turned out well enough that I decided to narrate it again and put it up on YouTube:


The landing at Urbana was middling bad, but the return to Bolton later in the day was much better. Neither was as good as what I can do without the winds, though.

In the video I mention a 172 on downwind at Urbana. That guy confused me a bit. He called on the CTAF about 8 miles south of the airport and indicated that he would be landing on 20. I waited until we were six miles out and announced that I'd be making a left downwind approach to 20. "You're going to make left downwind?" he asked, as if that was some kind of surprising decision. Apparently he had been planning on crossing the runway to make a right downwind, which makes no sense at all because 1) it would take longer, and 2) would violate the standard left pattern rule which states that unless a landing pattern is defined as unstandard (right traffic), then it is standard left traffic. Oh well, he did the right thing by following me into left traffic, so all ended well.

Update:

I fiddled around with the microphone this morning, and the problem does not appear to be with the adaptor as I had originally thought. I can barely get the new microphone to work on the PC, much less with the camcorder. I don't know if it's a problem with the microphone, its battery, or the way in which I'm trying to use it, but I'm becoming passimistic on the question of whether I will be able to capture the ambient flying sounds in the way I want. That's a shame because I think my narrations aren't nearly as interesting to listen to as the real sounds would be. Drat.

Saturday, November 25, 2006

Helmet cam mounted

I went to Lowes early-ish this morning to get a few nuts and bolts to mount the little lipstick camera to my headsets. It cam with a little swivel mount that will let me aim it just about anywhere I want, and it tightens down so that it won't drift around under G loads or tension on its cable.

I don't have the microphone yet, but I was able to narrate over the video later using a little passive microphone that I had stuffed into a drawer. The sound quality isn't terrific and the narrator really didn't have much of interest to say, but it's better than nothing. I'm hoping that the microphone I have on order will fit neatly up inside one of the ear cups on my headsets so you can hear the engine sounds and the radio transmissions.


The mount worked out great and I was able to get it set to a good aim point. I might lower it down just a wee bit next time to get a sliver more of the panel in, though.

After the landing at MadCo I went around again to try another, and mercifully ran out of tape in the camcorder. It was pretty windy so I tried a no-flaps wheel landing. It was pretty dismal so it's a blessing that there's no video evidence of it. With the cleaner wing and touch more speed of the no-flaps approach, the ensuing bounce was pretty healthy. As I arced through the foot high parabola of the initial bounce I couldn't help thinking "she's a sprightly mount when she has her wind up!" These landings went great last week when there was no wind to deal with, but this 7 knot crosswind was giving me fits!

The wind was right down the runway back at Bolton, so that landing went well enough. I rushed home with the camcorder to get a look at how well the camera worked and was pleasantly surprised. It doesn't do long distance stuff well, but I think it's clear enough that you would get a good idea of what it's like to fly out to the islands, or to do some formation flying if I ever get around to learning how to do that. Not bad for $30.

Friday, November 24, 2006

Farm Visit

It's always a good sign when it's the bright sun sneaking through the window shades that wakes me up in the morning, particularly when I'm hoping to fly. Today we had a nice high pressure area to give us clear, crisp skies, and the promise of great visibility a little later in the day. The altimeter was 30.30, the temp was 30, and I'm down to half tanks of fuel, so Co-pilot Egg and I enjoyed a 1000 fpm climb at 135 knots. The engine and wings love the cold dense air like a Husky loves the snow, so we took a few minutes en route to just frolic around the sky a bit.

I don't know what it is about Versailles-Darke Co. airport but no matter what the winds are everywhere else, there is a direct crosswind from the south at KVES. I held a good 15 degrees of left crab on approach to runway 27 but managed to get it converted into the left bank / right rudder combination to land straight down the runway. Egg thought it was a pretty good landing, considering.

We had a nice visit and I was able to get in a walk down to the creek to take some pictures. I ran into a couple of the horses too. The light was pretty good and the sky was a very photogenic shade of blue, so I tried to get some sky in most of the pictures.


Egg too a couple of shots on the way home. You can see how clear the air ended up being after the slightly hazy morning.


Egg got some stick time today. She's been reluctant to try her hand at the RV, but today was the day that she decided to give it a go. She did pretty good, but she still has trouble seeing out the front. She did what she always did in the Tampico: she flew by instruments. That's a bit harder in the RV since I have a CNN attitude indicator (it always leans to the left - har har) but she was able to hold course pretty accurately by using the GPS. I'm happy to have her learning to hold altitude and course so she can help me out when I need to look at charts or whatever, and distracting her from her normal in flight activities of playing cell phone ring tones through the headset microphone or randomly flipping switches to see that surprised look on my face now and then is a good thing too.

The landing back at Bolton was only so-so, but Egg again refrained from harsh judgement and deemed it "Ok." That's pretty good, considering!

Wednesday, November 22, 2006

Oh Dark Thirty

Well, it was really 6:30 am, which is my normal work day time to be out and about anyway, but it felt like oh-dark-thirty when I arrived at the hangar. The plan was for a quick flight to Urbana for an early breakfast (going in early, under the radar, to avoid running into the waitress I forgot to tip last time there) and straight back to Bolton in order to be home before the family got out of bed. The skies were clear, the winds were out of the north-ish at 5 to 7 knots, but it was chilly. I plugged in the pre-heater last night in preparation for the early morning temperature, so at least the plane wasn't feeling the effects of the low temperature.


It didn't take long for it to get light enough to take off, and the trip to Urbana was smooth and fast. I was a bit surprised to see 175 knots groundspeed on the GPS given how little wind I felt on takeoff.


The heat from the engine felt good after the chill of preflight, so I left it at nearly full throttle all the way there. I carried 150 knots into an nearly empty pattern (the only other plane in the pattern, an Archer, was really keeping the knots up too! I thought it was a Lear jet after watching it use the entire length of the runway to land) and had it bled off nicely by the time I was ready for the turn to left base. Flaps down, nice wheel landing, but I didn't make the first turnoff. There was a 4 knot quartering tailwind (probably more like 10 at pattern altitude) so I was carried down the runway just far enough that I would have needed aggressive braking to make my normal turnoff. That wouldn't have been worth the wear & tear on the airplane, nor would it have been worth the less likely but still extant risk of dropping her on her nose. Note that none of this was a surprise; I had heard reaports of up to 4 knot winds from the north on the automated weather system during my initial preparations for landing. With such a light wind, I figured it would be good practice for me to go ahead and land downwind since quartering tailwinds had always been a bugger for me in the Tampico. No problems at all in the 6. Go figure.

Coming back later in the morning provided an opportunity to try out the new lipstick camera. It's velcroed to my headset until I can build up a mount for it so the aim was off a bit, but some of the clips are good enough to get an idea for what it will do. I still don't have sound, though.


The landing back at Bolton was another race to the pattern with a 172 headed back down south from Hilliard, but he was no match for my easily managed 150 knots. Landing on runway 4 means a mile long taxi back to the hangar so I generally land long in order to catch the mid-runway taxiway. That lets me carry 80 mph well into the distance that I would have to taxi (or in the case of runway 4, roll out on the runway with a guy behind me wanting to land) if I landed on the numbers.


This is the perfect argument for having finally learned to perform good wheel landings since they don't seem as critical about airspeed as the 3-point landings I had been doing. I rolled this one on at 70 mph with no problems. Carrying 70 mph into the flare for a 3-point landing would have resulted in a tremendous bounce if I let it drop in too quickly, and the extra pitch authority would have caused me to over control in the flare. At least that's what my past experiences indicate.

Tuesday, November 21, 2006

Anti-Skid Brakes

We've been talking about anti-skid braking systems in A&P class. They're actually fairly simple: each wheel on the main landing gear has a sensor attached to it that spins with the wheel. Unsurprisingly, they are called wheel speed sensors. They are actually little electric generators that create voltage as the wheels spin. This voltage is used as a signal in a computer. The computer uses that signal to determine when any given wheel is slowing to the point of skidding, and sends a signal to a hydraulic valve to release a bit of brake pressure for that wheel. The goal is to maximize braking power by keeping each wheel right on the edge of skidding.

This is not a trvial feature: the pilots of large, heavy, fast jets cannot feel the wheels beginning to skid, and if the wheels are allowed to skid, they will quickly rip themselves to shreds. When the bare wheel rim hits the concrete of the runway, all braking authority is lost, and with it goes lateral controllability.

I came across a series of photos today that demonstrate exactly why anti-skid is so imporant. Note that I am making the assumption that an anti-skid malfunction was the cause of this incident; I have no actual evidence of that. Regardless, this would be the result of a failed anti-skid system:


Photos copyright by CRASCA, originally posted here: http://s102164210.onlinehome.us/forums/index.php?showtopic=103388&st=0

Monday, November 20, 2006

Weekend Projects

I just did a few little projects on Sunday, one of which should be patently obvious at this juncture. I started out just to replace the banner picture, and during my protracted search for a good picture to use I came across one from the Middle Bass Island trip. There's something about the bike leaning against the wing that encapsulates the amazing abilities of my recreational transportation gadgetry. I took that picture not more than one hour after lifting off from the home field in Columbus. Had I foolishly attempted the same trip by car, I'd have been just barely outside of the northern influence of the "big city," settling in for another three hours of travel. Wow!

I was looking for a way to dress up the picture a bit, and after experimenting with many different filters, effects, and distortions, I came across the Sepia filter. I thought it looked pretty good, but it was so much wider than the old banner picture (which never really fit correctly inside the box surrounding it anyway) that it made the rest of the template look pretty bad. Oh well, that's what lazy Sunday mornings are for: I dug down into the code that generates the pages and found the places I needed to fix to get the sizing right. It still had the white background, though, so it was too contrasty. I re-opened the sepia image in the picture editor and sampled the beige color around the edges of the picture, noted the Red, Green, and Blue values, converted them from decimal to hexidecimal, and found the spot in the code that sets the background color. It looks much better now since it isn't so stark, in my opinion.

Moving on from there, I used a pair of borrowed ratchet style wire crimpers to fabricate a small cable to run from the power adaptor I installed for the Wx Works box to the Avionics Master bus. Once I install that, I will be able to leave the Wx box plugged in all the time since the Avionics Master switch will protect it from the voltage and current spikes at engine start that were lobotomizing it before.

Finally, I made a trip to one of the mini-Best Buy stores known as Radio Shack. I was looking for a cigarette lighter power plug that I could splice onto the power connection on the $30 lipstick camera I bought for my camcorder. The idea is to be able to mount the little camera on my headset or somewhere on the airplane to take airborne video.


Radio Shack, which has been a big disappointment to me ever since they dumbed down their catalog, actually came through for me this time and I was able to find an adaptor cable that already had the correct plug on the end for the camera. The camera wants 12 VDC, which is perfect: once I liberate that power port from servicing the Wx Works box by installing the new power cable, I'll have the front-of-panel 12 VDC plug open for use with the camera. I tested the power adaptor using one of the cars, and everything worked great. Next step: acquire a lapel microphone small enough to nestle into the ear cup on my headset.

Saturday, November 18, 2006

Night and day.

Black and white. Hot and cold. The best of times, the worst of times. Choose your favorite and apply it to today's flying compared to that of a week or so ago.

I hadn't figured on getting to fly today, but the weather this morning was better than I had expected. It was a solid overcast at 10,000' and only five miles visibility, but there was essentially zero wind, perfect for a series of stop & goes over and MadCo to see if I could get the hang of wheel landings. Without the wind as a detriment (read: excuse), I thought I might be able to get some improvement over the not quite up to standard examples from last week. I also thought that if I got started before 10am, the traffic would be light. I forgot (well, "forgetting" would be impossible in this case; it's more that I didn't factor it into my traffic forecast) about the huge OSU-Michigan game here in town today. All home games generate some degree of banner tow activity, but today's game would definitely cause a peak in their operations.

I kicked on the scanner while I was preflighting and could immediately tell that it was going to be a little more crowded than hoped. The tower was already balancing 3 or 4 banner guys and 3 students doing the touch & go routine. I did a braindead check of the altimeter (a new step in preflight prep after last week) and did a slower-than-usual walk around looking for any faults that may have arisen in the 9 day flying hiatus. All looked good, so I saddled up.

The tower cleared me to taxi to runway 22 quickly enough, but I could see that there was still a bit of activity in the pattern. Surprisingly, I completed my run-up in time for the tower to get me cleared for takeoff before the touch & go on downwind and the two banner-tows waiting on the Alpha 3 taxiway a couple of thousand feet down the runway. No wind equals easy takeoff, and the cooler temperatures and high pressure equals great climb performance, so I stayed down in ground effect for a little longer than usual and was doing a good 120 knots as I got to the holding banner-tows and their groundlings, whereupon I pulled into a steeper than usual climb and a nice right turn towards the open fields west of the airport. For pilots, that was just like a little wave and a hearty "Good morning, GO BUCKS!"

I did my usual positioning for a south entry into a left downwind for runway 27 out at MadCo, but a Bonanza was taxiing out for a departure on 9. Eh, fine by me: I just crossed over to a left downwind for runway 9. I knew the Bonanza pilot and remembered his tail number from years ago when I got a ride in his plane, so I got to ruin his day my calling "Experimental 6 Papa Golf turning left base niner, got you in sight, Wayne." How did that ruin his day? Well, I figure he's gonna spend the rest of the day trying to figure out who in the hell that guy in the Experimental was!

The first wheel landing was better than any of the others from that last flight, but it was still a little bouncy/chirpy. The second was much better. The third was as smooth as could be, and by that time I had figured out that releasing just s smidge of back pressure on the stick at just the right time can smooth out some of the baby bumps. All in all, it was a pretty good set of landings, so there was nothing left to do but to squeeze myself back into Bolton.

Approaching our west call-in point (Lilly Chapel), I saw a 172 off to my right, same altitude, maybe a half mile away. I knew he would be calling the tower in just a few seconds as we were both just about to the grain elevator that defines Lilly Chapel. I beat him to it (150 knots is a gift that just keeps on giving...) and contacted the tower. I had planned on tacking on that I had the 172 in sight at my 4:00 so he wouldn't get spooked, but the tower was really hopping with all the pattern traffic he had so I decided against it. Sure enough, as soon as I made my call I looked back to see the 172 peeling off to the right. That wasn't all that surprising, but I think it was the completely wrong reaction. For all he knew, I was right there next to him and he could have been turning right into me. It's arguable, I suppose, but I kind of regretted not tacking on the position report so he wouldn't be quite as surprised to learn of my presence.

The tower called me back and told me that he also had a Grumman coming in from the southwest, and that I should report mid-field right downwind. He asked the Grumman how far out he was: 6.5 miles. I was 7.8. This was shaping up to be a simultaneous arrival. Grummans are good for about 135 knots, and I was indicating 150. I had been planning on hedging south of Columbus Southwest (a grass runway airport just a couple miles west of Bolton) because I had already heard two banner-tows heading back there from the stadium. They're pretty slow when they've got a banner in tow, and since they were reportedly still near downtown, I figured they'd not be a factor. As an aside, I heard the tower tell someone that he had six banner-tows working out of Bolton, and another five out of Southwest. And three hot air balloons. And two (soon to be three, I thought as I flew under a Diamond DA-20 maneuvering just outside of Bolton's class D airspace) touch & goes. Anyway, it looked like Southwest would be clear and I could scootch myself to the north a bit more, so as to catch the right downwind at mid-field. As I got close, I could see the Grumman off to my 2:00, still a few hundred feet higher, and still cooking right along. I was still at 150 knots, and with him being in a descent, he was probably at least 140.

I've seen this before, so I knew to be ready for it: he called right downwind early, which he could do because the tower would have instructed him to "report entering right downwind" when he had reported that he was arriving from the southwest. Not yet being abeam the departure end numbers, he wasn't technically in the right downwind yet, but he was close enough to make a strong argument that he was. The tower cleared him to land, as I expected. I was already making the left turn to enter the pattern at mid-field, so I quickly jumped in and told the tower that I was mid-field right downwind, ahead of the Grumman. The tower replied, "Grumman, I'm going to make you number two behind the Experimental, he's a lot faster than you are." I live for that kind of thing, I'm tellin' ya.

I landed (another smoothy) and was off the runway at Alpha 3 as the Grumman was coming down final, so I stopped to see how his landing went. He was still 50' in the air as he sailed past me on Alpha 3 and didn't get stopped until well down the length of the 5000+ foot runway. I suspect he got himself a new yardstick today with that landing!

Thursday, November 16, 2006

I just can't get this question out of my head

A couple of weeks ago, the topic of the ADF came up in A&P school. For those of you not familiar with that acronym, and ADF is an Automatic Direction Finder. It basically points a needled at a ground-based transmitter called an NDB (Non-Directional Beacon). It's pretty old technology and really not used all that much anymore, but that is not to say that it isn't used at all. It's typically used in instrument flight by pilots that don't have access to the latest and greatest GPS technologies.

The display is very intuitive (a single arrow just points at the ground station) but the usage of it is not. Actually, the simplicity of the display is what causes so much confusion with new pilots, but once they can get their heads around it, it becomes a valuable tool. If you're interested, there's more info here.

Being mechanics school, we aren't particularly interested in how pilots use it, though. Rather, we're more interested in how it works. Very simplistically, it uses the fact that a loop antenna (think of a halo) can determine when and if it is oriented perpendicular to an AM radio signal. The new ADF loop antennas have no actual moving parts, but older antennas had a motor that would rotate the loop antenna until it detected that it was perpendicular to the ground source and send that bearing to the needle in the cockpit. Now, here's the point that I'm stuck on. The instructor said that the loop antenna is continuously rotating, much like a radar antenna. To me, that doesn't make sense.

What would make sense to me would be for the motor to rotate the antenna until it detects the bearing of the ground station. Once it senses that it is correctly oriented, it would then maintain a "lock" on the ground station by using a feedback loop to control the turning motor. That way, the antenna would always be pointing at the ground station and the positioning of the needle in the cockpit would be as simple as tying its movement to the movement of the antenna by using an autosyn. An autosyn is simply a method of electrically sending position data to a remote display using a bundle of three electrical wires, rather than a complex and heavy mechanical linkage. They are used for many, many things in airplanes, so it is a reliable and proven technology. Now, if the antenna was constantly rotating, how would the correct bearing be transmitted to the cockpit ADF indicator? Beats me! That question was not answered in class, and I didn't want to waste class time pursuing it.

But I just can't let it go! I had even talked myself out of my "solution" for awhile by considering that the needle will sometimes point in the direction of a lightning bolt. My thinking was that the antenna wouldn't be able to detect the lightning because it was "locked" on the NDB, but upon further reflection I see the fallacy of that argument. Changing the frequency of the ground station (selecting a different station in a different location) works because the orginal signal goes away, and is replaced by one that is likely on a different bearing. I think what happens with lightning is that it creates a much stronger "signal" that the ground station, and temporarily makes the antenna thinks it's pointing in the wrong direction.

Well, there you have it: this is the kind of stupid thing that occupies my mind.

Sunday, November 12, 2006

It's getting cold, and that means only one thing...

... it's time to get back to working on nose art. Very few of you were reading this blog around this time last year, so here's a quick refresher. I commissioned an artist that I knew would work for free to draw me a nice picture to put on the nose of the plane, more or less to play along with the military fighter motif. The resulting picture was delivered as a colored pencil drawing on coarse paper:


The first step was to get it digitized using the digital camera. That's what you see above. That was the easy step. The next step was to spend many, many hours making the colors crisp and solid. This necessitated a foray into the exotic and esoteric skills needed to work in a complex digital editing program named GIMP, which is a fantastically powerful tool in addition to its
best feature: it's free. Working at the molecular level (eg. pixels) was the only way to get the clean, crisp digital image that it would take to get a high quality image transferred onto a vinyl decal:


I didn't track the hours that it took, but it was a lot. Here's the latest cleaned up image:


The next problem was to find a way to get the image transferred to a decal. I didn't exactly hunt for a service provider in the way a wolf hunts for comestibles, rather I used the watering-hole ambush method: when I saw an ad for an outfit that looked like it had this capability, I'd fire off an email asking if they could create a decal based on the image. This turned out to actually be theblackhole approach: questions went in, but nothing came out. Recently, however, I came across a referral on the Vans RV Forum and fired off yet another email. This one struck gold, and it now appears that the project is back on track. This prompted me to put a few more hours into cleaning up the image, and now that I have a nice color photo printer, I was able to print the results and see how they would look on the airplane:


The actual decal would be trimmed a lot tighter to remove the white background (and of course the bottom wouldn't be chopped off like that), and there would be two more gun ports on each side, for a total of six. The builder of the plane was more or less trying to create an F-86 look (albeit a taildragger F-86 (which doesn't actually exist) so I'm going to use three ports per side, just like the F-86 has:


I won't go to the bother of having two different sizes, though, and the grey background around the ellipse of the gun port would be trimmed off.

So, there's your update to the nose art saga.

Thursday, November 09, 2006

My new yardstick

If you never had a bad day, you'd have no standard (yardstick) to measure good days against, and today I got myself a new yardstick.

Let me start off by pointing out that I'm tired. Thursday afternoon is when the work - night school - work - work - night school - work cycle catches up with me, and I get very, very tired. But... when I see a clear blue sky and moderate temperatures (in NOVEMBER no less!!) I just have to fly. I wanted to gas up anyway in order to start my newly designed fuel log with a known quantity (i.e. full tanks), so I decided on a quick hop over the MadCo.

Preflight and start went well enough, although I was a bit surprised to see that I hadn't unplugged the preheater when the temperatures came back up early this week. I called the tower (they answered this time), gave the altimeter a nudge up to the 905 ft mark, taxiied out, and made a normal takeoff. On the way over to MadCo, I attempted a couple of recovery from unusual attitude exercises (you never know when you might run into some wake turbulence and one should always be prepared), but neither attempt was very good and I quickly gave up on that idea. Things were going fairly well other than that, although I did notice that I was having a little trouble with my radio communications, stumbling over my call sign and things like that.

As I was approaching MadCo's right downwind to runway 27, it felt like I was too low. Chalking that up to being a bit rusty, I proceeded into the pattern, and soon found myself on final. Final felt a little off too, as it seemed that even at 80 mph indicated things were happening very slowly. That, of course, was a result of the 10 - 13 knot headwind. The flare and touchdown were OK for a wheel landing (not my strong suit by any stretch of the imagination), but on rollout the nose took a frightening dip towards the runway. This was caused by the shoes I was wearing, which aren't my normal flying shoes. Rather than the light running-type shoes I normally wear, I was wearing clunky, heavy hiking boots. The brakes are pretty sensitive, and the bigger, bulkier shoes caused me to accidentally apply more brake than normal, and in the (for me) unusual attitude of a wheel landing, the unintentional extra braking caused the nose to dip precipitously. I easily recoverd by getting some weight off the brakes and a titch of back stick, though.

I pulled up to the pumps and parked next to a very nice RV-8 that was already there. Gas was $3.44/gallon, which is not too bad.

After tanking up and a brief chat with the RV-8 pilot (who had thankfully had been in the FBO paying for his fuel when I arrived and probably didn't hear my landing, during which I had squealed the tires so much that it sounded like a cat being pulled through a taffee machine), I decided that my icky landing called for a couple of stop & goes to get in some practice while we still had nice weather. At the end of the runway, a quick check of the altimeter to set UYFs field elevation showed me to already be at almost 2000 ft! Ah-ha! That explained why downwind had felt so low! The barometric pressure today was 29.72", and the altimeter was set at 30.72", which is nearly 1000' off. The pressure on Saturday when I flew last must have been almost exactly an inch higher than today, and when I nudged the altimeter up to 905', I didn't notice that it was actually 1,905'. D'oh! Another rookie mistake! Yawwwnn.

After two acceptable stop & go landings, it was time to head back to Bolton. The routine of configuring the plane for the various flight modes and the management of other little tasks had come back to me pretty quickly despite having not flown much recently and the plane felt great in the air, but I still managed to bounce the landing back at Bolton to the degree that I needed a quick burst of throttle at the apex of the bump to recover the landing. It was pretty windy, though, and wind is always a great catch-all excuse, often cited as being culpable for a multitude of sins. Surely an exuberant bounce on landing can be attributed to a 10 knot wind, can't it? And it was a crosswind too, after all.

Back in the hangar, I yawned mightily and decided that if nothing else, I got some good practice in today, and set the bar low enough that there's no way my next flight can't be an improvement. But here's the best part: it was still a blast and left me smiling! Having a couple of sub-par landings in an RV is like a golf pro hitting a couple of bogies at Augusta: it's mildly disappointing, but you're still damn glad just to be in the game.

Saturday, November 04, 2006

A flight made distinctive by its atypicalness

Or is it atypicality? Or atypicalitude? Most likely, its none of the preceeding and you really can't get there from here. Let's just stipulate that there was something between 'slightly weird' and 'abnormal' about flying today.

After a few weeks layoff there's always going to be a little bit of surface rust on the skill set, but it's normal, expected, and not difficult to deal with. Today dawned with clear skies and a manageable wind, but the look in the hound's eyes when presented with his first potty break opportunity of the day said it all: it's cold out there! The frost on the grass confirmed his assessment, so I knew I was going to have to dress warm unless I wanted to get my winter temperature acclimation completed in one sitting. I bulked up with long underwear and a long sleeve shirt, grabbed my RV hoody sweatshirt, and what with it being a game day, topped it all off with my OSU jacket. I have an ancient bomber jacket that's nice and warm, but it's too bulky for the airplane, so I find it's better to dress in layers. If I may butcher a metaphor, the problem with an airplane that fits me like a glove is that the glove gets pretty tight when my hands are swollen. Even with just the longies, sweatshirt, and jacket, I struggled to get the safety belts situated and found that I had to slouch a bit once the canopy was down.

A weather check indicated an ambient temperature of 25 degrees, so it was a good thing that I had remembered to stop by the hangar Friday and plug in the engine pre-heater. I had also looked over the plane while I was there because through experience I have learned that the two keywords for 25 degree flying are "perfunctory" and "pre-flight." Having gone over the plane yesterday, I was pretty comfortable with the "Wings: attached. Tail: attached. Propellor: attached. Ass: frozen off and lying on the tarmac." style of preflight. The engine pre-heater does a great job, and even after a weeks long layoff she started right up after just one blade.

By this time it was right in the middle of the zone-of-confusion that surrounds the control tower being open or closed. The schedule is for the tower to open at 0730. Anytime between 0725 and 0735, I'm never absolutely certain what the status is. I have a scanner in the hangar that lets me hear the tower, so I turned that on as I did my preflight. The tower makes an announcement when they open, so catching that would negate the uncertainty. Nada. A couple of minutes later I was in the plane and had the radios on. My watch was within a minute of 7:30, so it was possible that I missed the announcement. Discretion being the better part of lots of things (valor is overrated anyway), I called ground control for taxi clearance. Nothing. Ok, I can go pretty much all the way to the ramp without their permission anyway, so I went ahead and got rolling. I called them a couple of more times on the way, but no response. Once clear of the hangars, I could look at the tower and see that there was no one up there, and it was still only a couple of minutes beyond 7:30 anyway so it was certainly within the bounds of possibility that my watch was fast or theirs was slow. Normally, being able to see the tower would be all I'd need. If the tower is closed, the green and white rotating beacon will be on. Today, however, I saw in the NOTAMs (Notices to Airman) of the preflight weather briefing I got before I left home that the rotating beacon was out of service. Since it was plain to see that there were no other planes in the area and that the tower cab was uninhabited, I decided to go ahead and taxi on down to the runway. I called again at the end of the runway, but when there was no response I just transmitted my intentions to any local traffic (which is normal for when the tower is closed) and went.

The climbout was glass smooth and the visibilty was about 10 miles in a light haze. It would have been lousy photography lighting, which is good considering that I had forgotten to bring the camera. Still, I'm kicking myself for not getting even a mediocre picture of the corn field with the seal of the State of Ohio and an Ohio flag cut into it that I flew over. If it's nice tomorrow morning, maybe I'll go back to get a shot ot two. It's only 19.4 nm NW of here.

UPDATE:
Some people actually do remember to bring their cameras. Brandon took this shot on his way back from Columbus to Lima:


Photo by Brandon D. Wren, all rights reserved.

Along the way I dialed up 122.7 to see what was going on at Allen Co., but the skies were apparently empty at 07-early on a frigid morning. A few minutes later, though, voices starting popping up and it quickly got busy. This caused me to wonder if perhaps there had been a problem with my radio that precluded communications with the tower. Hmmm. Still, it had been quite plain to see that there was no one in the tower cab. Oh well, water under the bridge and I had a pending landing to think about anyway.

The destination today was Lima/Allen Co. airport to have a breakfast visit with the world-record holder for the briefest time to be an RV-4 owner. The runway there is 09 - 27, and I knew the winds were at least southerly. That means I would be facing a nearly direct (perpendicular to the runway) crosswind on my first landing in weeks. The only real remaining question was how much crosswind. Allen Co. has an AWOS automated weather system, but it transmits on a Nav frequency and I don't have a nav receiver in the plane. Fortunately I bought that nifty AnywhereMapWX at Oshkosh. A quick tap of the stylus and I had the winds from Allen Co: 180 @ 9. Direct crosswind, but within my normal limits. It was a bit more than what had been forecast for nearby Findlay, but not to an eyebrow raising degree. I had about a 15 degree crab coming down final, and as I transitioned into the flare I was able to straighten it out to align with the runway with about a half boot of right rudder. A little compensatory left bank into the wind kept me tracking right down the middle of the runway, and the whole thing ended with a nice, smooth touchdown, which is a rare enough occurence under the best of condtions that I had to congratulate myself.

Upon leaving after a few too many cups of coffee to ensure a completely comfortable trip, I briefly thought about using runway 9 instead of 27. When taking off with a crosswind from the left, it takes quite a bit of right rudder to counteract the weather-vaning tendency of the plane to turn into the wind, and combined with the normal leftward pull of the engine and propellor, we're talking about a comparatively high demand for right rudder. By using runway 9, the crosswind would be from my right, which typically results in a takeoff that requires no rudder whatsoever. Alas, 'twas not to be. There was a Mooney practicing ILS approaches to runway 27 and the benefit of a slightly easier takeoff is not outweighed by the risk of flying directly into opposing traffic.

The takeoff was fine, and good practice. The flight home was marred only by the tenatious internal questions about what kind of reception I might receive. More than likely, I'd breeze right in as if nothing happened, because nothing did. But that nagging idea that my radio may have been the culprit rather than a slightly tardy controller or an inaccurate time setting on my watch had me wondering if I might receive a cooler reception and a request to have a chat after landing. Preparing for the worst, I tuned in the tower as soon as I was clear of Allen Co. to see if I could get a feel for the controller's mood:

"Uh-oh. It's Mr. Grumpy, the controller that's so petty and snippy that an air traffic controller I was flying with once commented on it. Well, maybe he's in a good mood."

"Uh-oh, he's worse than normal! He's barking at a touch-and-go'er for not repeating clearances in under 3 seconds. Dude! Lighten up!"

"Ah, this could be a help. The pattern's pretty busy and he may not have the time to scold me."

I get closer:

"Geez, where'd they all go? The one time I want a crowded pattern..."

Me: "Bolton tower, experimental four-six-six-papa-golf over Darby Dan, inbound full stop."

Tower: "Four-six-six-papa-golf, report two mile right base, 22."

Me: "Bolton tower, six-papa-golf two mile right base"

Tower: "Six-papa-golf not in sight, cleared to land."

Pretty good landing, albeit again with a direct crosswind. Funny how the wind shifted just enough between Lima and Columbus to ensure the worst case at both locations. Then:

Tower: "Six-papa-golf turn right alpha-three monitor ground on point eight taxi to park"

Me: "Right alpha three, monitor ground." "Whew. Glad that's over!"

Monday, October 30, 2006

Project Valour-IT

You will see a new link over on the right side of the page for Project Valour-IT. Here's a description of the program:

Project Valour-IT
(Voice-Activated Laptops for OUR Injured Troops)
In memory of SFC William V. Ziegenfuss

Every cent raised for Project Valour-IT goes directly to the purchase and shipment of voice-activated laptops for wounded servicemembers. As of October 2006, Valour-IT has distributed nearly 600 laptops to severely wounded Soldiers, Sailors, Airmen and Marines across the country.

During its initial phase, Valour-IT created "libraries" of laptops equipped with voice-controlled software for the severely wounded staying at major military medical centers. In many cases a laptop was provided to a wounded hero for permanent use.

Valour-IT is continuing to accept donations of any amount to supply the "libraries" of laptops at major medical centers and gifts to individuals, but has also added the option of an individual or organization directly sponsoring a wounded soldier by completely funding the cost of a laptop and continuing to provide him or her with personal support and encouragement throughout recovery. This has proved to be an excellent project for churches, groups of coworkers or friends, and members of community organizations such Boy Scouts.

Most recently thanks to the efforts of the Military Order of the Purple Heart, Valour-IT is now able to reach personnel in VA hospitals who would benefit from a Valour-IT laptop.


I chose to champion the USAF since I spent 5 years active duty in the Air Force, three of which were overseas assignments, and then spent another 6 years in the Ohio Air National Guard. I considered selecting the Army or Marines, but they were already well represented. It's all for a good cause, though, so you can't go wrong with contributing to any of the service members.

Why don't he write?

Admit it: we all have our own version of the crude, crass movie line that despite of its misanthropy we still laugh at every time we see it. For me, my guilty little piece of movie dialog comes from Dances With Wolves. The crazy wagon driver comes across a skeleton out on the prairie, and speculates that "someone back East is wondering why she don't write." Cruel, thoughtless, yet it still makes me chuckle every time I hear it, albeit mostly because of the way the line is delivered rather than any inherent comedic value.

So, why don't I write? Well, mostly because for the second weekend in a row I haven't been able to fly. Yesterday was nice enough from a sky and visibility point of view, but the winds were gusting over 20 mph and I just won't fly my taildragger when it gets that gusty. I'm a bit of a sissy that way.

I managed to fill the time quite nicely with winterization chores around the house, and fortunately there wasn't much air traffic in or out of Bolton to taunt me. I think I'm not alone in considering 20 mph winds too much for a safe and comfortabel flight. I'm not saying it can't be done, mind you, and I have in fact landed the Tampico in a direct 25 knot crosswind, but the risk vs. benefit analysis iw weighted more towards just staying home on windy days since I moved to the taildragger.

Now that the days are getting shorter, it's going to become increasingly difficult to even work in a short flight after work. I hate this time of year.

Monday, October 23, 2006

What is it??

I've seen this thing flying around Bolton for a few days now, and this afternoon I got a few minutes to take a closer look:


All I can find on Google that's even remotely similar is this:


Airborne UXO Detection

The numbers reach the tens of millions in both acres and dollars. And the standard operating procedure literally has been pedestrian. Until now.

A team of researchers in a newly opened Battelle office in Oak Ridge, Tenn., is tackling the problem of UXO—unexploded ordnance—buried in an estimated 15 million acres of land and consuming upward of $200 million in cleanup costs each year.

The Battelle team has developed and refined several airborne systems for detecting UXO using magnetic fields, electromagnetic induction and global positioning systems. The technologies are essentially flying metal detectors.

Mounted on a commercial helicopter, the equipment is a rigid fixed boom configuration that has the capability of delivering data analysis, digital maps and target lists within hours. Battelle’s detection system has eight sensors, or magnetometers, and a sampling frequency of 1,200 hz, which yields a high density of data. To get the most specific data possible, the distance between the system and the ground is kept between one to three meters.

After a quick pass by the helicopter, the system is able to detect different sizes of munitions, all the way down to 60mm shells. That’s comparable to the capability of ground-based systems, but not nearly as time consuming or dangerous.


This must be either a newer version, or something similar but different. (And yes, that is what passes for deep insight and stellar grammar after a full day of work and a night at A&P school. Just consider yourself lucky that I haven't gotten to the beer yet!)

Friday, October 20, 2006

Best use of spare instrument space?

UPDATE: I've decided that I need a combo EGT/CHT emgine monitor, and that I will buy it from someone other than JPI. I did a little research and it didn't take long to find their abysmal reputation for customer support and some of their more heavy-handed legal tactics. I have no patience for that kind of thing, so will look elsewhere for what is in essence a commodity product. It amazes me that a company making a product that is easily available from a competitor at the same price point doesn't realize (or care) what a bad reputation can do to them.

Original post:

Since I moved by mag compass to a new location in the panel, I have an empty 3 1/8" instrument hole to fill. My first thought was to put in a g-meter, but given the type of flying that I do, there's no real need for it.

One need I do have, however, is in the realm of engine management. I do not have any temperature gauges whatsoever, other than oil temp which is nearly a constant anyway.

The two possible engine temp gauges under consideration are either cylinder head temp (CHT) or engine exhaust temp (EGT). My understanding (and please, chime in with a comment if you disagree) is that EGT is more useful in determining the best mixture to set than CHT. Assistance in setting the appropriate mixture is primarily what I'm after, so unless a strong counter argument can be made for monitoring CHT instead, I'm planning on installing an EGT gauge.

Of course, if I were willing to spend the money, I could have both, but graphic engine monitors that display both EGT and CHT are pretty expensive. If I choose to do only EGT, it will be quite a bit cheaper, and I'm not convinced that I need both. Again, chime in if you disagree.

In any event, if I go with EGT, I want it on every cylinder. Leaning based on the EGT of a single cylinder seems pretty risky.

So, with all that said, here is the gauge I'm looking at:


With all four probes, it's going to be nearly $400. A graphical engine monitor that provided both 4 cylinder EGT and CHT is about $1000 more:

http://www.aircraftspruce.com/catalog/inpages/gem1.php

I think I will get what I need from the lower cost alternative, but I can still be persuaded.

UPDATE:

Another option:


I'll have to measure, but I think I have the required space behind the panel for it to fit. But at $2300 for the display and probes, it definitely blows the budget all to heck.

I looked at the JPI and EI units, but they are all 2-1/4" units, and I'd really like to completely fill the 3-1/8" hole. I'm not ruling out one of the smaller units, though, as I imagine I'd get used to it pretty quickly.

Tuesday, October 17, 2006

Another review up at GamingNexus

UPDATE: Here's the link to the review:

Well, in the next day or so, anyway. This one is for a racing simulation for the PC called GTR 2. It simulates the cars, tracks, and rules of the FIA GT Racing league.

I'll update with a link to the review as soon as it gets posted. In the meantime, here's a movie clip of a few turns in a Ferrari (the lighting effects from the sun are incredible!):

Sunday, October 15, 2006

Urbana "Remembering When" Fly-in

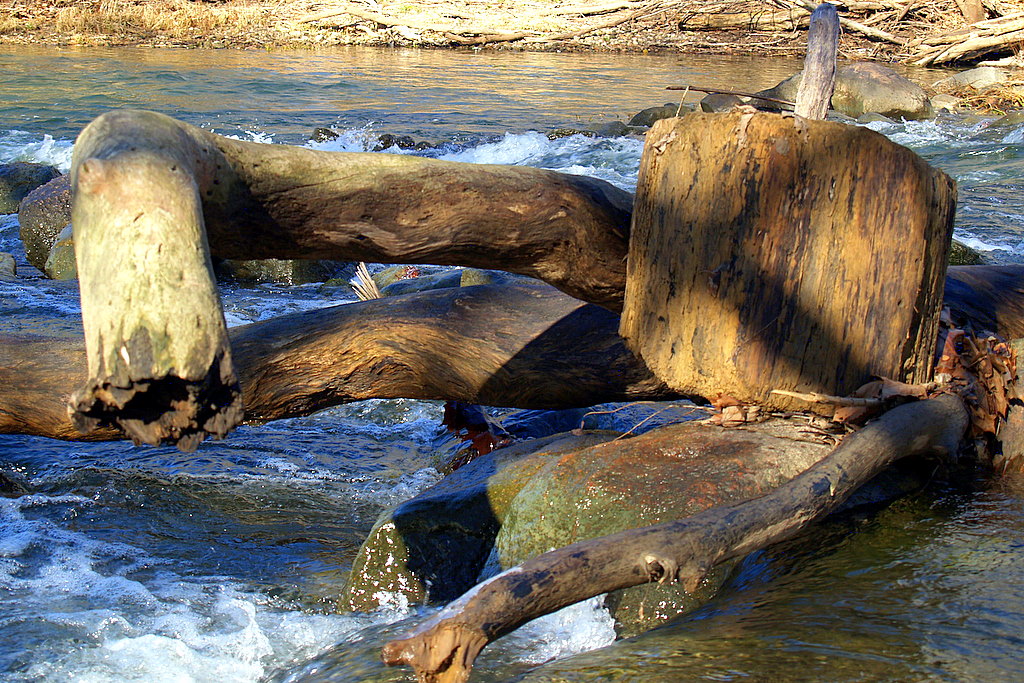
Unquestionably flyable great Fall weather today, although the breeze did have a puppy-like bite to it. It's no longer possible for me to live in denial - winter is coming. Maybe not today. Maybe not tomorrow, but soon and for the rest of... or however that goes. I had been hoping for a nice enough day to go to a fly-in over in Urbana. This is a really neat fly-in where the residents of a local retirement community come out to visit. It seemed just the thing for co-pilot Egg and me to do, so I got it on her schedule days ago despite the risk that doing so would trigger my ongoing bad weather karmic retribution. It seems I must have balanced the karmic books with some recent unremarked good deed based on today's experience, though.

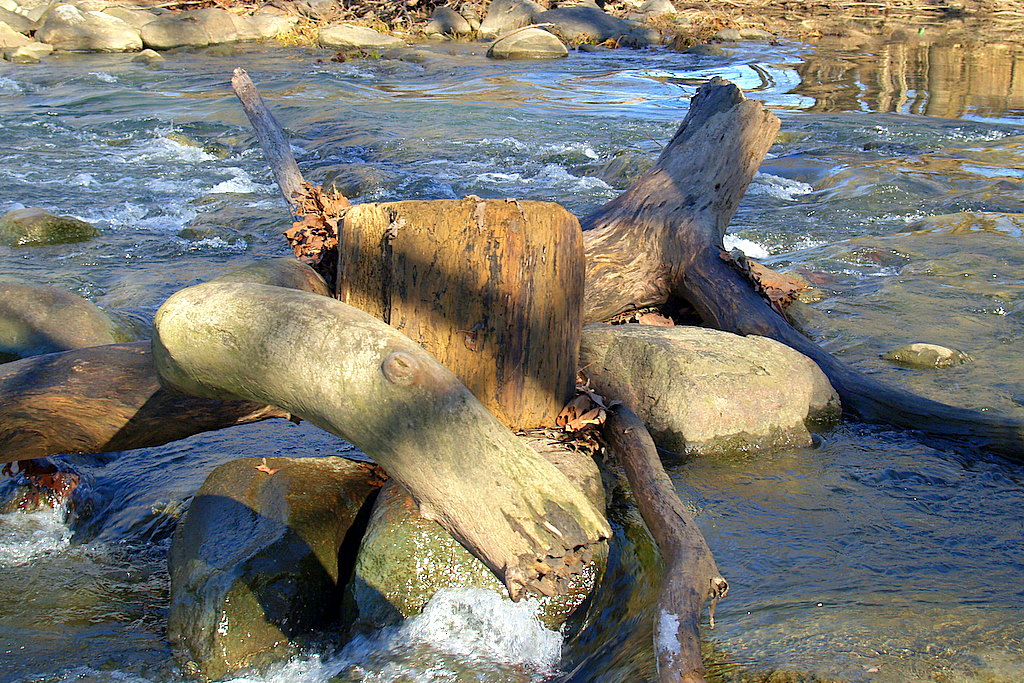
I hadn't gassed up since the river run last week, so we decided on a pit stop at MadCo. At $3.44 a gallon I had expected that it might be a tad crowded, but Blimey! By the time I left I think there were five RVs and a couple of store boughts waiting for gas, and we had waited behind two others. The landing at MadCo was ok, but had 5 or 6 of those little baby bumps I get when I carry too much speed down final. Co-pilot Egg is a landing perfectionist and rated it at only a middling effort. 'Tis a fair cop.

It's only a few minutes from MadCo to Urbana, hardly enough time for a single "are we there yet?" to come through the headsets. The pattern was surprisingly empty, allowing me to concentrate on trying for a better landing, and hopefully performing well enough to win the rare and coveted "thumbs-up" rating from this particular co-pilot. Well, depending on how you look at it, I did or I didn't. I did reduce the number of bounces to 3, but they were not baby bumps! This, again, is why I always try to arrive first! Egg had no comment. It's perks like that that keep me paying her allowance.

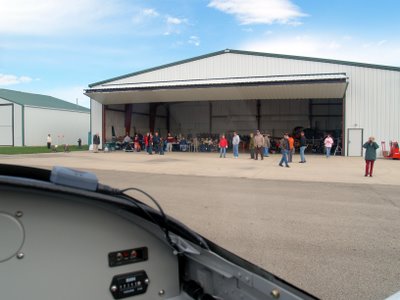
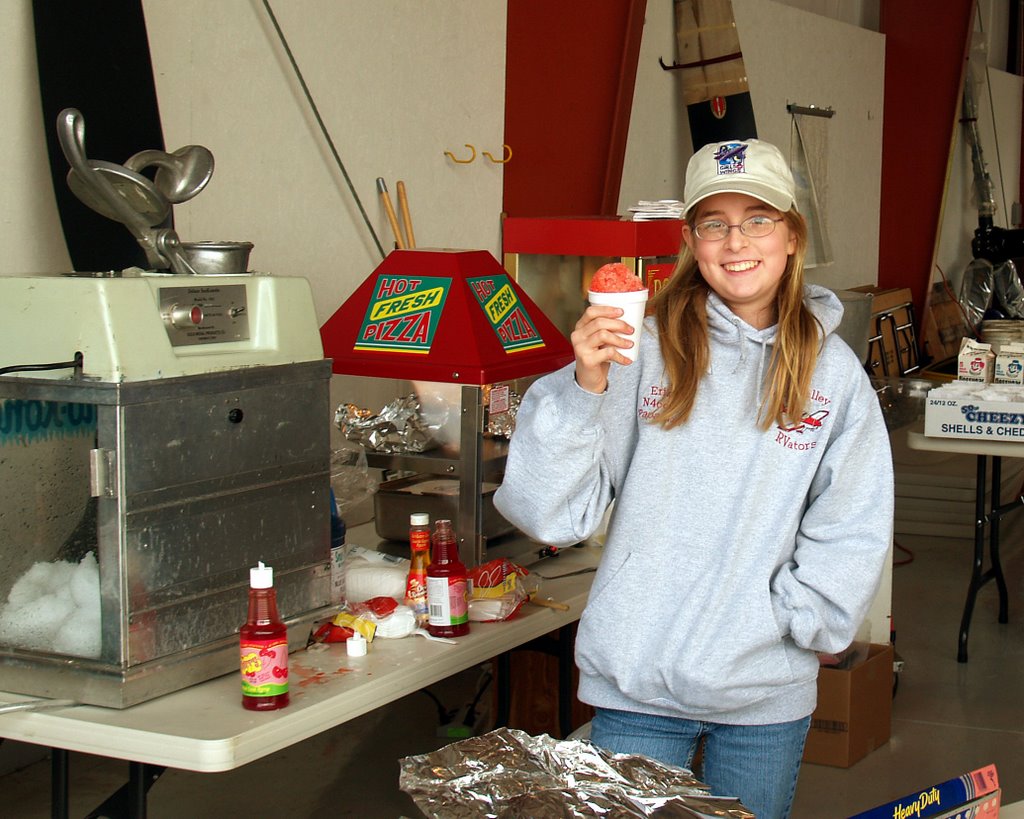
We parked in front of the restaurant and walked down to the hangar where the gathering was. The five RVs from MadCo were going to be doing fly-bys soon and I wanted to get back to take pictures, so I left Egg at the hangar where she lived her dream of actually 
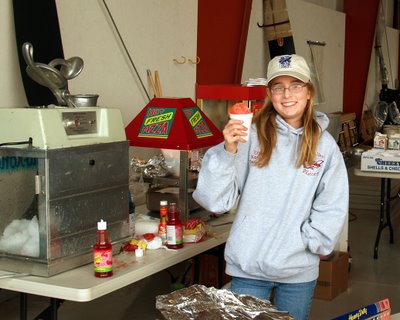
making sno-cones, cotton candy, and theatre-style popcorn. It's not that she has carney in her blood, it's that those are three of her four personal food groups. The fourth, the hot dog group, was also easily available nearby if she wanted to avail herself of the opportunity to corner the market on all four at once. The Pilot was more than a wee bit nervous as to what the state of the Co-pilot's tummy might be on the bumpy ride home if she was left to her devices for any length of time, as you can imagine.


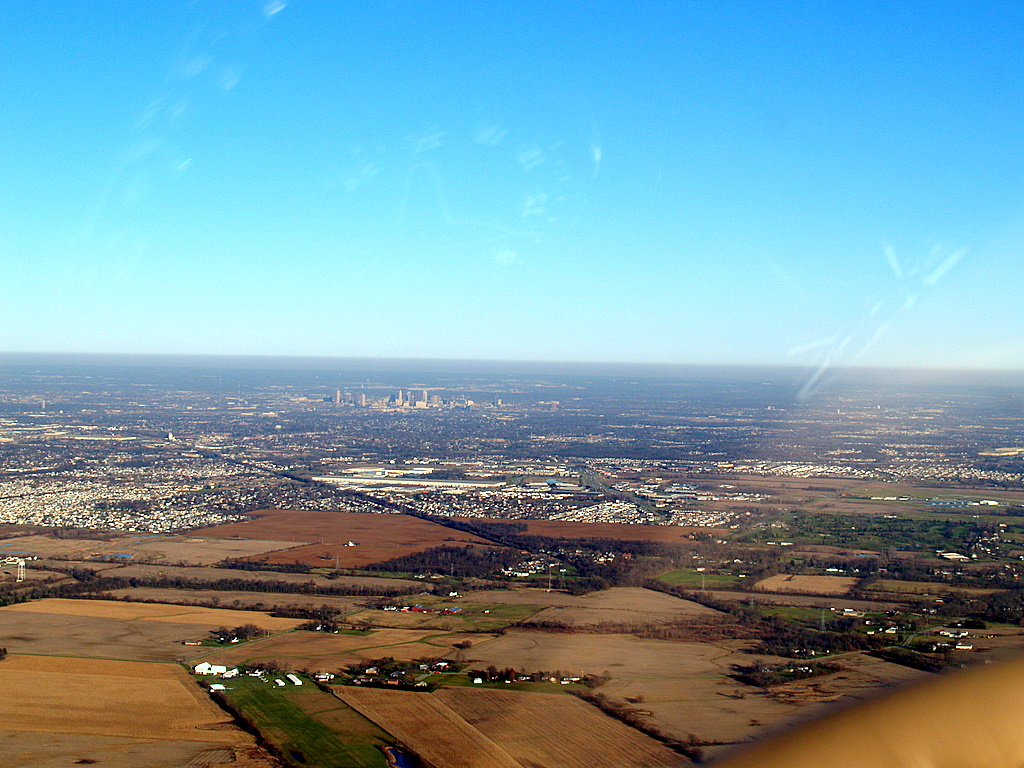
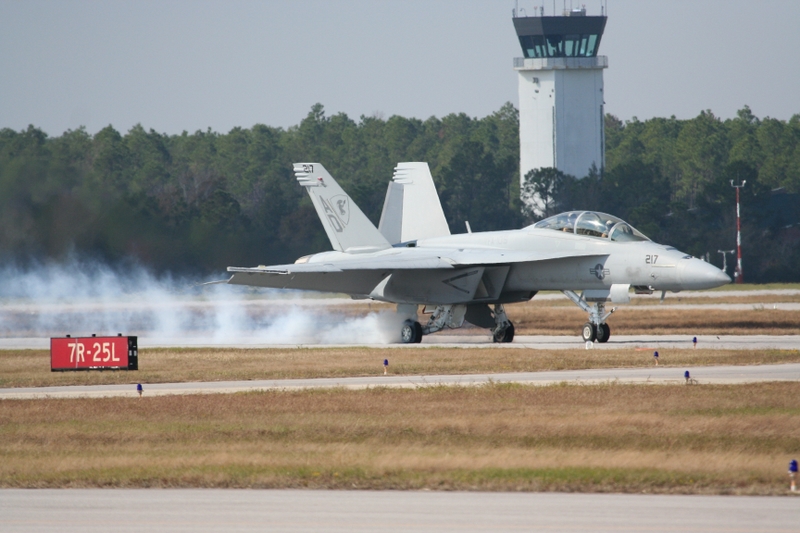
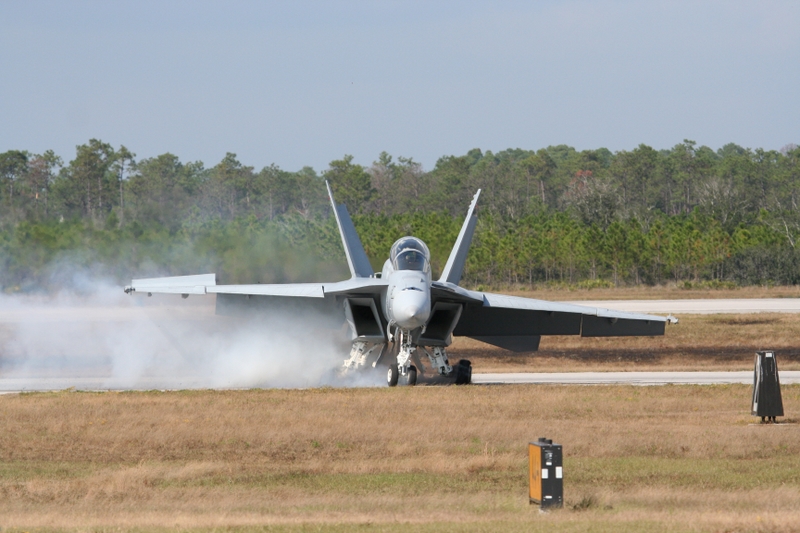
I'm still struggling with getting decent ground-to-air pictures:


Private to Rick Lee: what should I be looking for in the camera settings to get better ground-to-air pix?? It seems that I have to do a tremendous amount of Picasa hammering with fill light, saturation, and other gadgetry to get something more or less presentable, and those are the ones that turned out good to start with compared to the rest.

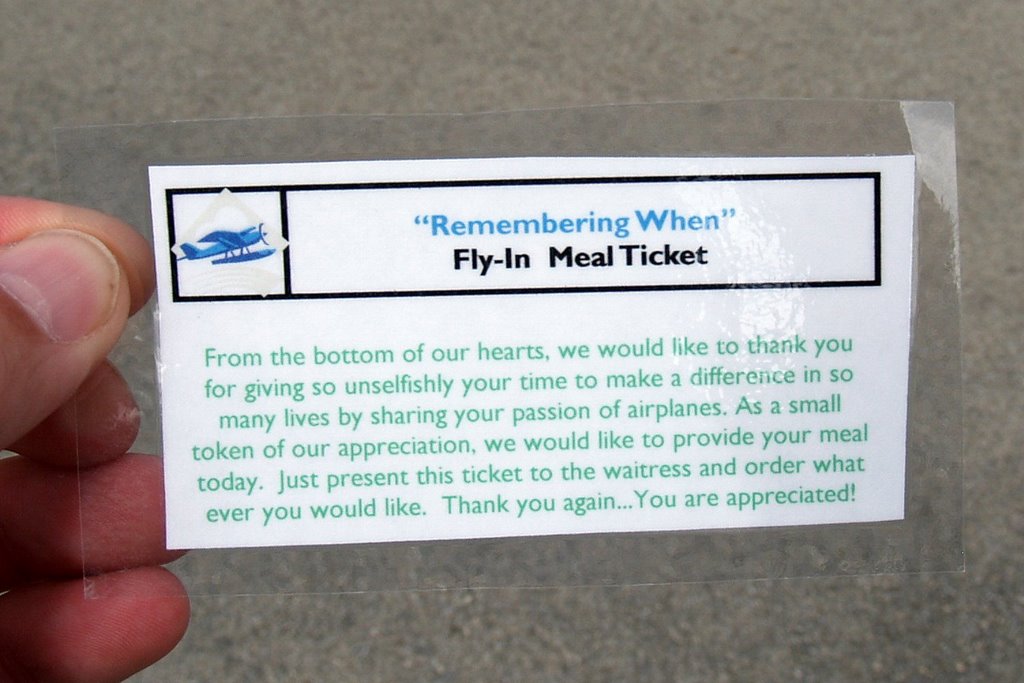
The coordinators of the fly-in had gone all out and provided us with these meal cards:


That was such a generous and unexpected offer that I was tempted to keep mine as a souvenir, but hunger got the better of me. Lunch was a community affair in the second dining room of the diner, where I enjoyed a healthy slice of the Day's Special ham loaf. Once fed, I wanted to grab a slice of pie (it was going fast, and coming home without pie is unthinkable!) for the missus, get it paid for, and head back down to the hangar to check up on Egg. It struck me once I got home that I had left the lunch table in such a rush that I had forgotten to tip the waitress! Arghhh! What a swell representative for the RV pilot community I am: sit there and enjoy a free lunch and then stiff the waitress! And darned if I hadn't just gotten my karma back in balance too! I'll have to go back next Sunday and see what I can do to make amends.

When I got to the hangar, Egg was doing fine and was happily dispensing sno-cones to people in heavy jackets and blankets. I swear, she could sell water to Noah.


Rick will recognize the hat: it's the Girls With Wings hat we searched the four vendor halls for on a really hot afternoon at Oshkosh. I remember squatting down in front of the little fan they had at their booth, just trying to get a little cooled off after the exhausting slog through the jungle of Oshkosh mid-afternoon crowds. Well, she loves it, so it was worth the effort.


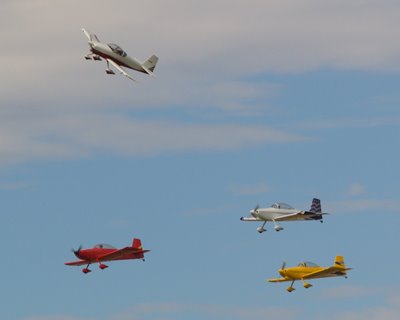
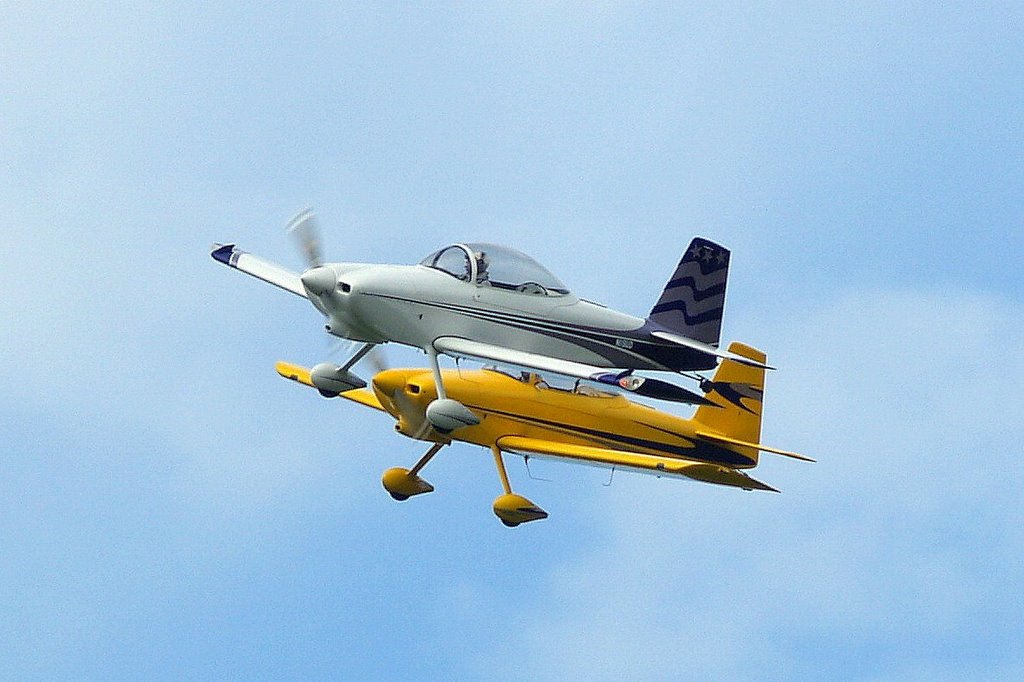
While I was at the hangar checking on the co-pilot, the formation groups were briefing to depart. Jeff, the organizer of the event, asked me to jump in his 7A and see if we could get a few pictures as they did their fly-bys. I had the short lens on the camera, but since I've had mixed results with the long lens in air-to-air work and it was inconveniently sitting back in the airplane anyway, I decided to give the shorter lens a try. Results were mixed. We never really caught up with the formation, so I couldn't get close enough for good shots. When we did catch up with four that were flying home westbound, the sun was in the background and that never works out well.

See if you can guess what tickles me so much about this picture:


If you guessed that it's the woman on the right taking our picture at the same time I was taking hers, you win the prize.

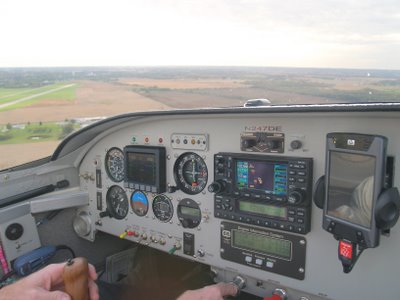
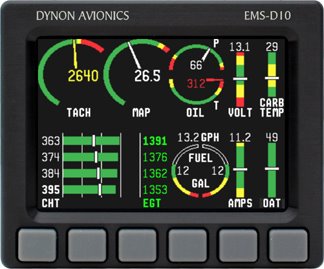
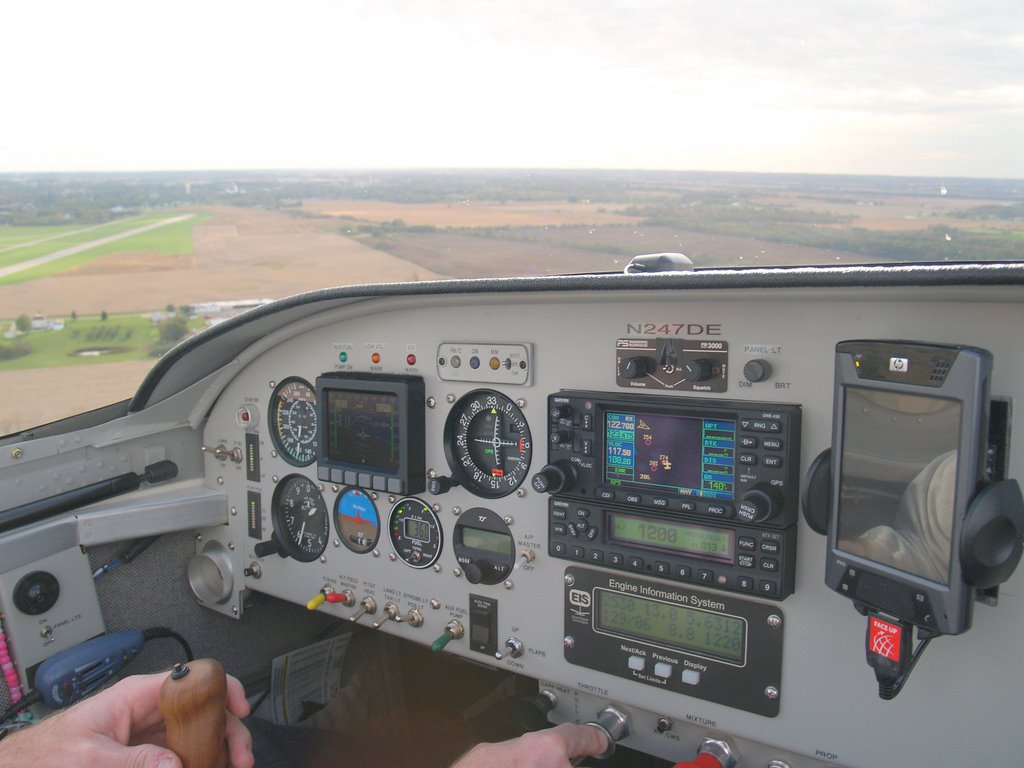
Even though the pictures didn't work out, it was a blast to ride in that plane! It sealed the decision that my next RV will have at least 180hp and a constant speed prop. It's not that my plane is slow on 150 horsepower (we did 162 knots each way today), it's just that the 180 hp really, really gets up and goes, provides climb on demand like this month's Dow, and it's smoooooth. I really liked the panel, too. Jeff let me fly for a few minutes and I used that time to try flying by reference to the Dynon D-10A for my first time. I liked it, but I think I would install at least a 2 1/4" vertical speed gauge too if I were to go to a glass panel, and probably not for the reason you'd guess. Yes, for redundancy to some degree (were you thinking that?), but also for ease of interpretation in a quick scan. Let's put it this way: the numeric vertical speed indication on the Dynon was not a comfortable replacement for the immediate graphical depiction of the pitot-static vertical speed gauge that I'm used to, and I don't know if it ever would be. Keep in mind, though, that I was sitting in the right seat and had to look askance at the Dynon - not the best way to view LCD devices - so I may have missed something. In any event, that's just a tidbit for me to file away for future reference should I ever get the opportunity to design my own panel. I know for sure that I'd go for glass at least with the primary display like Jeff's, and probably engine management as well.

It felt strange riding in a nosewheel RV (this was my first), but only until we were off of the ground. After that it was pure RV. I am a little sore in my left leg from the flight, though. One thing that one apparently must remember when going from a taildragger to an A is that the step down from the wing of the A is much higher than the step down from the wing of a taildragger. If one were to forget that, even momentarily, and blithley step from the wing without aid of the side step, one might ignomiously lurch from the wing to the ground and hyperextend one's leg a painful manner. Don't ask me how I know - that's one of the perks of owning the blog.


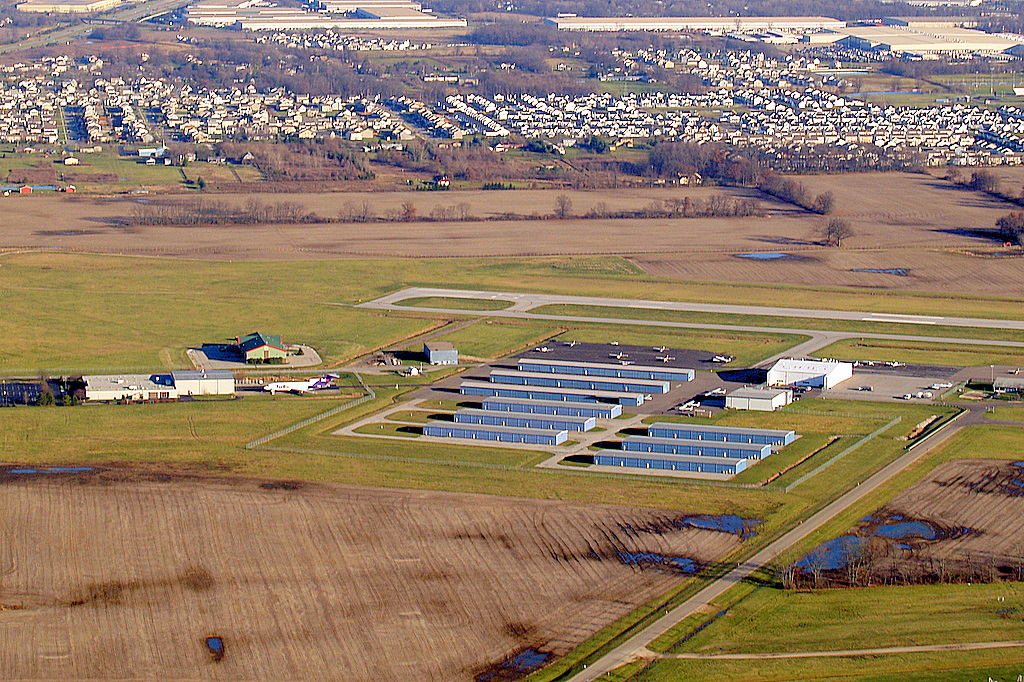
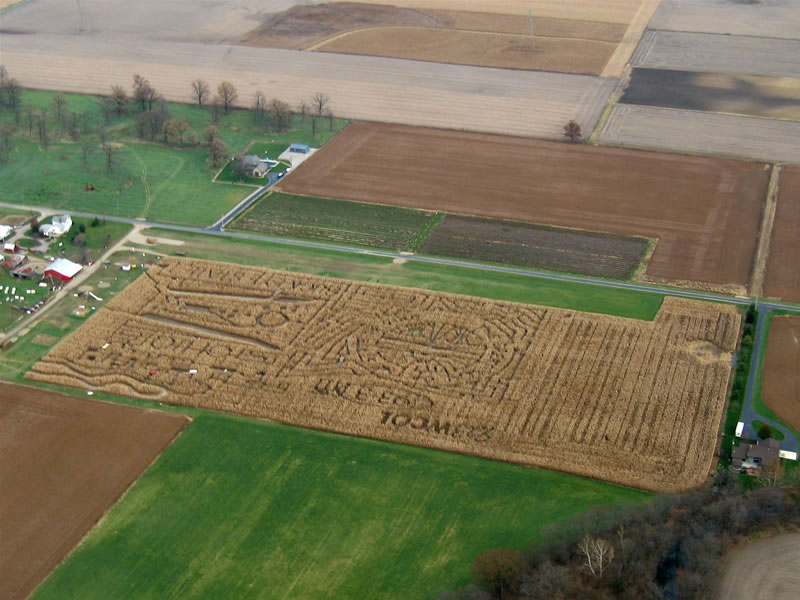
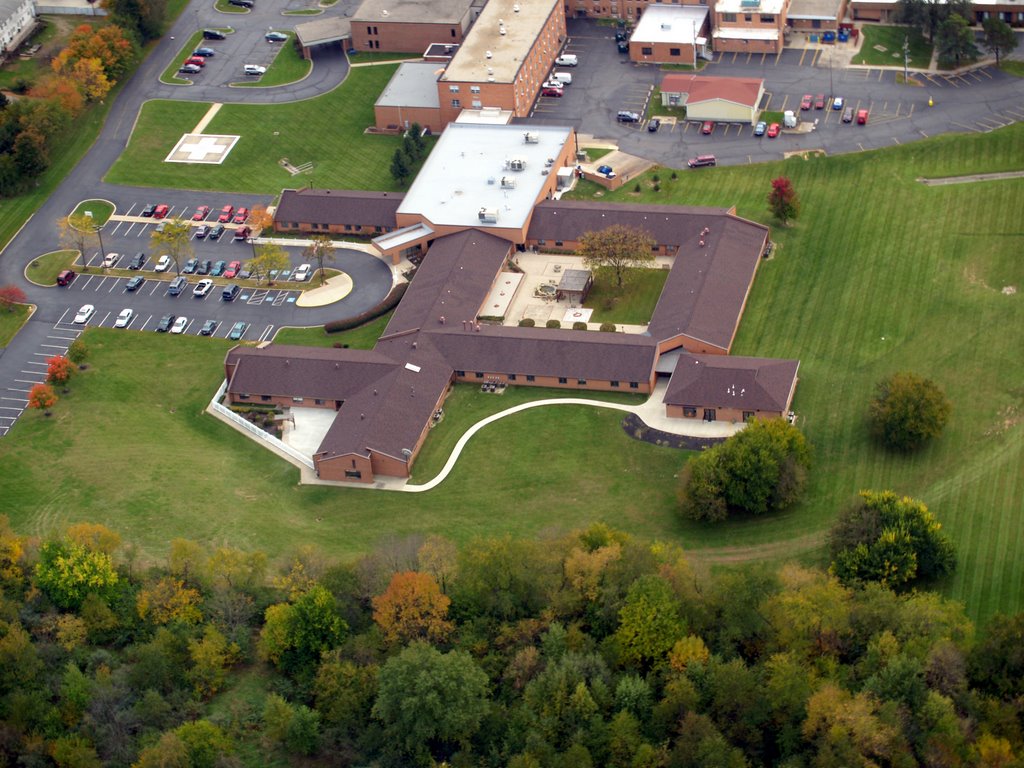
On the way back to the airport, we circled around the retirement community so I could try to get some shots. The autofocus struggled with the tight turn, but it managed to lock on for at least these two:


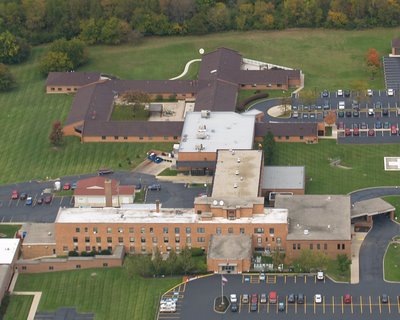
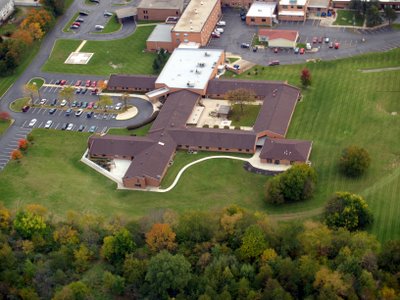
Once back at the airport, I broke Egg away from her newly beloved sno-cone machine and we saddled up to head home. You know it was a successful trip when you're both reluctant to leave, but it was getting late and we needed to get back. The fly-in ended up hosting nearly 20 RVs, and despite the slightly chilly weather I think everyone had a good time. I think it will be easy to get this one back on to her schedule next year. In fact, she has already mentioned that she'd like to go again, and how good it felt to "help the elderly get out for some fresh air and sugar."

They had a band at the fly-in, and it led to one of those weird little coincidences for me. You know how you can go years without hearing a song? That's how I was until just last week when the topic of the song "Amie, what you going to do?" came up at work. I'll give you one guess as to what these guys were singing:


Oh, and before I forget: the landing back at Bolton? Thumbs-up!!