
After months of thought, I've finally designed the panel I think would best fit the mission of the airplane, which is a VFR airplane that could be asked to traverse 500 miles of weather in a single hop. I think back to my trip back from Oshkosh when I departed in great weather, but ran into a lot of low, scuddy clouds in Indiana. I could get over the clouds, but I didn't know for sure if conditions were clear in Ohio and I didn't want to get stuck on top and low on fuel when I got there. There are ways of getting an in-flight weather report, but are now better ways, and I decided that should be the first area to improve the panel.
The design I came up with adds another Garmin portable GPS to the Garm 295 I have now, and places both of them in flush mounts in the panel. This takes room that is currently occupied by engine instruments, so I also planned on replacing the engine gauges with a graphical engine monitor. That would not only free up a lot of space, it would afford me an acroos the panel improvement in the quality of my engine management and monitoring gauges. And, referring again back to my Oshkosh trip, I decided to include a fuel totalizer option so I'll have a far more accurate reading of how much gas I have left.
I used www.ePanelBuilder.com to sketch out the panel with the new instruments, then grabbed a screen shot of the new panel. I imported that into GIMP and painted it gray rather than black to make the instruments stand out a little better. I pasted that onto a picture of the current panel, but it looked pretty bland. GIMP has a nice rendering feature that let me kind of lighten it up and make it look more natural. I continue to be amazed not only at the powers of GIMP and the fact that it's absolutely free, but how useful it is in prototyping stuff for the plane!
Here's the before and after:

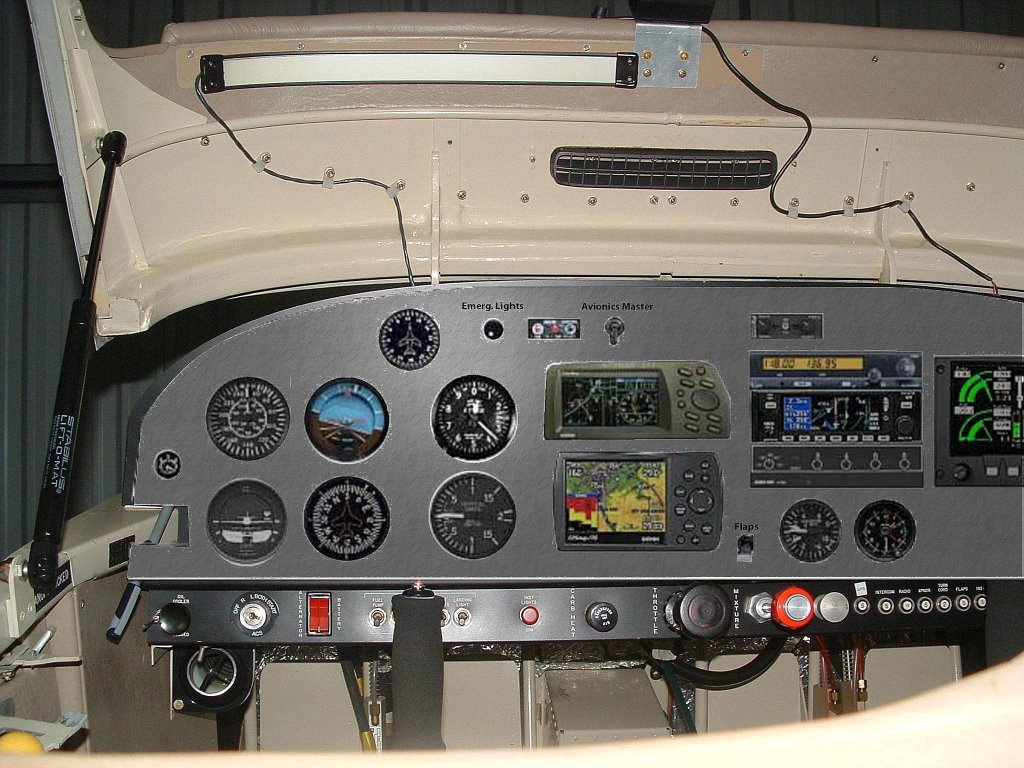
The new panel carries over most of the stuff from the old panel, primarily in the interest of cost containment. I didn't bring over the old mag compass since I really prefer the vertical card model. In the new panel picture, I have the vertical card compass sitting on top of and between the attitude indicator and the altimeter.
The Garmin 295 that currently hangs from the canopy glare shield gets moved into a flush mount holder. Just below it is another flush mount holding a new Garmin 396. This is the first shockingly expensive new part. The benefits, however, are manifest and justify the $2500 price tag. The first and foremost benefit is the XM sattelite weather download. Having access to almost real-time NEXRAD radar and FAA weather observations right there in the plane is a huge safety deal. That alone would be worth the price, but the 396 also shows terrain elvations around where you're flying. I decided to put both the 296 and the 396 in the panel so I could use the 296 for the HSI display and the 396 for the moving map.
The repercussion of panel mounting the GPS units is that there is no room to keep all of the mechanical engine gauges. I looked at a lot of alternatives, and finally decided on the Grand Rapids Technology graphical engine monitor. It has everything currently on my panel plus more, but takes far less space. It's likely to be more accurate in a number of areas as well:

This is the second shockingly expensive decision. With the fuel flow option, this thing runs $3400. Yow! Bit again, the increased capabilites over what I have now in the critical area of engine management make that pill easier to swallow. Having both EGT and CHT measurements on all four cylinders is the only way to really know what's going on with your engine. The fuel totalizer is also a huge help in managing what's in the tanks and when it's time to get more.
I also think it would be instructive to do the installation of the panel and the related engine probes. In fact, this idea is competing for funding with the idea of restoring a Pitts biplane or something similar. One factor I'll have to consider is this: if I choose to spend this money on the RV, the cost is the cost. Once it's done, it's done. In rebuilding a Pitts, buying the plane is just the beginning. There will be thousands to spend on fabric, paint, tools, and engine parts, if not a complete major overhaul. One other consideration, though, is that I can't stretch out the panel project like I could the Pitts because I can't go that long without a flyable airplane.
Chances are I'll end up doing neither. But at least I'm getting better with GIMP!
Later:
I'm not sure why I kept the King KLN-89b GPS in the panel. I don't use it now, so I'm not very likely to start using it when I have the second Garmin. I suppose I could sell it on eBay, but I don't think I'd get much for it. Getting it out of the panel would probably free up enough space to move the engine monitor over to the left a bit, and might even free enough room for a map box. That would solve yet another problem: there's very little room to carry maps and other stuff in the cockpit.
I also found a lower priced engine monitor:
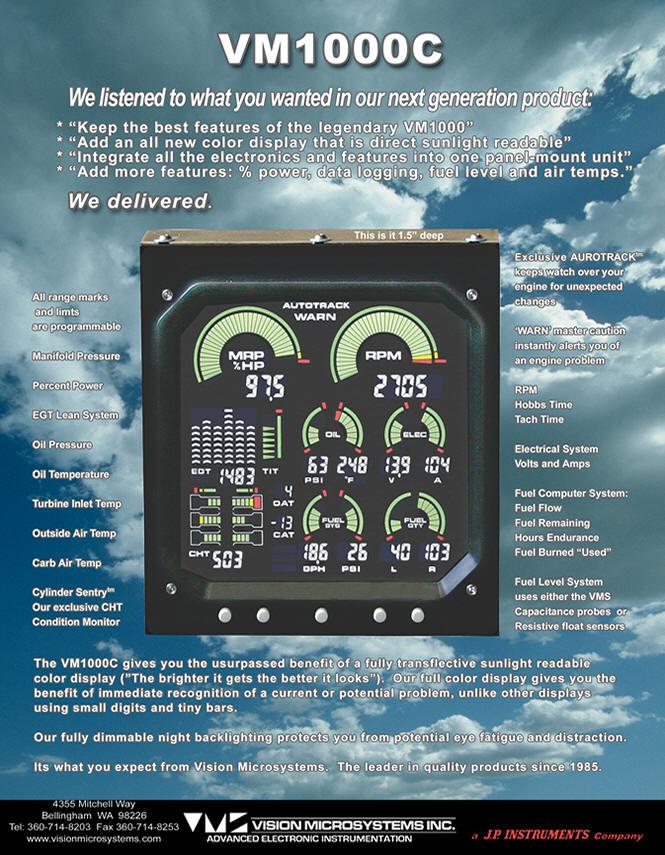
It gives me everything I want, but for $1000 less.
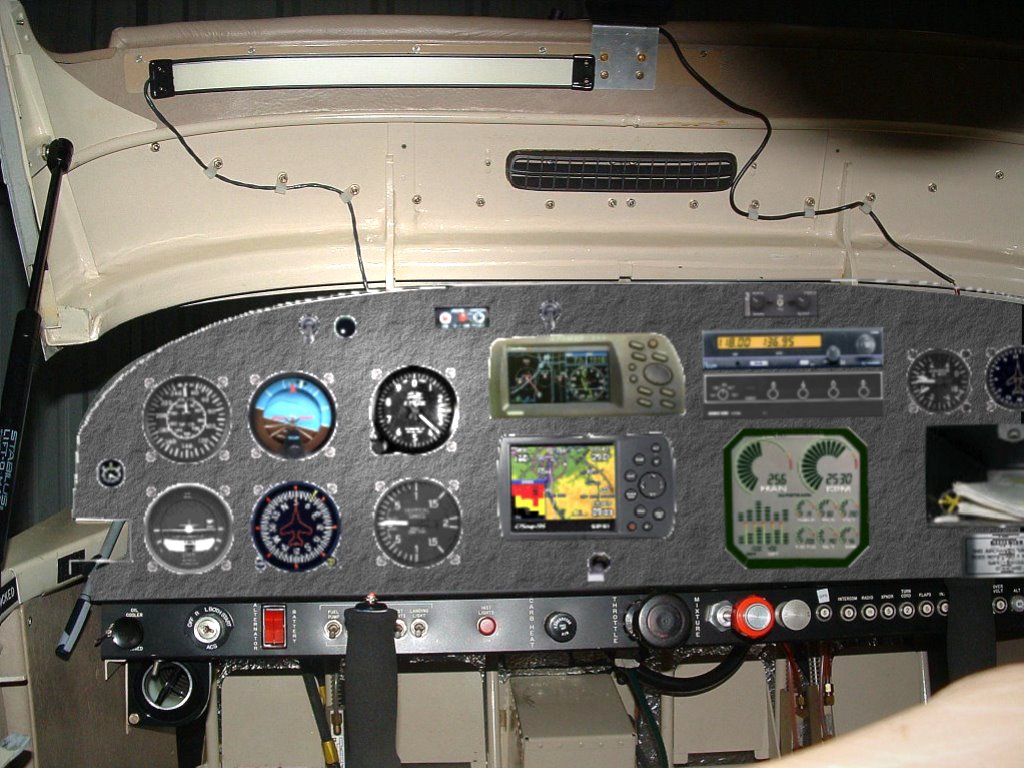
A sloppy GIMP rendition of losing the King GPS, using the VM1000 instead of the GRT, and adding a map box:
No comments:
Post a Comment