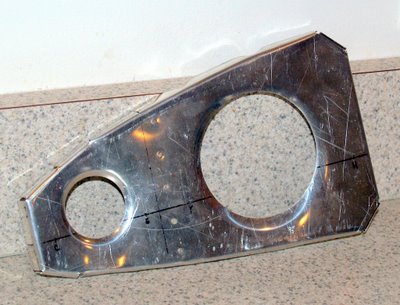
I couldn't understand how I could possibly have mis-measured that horribly, but as I was building the new rib I almost made the exact same mistake. The cause turned out to be a mark that I placed on the chord line, which you may recall being the X-axis used to plot the points on the metal to give it the aerodynamic shape. I was using a 6 inch measure, and as the points got beyond six inches, I placed a small hash mark at the 6" point and used that as the basis of further measurements. The center of the lightening hole is seven inches from the start of the chord line, so I put another hash mark there. When I went to measure the vertical (Y-axis) location of the center, I caught myself using the 6" hash mark instead of the 7" mark. I musty have made the same mistake on the first piece, but at least I caught myself in the act this time and made the correction.
Everything goes easier the second time, and this was no exception from that rule. I had the new rib done by the end of class. It still needs some clean-up, bit it's done for the most part:

Normally the metal wouldn't be all scratched up like this, but the scrap pieces I start with are already distressed to a ridiculous degree. In other words, I didn't make those scratches. Well, at least not all of them. There are a couple of spots inside the flange where the air shears had trouble cutting through the fluted areas and left some marks on the inside skin. Those could be burnished out easily enough, and the primer that you'd use on a real part would provide corrosion protection to the areas that had lost their very thin pure aluminum coating through the process of cleaning up the scratches.
So, there it is. The last "official" project of the class. I'll finish it up Monday night and either go on to another project if there's anything left on the "optional" list, or I'll bring in the trim tab from the RV and build a strengthening doubler as per Van's advice to solve the cracking problem.

No comments:
Post a Comment