This is the old bracket:

This is the new bracket:

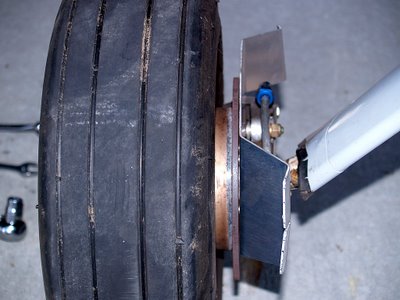
'Twas not to be though. The old bushings fit just fine. I thought the right side gap was too large so I removed a set of washers, but I think I'm going to put a thinner set back in to try to get a bit more gap than I have without the original washers. I don't want the bracket to be too close to the brake disk because that leads to the possibility of it rubbing against the brake disk, which intuitively seems like it would meet the general description of being "a bad thing." The brackets still need to come off of the plane one more time to install the nut plates that the cowl halves will screw into, so it's no extra effort to add a set of washers.
You can see the insufficient bracket-to-disk gap here:

Since the brackets went in so easily, I had plenty of work time left over. The next step in the manual is to position the pants correctly and drill the holes for the mounting screws. To get the pants level with the airplane as it is in flight, the tail needs to be lifted onto a stand and the plane leveled by placing a bubble level on the canopy sill. That done, I made the cuts in the bottom of the pants to enlarge the opening to fit the size tires I use. I installed a cutting disk on the $15 Harbor Freight die grinder, drew some guidelines on the pants with a Sharpie marker, and commenced surgery. The cutting disk moved easily through the fiberglass, but created clouds of nasty dust. It also was unable to negotiate any curves in the cutting line, so I'll have to go back later and clean up the corners. I couldn't find any indication in the manual or on the plans telling me how wide the opening should be, or how large the gap between the side of the tire and the edge of the opening should be. I searched around the web (there are a ton of builders sites out there!) and decided to allow approximately 1/2" gap between the tire and the edge of the opening.
The new HF (Harbor Freight, of course) respirator helped a great deal in avoiding beathing in the fiberglass dust, and it got a lot more comfortable once I realized I could get the straps to stop abrading my ears if I wore the headpiece higher.

I finished up the day with fitting the pants to the plane as far as they would go without cutting the axle relief in the leading edge of the aft pant (which is the next step once I get the plane levelled), so you can get a pretty good idea of what they will look like when they're done.


Slick! Man, you're going to be cruisin in no time.
ReplyDelete