
Did I mention that I had decided to order the plans for the Hiawatha 14? No? Sorry about that. I figured it was a pretty low risk investment at $30 (although the $10 shipping charge came fairly close to triggering my disproportionality reflex) and would at least afford me the opportunity to make a go/no-go decision prior to sinking in meaningful dollars. You'd think that with having the successful kayak build done that I would be confident that the canoe is no big deal, but...
It's a completely different animal. The kayak came as a kit, with all of the wood very precisely cut, the holes for the stitching wire already precision drilled, and an instruction manual that assumes absolutely no prior knowledge of boat building. The canoe plans are exactly that: plans. No more, no less. That said, the company that sells the plans has very good web support, and I found a collection of pictures posted by a guy that successfully built a Hiawatha canoe that I can use for reference. There's even a technical support forum, offering up both designer- and peer-level support. That, combined with the experience gained in the kayak build, should be enough, right?
Well... I opened the plans yesterday and took a look. I had been curious about how exactly the dimensions provided on the scale sized plans would transfer to a full-size outline on the plywood. My first thoughts when looking at the plans ran along the lines of "Whuh?? Where are all the numbers???" Compared to the details provided for shaping the blank aluminum instrument panel that I bought from Van's back in the days when I thought I could spend a bunch of money replacing my panel in PapaGolf, there were nowhere near as many measurements provided to get the curved edges done using anything other than freehand SWAGs. "Uh-oh..."
Enter the Web site. They have a pretty comprehensive collection of "how-to" guides, ranging from the first steps of building a simple boat like the Hiawatha, all the way up to guides on how to build 20+' open water power boats. The most informative for my purposes is a set of free plans for building a slightly less sophisticated canoe than the Hiawatha:
The Cheap Canoe
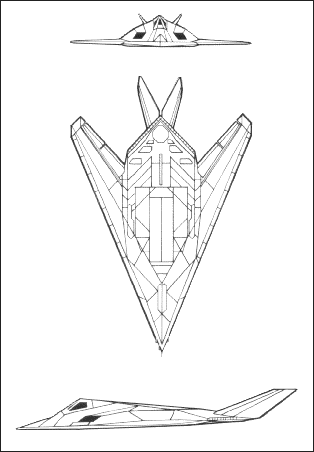
If you don't want to download the PDF file at that link, suffice it to say that the way it works is that you lay out "station lines" every 24" on the plywood. The plans give measurements down those station lines that you mark as points on the wood. If you were to connect the dots, so to speak, you would end up with a somewhat ugly canoe with nothing but straight edges, much like the F-117 Stealth Fighter; this is where you need to know how to add enough points to make a more attractive curved edge. With having only one point for every 24", though, you need some way to make a nice curved "best-fit" edge. This is done by tapping in a nail at each point, then using a small diameter length of PVC pipe to bend around the nails. You then use the edge of the PVC pipe to trace a cut line onto the plywood. Now, this is fine for one side, but there's no guarantee that the PVC will bend in exactly the same way on the other side. That's ok, though. You use the outline of the first side to make the outline of the other side, so they will be nearly identical. The other reason you can live with a little slop here and there is that there is a 1/4" tolerance on all of this stuff. Any gaps will be covered by fiberglass cloth and eopxy, just like they were on the kayak.
So, confidence is still high. The next task is acquiring plywood and a length of PVC pipe. I'm going to transpose the lines onto the plywood and make the cuts, and depending on how that goes, order the most expensive parts of the whole build: the epoxy and fiberglass cloth. No sense buying that stuff until I know for sure that I can create reasonably shaped parts, after all.
No comments:
Post a Comment